Choosing a Tree!
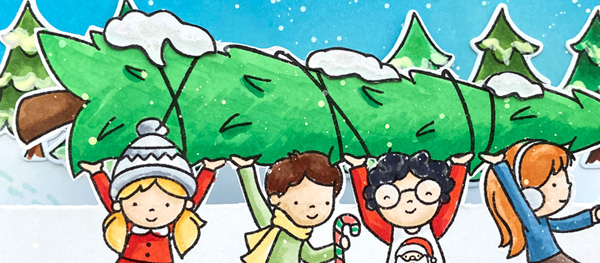
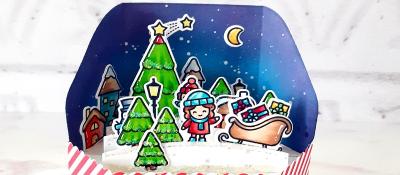
I'm back again with more children enjoying the snow today and this time they're at the Christmas Tree farm.... they've selected quite a big tree!!
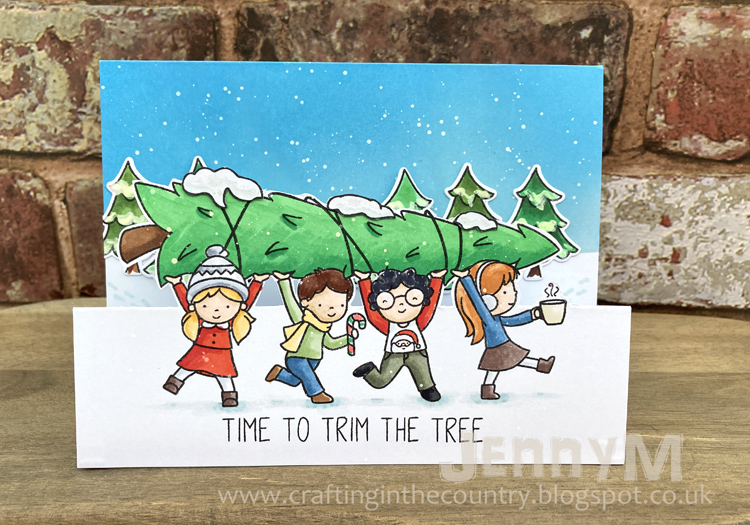
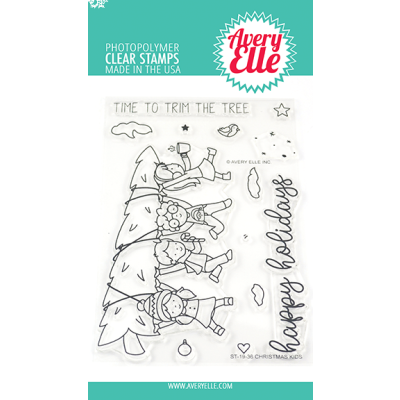
What a fun image this is from Avery Elle... I think the girl at the front is doing a sterling job of carrying a warm drink too!! This card is a bit different because it has an extra valley and mountain fold on the front so as to make a scene with dimension when stood up..
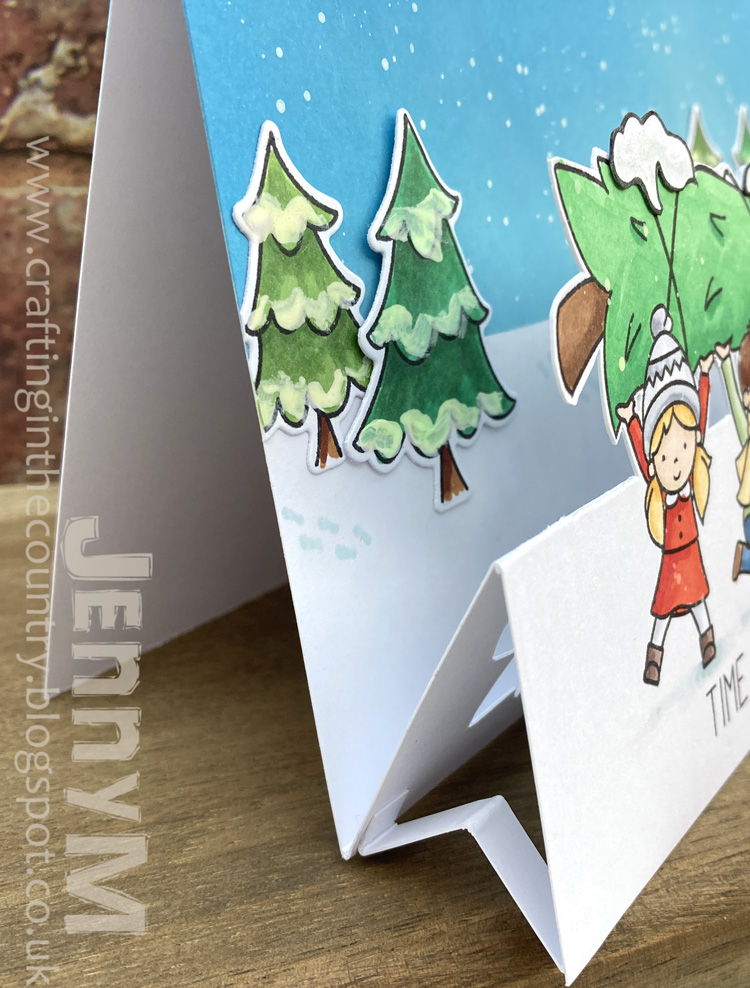
I used the whole length of an A4 piece of card and then cut it to the width I required. I then created a top folding landscape card as you can see above and used the extra length of card to fold again and make a smaller tent shape. Before making that smaller mountain fold I marked out where it would be with a pencil then stamped the image, lining it up so it straddled that marking then I trimmed around the top of the tree to the pencil line which became the score line.
As you can also see in the photo above I added a couple of tabs to stop the card front slipping open when on display.... don't add these until the end though.
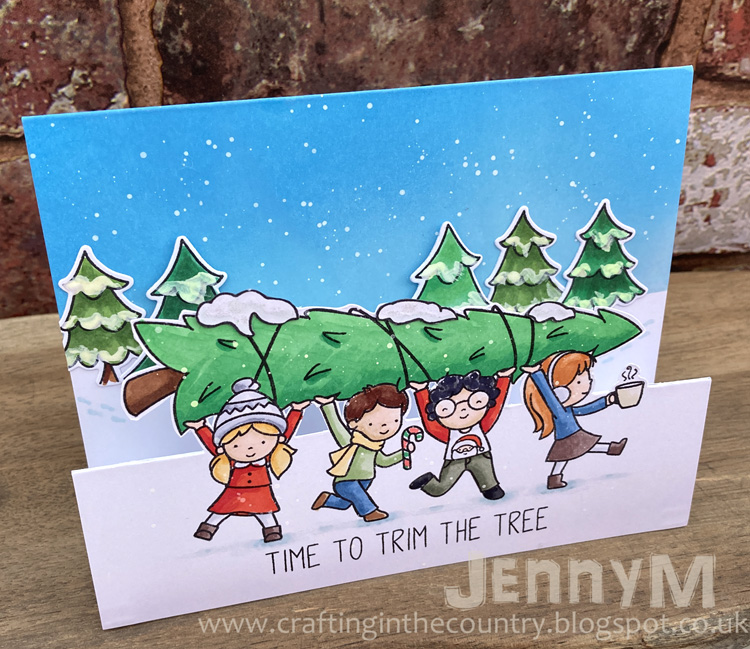
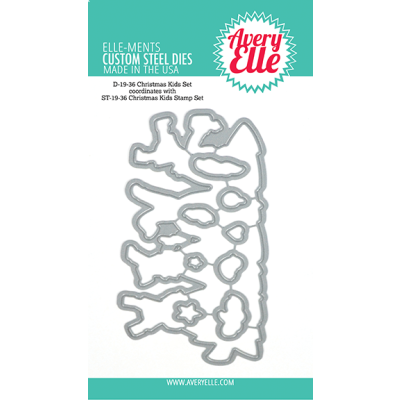
You can use the coordinating die to do partial die cutting which is probably best to do before colouring or decorating the rest of the scene, just in case it doesnt go as planned! I used Copics to colour the image and blended Distress Oxide ink for the sky and added a few extra trees in the background too. A splattering of white paint made a nice snowy sky and snow on the trees too.
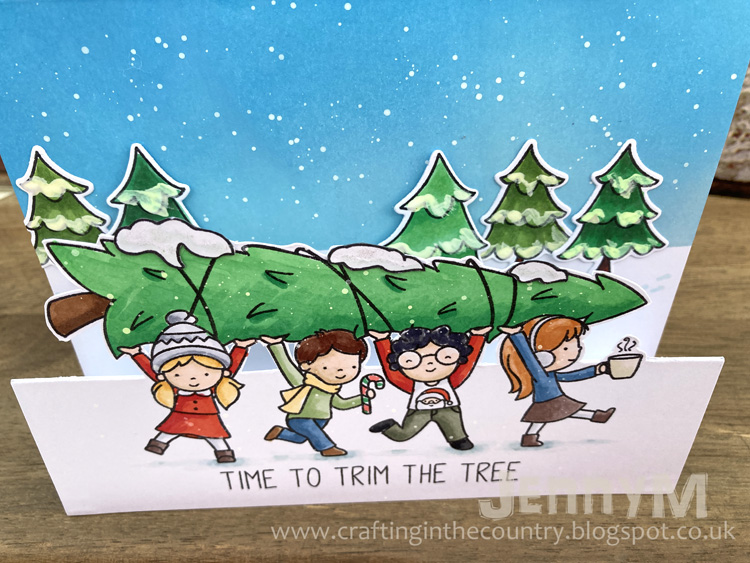
I'm quite pleased with how it turned out, you could use this style of fold with other stamps and dies too. You can easily just add the die cut images or pieces after making your card base instead which eliminates the partial die cutting step altogether.... I hope you give it a try.
Thanks for stopping by, catch you next week :)
Jenny x
07/12/2020
|
View: 299
|
Categories: Colouring Stamped Images, Partial Die Cutting, Fussy Cutting, Shaped Cards
|
Tags: Avery Elle
Share this post
Related Posts
Shine Like a Diamond
17/06/2020| Posted in Copic Colouring, Die Cutting, Card Making, Stamp Layering, Stamped Background, Heat Embossing| 334
Retro Christmas
01/07/2020| Posted in Copic Colouring, Die Cutting, Card Making, Stamped Background, Heat Embossing| 255
Xmas in July: Hey Winter
03/07/2020| Posted in Copic Colouring, Card Making| 423
Snowflake Flurry
15/07/2020| Posted in Card Making| 289
Christmas Cards
20/08/2020| Posted in Copic Colouring, Die Cutting, Card Making, Stamped Background, Heat Embossing| 233
Merry, Bright & Joyful!
19/08/2020| Posted in Card Making| 291
Birthday Shakers
26/08/2020| Posted in Die Cutting, Stamping Techniques, Card Making, Stamped Background, Fussy Cutting, Heat Embossing, turnabouts, Repeat Pattern Building, Stamping on non paper surfaces| 415
A Baubling Merry Christmas
07/09/2020| Posted in Die Cutting, Heat Embossing| 581
Holly, but no ivy ..
09/09/2020| Posted in Colouring Stamped Images, Copic Colouring, Water Colouring, Paper Piecing, Card Making| 1| 478
Lawn Fawn is Live!
10/09/2020| Posted in Pencil Colouring| 658
Let it Snow!
11/09/2020| Posted in Die Cutting, Card Making| 333
Merry Drink To Forgetmas
13/09/2020| Posted in Die Cutting| 2| 1453
Little Framing Tricks
20/09/2020| Posted in Pencil Colouring, Die Cutting| 509
Christmas Joy
25/09/2020| Posted in Die Cutting| 629
Sweet Christmas Wishes
01/10/2020| Posted in Colouring Stamped Images, Copic Colouring, Card Making, Stamped Background, Fussy Cutting| 1| 325
Merry Christmas
07/10/2020| Posted in Die Cutting, Card Making| 431
Merry Kissmas!
12/10/2020| Posted in Die Cutting, Card Making| 354
Iconic Christmas and More!
14/10/2020| Posted in Copic Colouring, Die Cutting, Card Making, Stamped Background, Heat Embossing, turnabouts| 321
Cozy Friends
19/10/2020| Posted in Die Cutting, Card Making| 477
Cool Christmas Wishes
20/10/2020| Posted in Colouring Stamped Images, Copic Colouring, Die Cutting, Ink Blending, Card Making| 263
BIG Snow Flurry
22/10/2020| Posted in Die Cutting, Ink Blending, Card Making, Stamped Background, turnabouts, Masking| 284
Blossoms and Berries
02/11/2020| Posted in Stamping Techniques, Card Making| 2| 544
Quick One-Layer Cards
04/11/2020| Posted in Stamping Techniques, Card Making| 1| 331
O' Christmas Tree
05/11/2020| Posted in Card Making, Stamped Background| 234
'Tis the Season
10/11/2020| Posted in Colouring Stamped Images, Pencil Colouring| 3| 290
Friends and Christmas
18/11/2020| Posted in Stamping Techniques, Card Making, Stamp Layering, Stamped Background, Masking| 1| 377
Reindeer, plaid and stars
15/11/2020| Posted in Copic Colouring, Die Cutting| 2| 280
Even the Mice Were Stirring
22/11/2020| Posted in Copic Colouring| 2| 480
A Winter Scene
23/11/2020| Posted in Colouring Stamped Images, Copic Colouring, Card Making, Interactive Cards, Shaped Cards| 2| 382
Christmas Trees Galore!!
25/11/2020| Posted in Die Cutting, Card Making, Stamp Layering, Special Effects, Shaped Cards, Heat Embossing| 1| 562
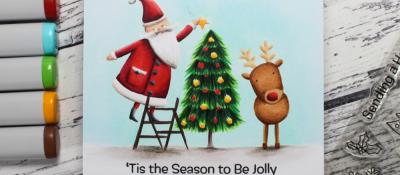
'Tis the Season to Be Jolly
27/11/2020| Posted in Copic Colouring, Card Making| 3| 454
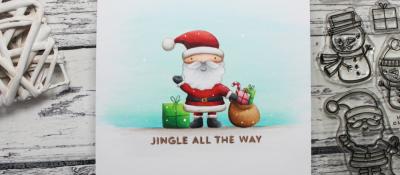
Jingle All the Way
04/12/2020| Posted in Copic Colouring, Card Making| 2| 442
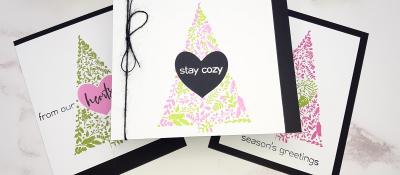
A modern twist on the Christmas Tree
01/12/2020| Posted in Stamping Techniques, Card Making| 2| 365
Trimming the Christmas Tree!
03/12/2020| Posted in Die Cutting, Card Making| 1| 318
Festive Decorations
06/12/2020| Posted in Die Cutting, Off The Page Projects, Stamped Background, Heat Embossing| 1| 363
Tartan Christmas Wishes
08/12/2020| Posted in Stamping Techniques, Card Making, Heat Embossing, Repeat Pattern Building| 2| 231
The Classic Christmas Half Tree
11/12/2020| Posted in Die Cutting| 1| 347
Festive Gift Tags
12/12/2020| Posted in Colouring Stamped Images, Die Cutting, Stamping Techniques, Card Making, Heat Embossing| 3| 502
5 Minute Christmas make
15/12/2020| Posted in Heat Embossing| 3| 479
Oh Penguin Tree
18/12/2020| Posted in Copic Colouring, Card Making| 1| 782
Merry Christmas
19/12/2020| Posted in Colouring Stamped Images, Pencil Colouring, Water Colouring, Die Cutting, Card Making| 1| 445
Last Minute Die Cuts
20/12/2020| Posted in Die Cutting| 3| 614
A Topping Christmas
23/12/2020| Posted in Copic Colouring, Card Making, Stamped Background, Fussy Cutting, turnabouts| 439
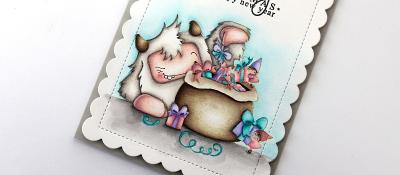
Happy New Year!
03/01/2021| Posted in Pencil Colouring, Water Colouring| 2| 647
Here Comes Santa Jaws
05/03/2021| Posted in Copic Colouring, Card Making| 2| 439
Lovely Christmas Legs
07/04/2021| Posted in Water Colouring, Card Making| 1| 307
Christmas Cards in the Sun
04/06/2021| Posted in Die Cutting| 211
Christmas in July - 2
14/07/2021| Posted in Copic Colouring, Die Cutting, Card Making, Stamped Background, Heat Embossing, Stamping| 256
Christmas in July 4
28/07/2021| Posted in Copic Colouring, Die Cutting, Ink Blending, Card Making, Heat Embossing, Stamping| 274
Wonderful Christmas
31/07/2021| Posted in Die Cutting, Stamping| 251
Here Comes Santa Jaws
21/08/2021| Posted in Copic Colouring, Fussy Cutting| 410
A Wreath for All Seasons
01/09/2021| Posted in Copic Colouring, Die Cutting, Card Making, Stamped Background, Fussy Cutting, Heat Embossing, turnabouts, Stamping| 457
Gone But Not Forgotten
08/09/2021| Posted in Copic Colouring, Die Cutting, Card Making, Stamped Background, Repeat Pattern Building, Stamping| 498
Festive One Layer
09/09/2021| Posted in Colouring Stamped Images, Copic Colouring, Stamping Techniques, Card Making, Masking, Stamping| 248
Nordic Inspired Poinsettias
25/09/2021| Posted in Die Cutting, Ink Blending| 228
Playing With Paste
26/09/2021| Posted in Die Cutting, Stencilling with embossing paste| 326
Christmas Time
28/09/2021| Posted in Copic Colouring, Water Colouring, Die Cutting, Ink Blending, Card Making, Stamped Background, Stamping| 377
Clean & Simple Christmas
09/10/2021| Posted in Copic Colouring| 279
Classic Christmas Scene
10/10/2021| Posted in Pencil Colouring, Masking| 294
Bright Florals
25/10/2021| Posted in Card Making, Stamped Background| 233
Let It Snow
30/10/2021| Posted in Die Cutting, Die Embossing| 282
Santa Duo
06/11/2021| Posted in Copic Colouring, Card Making, Fussy Cutting, Patterned Papers, Stamping, Clean & Simple| 545
What's in a snowflake?
07/11/2021| Posted in Pencil Colouring, Die Cutting| 769
Vintage Christmas
09/11/2021| Posted in Stamp Layering| 248
From All Of Us
13/11/2021| Posted in Copic Colouring| 333
Snowy Friends
19/11/2021| Posted in Pencil Colouring, No Line Colouring| 369
All Stacked Up
27/11/2021| Posted in Copic Colouring, Card Making, Interactive Cards, Fussy Cutting, Patterned Papers, Stamping, Clean & Simple| 337
Destination North Pole
28/11/2021| Posted in Die Cutting, Stamping Techniques| 1| 277
Tree-mendous Christmas!
03/12/2021| Posted in Copic Colouring, No Line Colouring| 340
December Calendar
01/12/2021| Posted in Stamped Background, Layering Stencils| 295
Merry Everything
07/12/2021| Posted in Die Cutting, Card Making| 252
City Christmas
10/12/2021| Posted in Die Cutting| 1| 237
Rustic Christmas
11/12/2021| Posted in Stencilling, Layering Stencils| 286
Winter Wreath
13/12/2021| Posted in Pencil Colouring, Card Making| 367
Tangled With You
12/12/2021| Posted in Pencil Colouring, Masking| 372
Mice on Ice
14/12/2021| Posted in Colouring Stamped Images, Die Cutting, Ink Blending, Card Making, Stencilling| 398
Fall Foliage All Year Round - Part 2
16/12/2021| Posted in Stamping Techniques, Card Making, Fussy Cutting, Stamping, Clean & Simple| 1| 277
Beastly Christmas
17/12/2021| Posted in Pencil Colouring, No Line Colouring| 3| 573
Twinkle Twinkle
18/12/2021| Posted in Copic Colouring, Off The Page Projects| 1| 932
Let there be Peas on Earth
21/12/2021| Posted in Colouring Stamped Images, Die Cutting| 635
Under The Mistletoe
23/12/2021| Posted in Colouring Stamped Images, Copic Colouring, Card Making, Stamping, Clean & Simple| 366
Christmas in May
18/05/2022| Posted in Die Cutting, Stamping Techniques, Card Making, Stamped Background, turnabouts| 364
Last Years Christmas Stocking
16/07/2022| Posted in Copic Colouring, Card Making, Fussy Cutting, Patterned Papers, Stamping, Clean & Simple, Clean and Simple (CAS)| 291
Christmas in July
22/07/2022| Posted in Stamped Background| 399
More Christmas in July
24/07/2022| Posted in No Line Colouring| 292
Striped Sentiments
27/07/2022| Posted in Ink Blending, sentiment Focal Points| 340
Not Exactly Sweater Weather
10/08/2022| Posted in Pencil Colouring, Water Colouring, Die Cutting, Stencilling, Stencilled backgrounds| 242
Controversial Santas
28/08/2022| Posted in Copic Colouring, Pencil Colouring, Die Cutting, Stencilling, Heat Embossing| 5259
Holiday Greetings
29/08/2022| Posted in Colouring Stamped Images, Die Cutting, Ink Blending, Card Making, Interactive Cards, Heat Embossing| 341
Ugly Sweaters
06/09/2022| Posted in Colouring Stamped Images, Copic Colouring, Die Cutting, Card Making, Interactive Cards, Heat Embossing| 224
Tipsy Santa
07/09/2022| Posted in Copic Colouring, Die Cutting| 192
All Is Bright
01/10/2022| Posted in Copic Colouring, Card Making, Off The Page Projects, Stamped Background, Patterned Papers, Stamping, Clean & Simple, Clean and Simple (CAS)| 278
Bright Christmas
07/10/2022| Posted in Die Cutting, Card Making| 258
Cool Christmas
14/10/2022| Posted in Die Cutting, Card Making| 426
Bloom in Winter
08/10/2022| Posted in Copic Colouring| 202
Aurora Penguin
09/10/2022| Posted in Water Colouring| 342
Curio Attic Ornaments
12/10/2022| Posted in Die Cutting| 342
O' Christmas Tree
24/10/2022| Posted in Die Cutting, Stencilling with embossing paste| 450
Coffee Lovers Blog Hop Fall 22
11/11/2022| Posted in Stamp Layering| 19| 383
Snowy Day Fun
25/10/2022| Posted in Colouring Stamped Images, Die Cutting, Ink Blending, Card Making, Interactive Cards| 187
Santa Chimney Pop Up
26/10/2022| Posted in Die Cutting, Interactive Cards| 320
Krafty Noel
06/11/2022| Posted in Die Cutting| 2| 390
Meowy Christmas
12/11/2022| Posted in Copic Colouring| 250
Christmas Garnish
14/11/2022| Posted in Die Cutting, Clean & Simple| 379
Christmas Snowflake
18/11/2022| Posted in Card Making, Stamping| 1| 316
Polar Opposites
19/11/2022| Posted in Water Colouring, Card Making, Heat Embossing, Stamping, Clean & Simple, Clean and Simple (CAS)| 339
Bella's Tangled Kitty
23/11/2022| Posted in Copic Colouring| 229
Star Gazing
26/11/2022| Posted in Copic Colouring, Fussy Cutting| 259
Winter Pine
05/12/2022| Posted in Colouring Stamped Images, Stamping| 269
Month By Month - Part 1
01/12/2022| Posted in Colouring Stamped Images, Copic Colouring, Die Cutting, Stencilling, Stamped Background, Gift Making| 276
Christmas with Friends
10/12/2022| Posted in Copic Colouring, Die Cutting, Stamping Techniques, Partial Die Cutting, Fussy Cutting| 232
Polar Pals
17/12/2022| Posted in Copic Colouring, Die Embossing| 335
A whole lot of baubles going on......
19/12/2022| Posted in Die Cutting| 467
Last minute Robins
21/12/2022| Posted in Pencil Colouring| 360
Peaceful Olive Two Ways
26/04/2023| Posted in Die Cutting, Card Making, Stamp Layering, Stamped Background, Stamping, Layering Stencils, Clean & Simple, Stencilled backgrounds, Inlaid Die Cutting, Clean and Simple (CAS)| 253
Tips and Tricks for Easy Paper Piecing with Large Dies
09/07/2023| Posted in Die Cutting, Paper Piecing| 209
Holly Jolly Sparkly Christmas!
27/07/2023| Posted in Die Cutting, Stencilling| 274
Santa Tagging
04/08/2023| Posted in Die Cutting| 176
Peaceful Fox
12/08/2023| Posted in Copic Colouring, Card Making, Stamping, Clean & Simple, Clean and Simple (CAS)| 291
'Tis the Season...
30/08/2023| Posted in Die Cutting, Card Making| 285
Folk Art Reindeer
10/09/2023| Posted in Die Cutting| 209
Very Merry
16/09/2023| Posted in Die Cutting, Inky Backsides| 1| 204
Hang a Stocking
20/09/2023| Posted in Die Cutting, Card Making, Stitching/Embroidery, Layering Stencils, Stencilled backgrounds| 236
Let's Be Merry
21/09/2023| Posted in Die Cutting, Stamping Techniques, Card Making, Heat Embossing, Shaker Cards| 181
'Tis the Season
28/09/2023| Posted in Die Cutting, Card Making| 259
Light Up Your Christmas
01/10/2023| Posted in Die Cutting, Homeware/Decorations| 1| 282
Tiny Houses
04/10/2023| Posted in Die Cutting, Card Making| 265
Gift Exchange
14/10/2023| Posted in Copic Colouring| 159
All aboard the Cheer Mobile!
18/10/2023| Posted in Die Cutting, Card Making, Stencilling, Stamping, Layering Stencils, Stencilled backgrounds| 211
Introducing Flashback Friday Bargains
20/10/2023| Posted in Copic Colouring| 1| 1000
Christmas Cloche
25/10/2023| Posted in Die Cutting, Card Making| 206
Big Beautiful Bow
01/11/2023| Posted in Die Cutting, Card Making| 492
Pretty CAS Gift
02/11/2023| Posted in Die Cutting, Ink Blending, Card Making, Clean & Simple, Clean and Simple (CAS)| 266
Figgy Pudding
08/11/2023| Posted in Die Cutting, Card Making, Stencilling, Layering Stencils, Stencilled backgrounds| 213
Hot Cocoa Anyone?
06/11/2023| Posted in Copic Colouring, Die Cutting, Card Making, Stamping, Clean & Simple, Clean and Simple (CAS), sales and giveaways, Flashback Friday Bargains| 209
Ta-Da! Seasons Tweetings.
07/11/2023| Posted in Colouring Stamped Images, Copic Colouring, Die Cutting, Card Making, Interactive Cards| 174
Joyful Christmas Sampler
15/11/2023| Posted in Card Making, Stencilling, Stencilling with embossing paste, Stencilled backgrounds| 206
Mini Christmas Gift Notebook & Co-Ordinating Card
13/11/2023| Posted in Die Cutting, Card Making, Gift Making, Stamping, Flashback Friday Bargains| 2| 208
Over the Rooftops
22/11/2023| Posted in Die Cutting, Card Making| 2| 257
Lil' Tags A Plenty and Store News
19/11/2023| Posted in Water Colouring| 245
Dashing Through the Snow
25/11/2023| Posted in Copic Colouring, Stencilling, Stencilling with embossing paste, Fussy Cutting| 181
Glitter & Snowflakes
30/11/2023| Posted in Die Cutting, Card Making, Stencilling, Stencilling with embossing paste, Clean and Simple (CAS)| 145
Flashback Friday Bargains - Concord and 9th
01/12/2023| Posted in Flashback Friday Bargains| 439
Simple 'Poinsettia' Card
04/12/2023| Posted in Copic Colouring, Pencil Colouring, Die Cutting, Stamping Techniques, Card Making, Stencilling with embossing paste| 118
Bulk Making Christmas Cards
03/12/2023| Posted in Die Cutting, Heat Embossing| 1| 250
Snow Much Love
05/12/2023| Posted in Die Cutting, Stamping Techniques, Card Making, Heat Embossing, Clean & Simple| 131
12 Days of Anita Jerams Christmas Part 3
09/12/2023| Posted in Copic Colouring| 162
Banner & Bough
13/12/2023| Posted in Die Cutting, Ink Blending, Card Making, Stamp Layering, Stamping, Stencilled backgrounds| 162
Last Minute Christmas Cards
11/12/2023| Posted in Die Cutting, Card Making| 139
All Is Calm
20/12/2023| Posted in Die Cutting, Card Making, Fancy Folds, Clean & Simple, Clean and Simple (CAS)| 221
12 Days of Anita Jerams Christmas Part 4
16/12/2023| Posted in Copic Colouring, Fussy Cutting| 255
Elegant Christmas Gift Tags
18/12/2023| Posted in Die Cutting, Card Making| 196
2024 Part Three
21/12/2023| Posted in Ink Blending, Stamping Techniques, Stamp Layering, Stencilling, turnabouts, Gift Making, Masking, mixed media, Wreath Building| 204
Sweater Season
17/01/2024| Posted in Die Cutting, Card Making| 121
Controversial Santas
28/08/2022
Birthday Forecast
14/02/2022
Encouraging Leaves
15/03/2021
Framed Snowdrops
22/02/2021
Paper Bouquet Take 2
24/04/2024
How to add dimension to your projects!
23/04/2024
Cute Milkshake Card
22/04/2024
Brighter Days Ahead
18/04/2024
Topics
- Birthdays
- Christmas
- New Home
- New Baby
- Mother's Day
- Father's Day
- Valentine's Day
- St Patrick's Day
- Masculine
- New Year
- Good Luck
- New Job
- Retirement
- Holidays
- Celebrations
- Belated
- Easter
- Florals
- Get Well
- Friendship
- Gifts
- Gift Packaging
- Halloween
- Interactive
- Invitation
- Weddings
- Anniversary
- Motivation
- Inspiration
- Kind Thoughts
- Number Birthdays
- Sympathy
- Cheers
- Food and Drink
- Children's Cards
- Covid19
- Love
- Thanks and Gratitude
- Hello
- Superheros
- Birds
- Gardening and Gnomes
- Weather
- Congratulations
- Summer
- Tag
- Wellbeing
- Home Decoration
- Puns/Humour
- Patterns
- Clock
- Seasonal
- Autumn
- Prize
- Winter
- Trees
- Trees
- Pets
- Notecards
- Animals
- Rainbows
- Plants
- Scenery
- Butterflies and insects
- Inky Backsides
- Framed art
- Gift Boxes
- Reading
- Borders and Edges
- People
- Storage
- Upcycling
- Party Decorations and Favours
- Wreaths
- Sport
- Thinking Of You
- Bookmark
- Alphabets
- Movies
- Eid
- Monochromatic
- Coronation
- Sentiments
- Sea creatures
- Leaves
Tags
Mochi Girls
Altenew
Avery Elle
Art Impressions
Colorado Craft Company
Concord & 9th
Echo Park
Fiskars
Flora & Fauna
Hero Arts
Kuretake
Lawn Fawn
Lil' Inker Designs
Mama Elephant
My Favorite Things
Neat & Tangled
Newton's Nook
Paper Smooches
Ranger
Reverse Confetti
Seven Hills Crafts
Simple Stories
Sizzix
Stampers Anonymous
Stamping Bella
Sguar Pea Designs
Therm-o-web
Tonic Studios
Tsukineko
Waffle Flower Crafts
We Are Memory Keepers
Wplus9
Purple Onion Designs
The Greetery
Thinking Of You
Transotype


