
Getting the most from foil plates

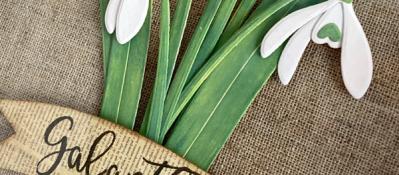
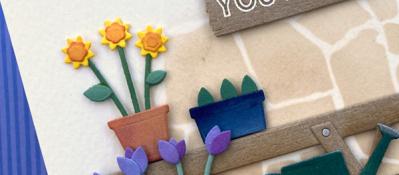
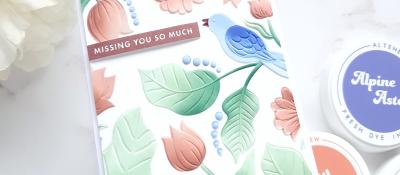
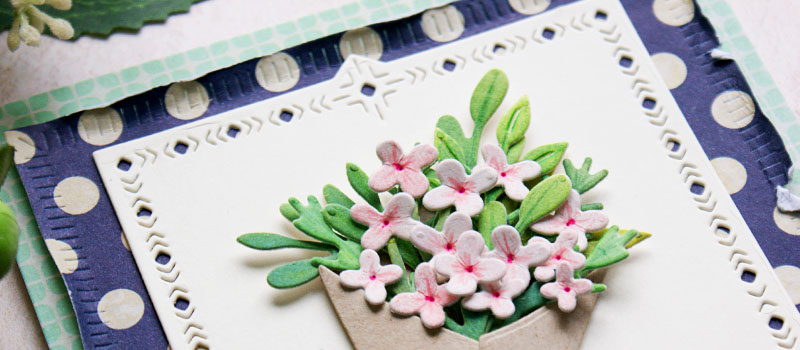
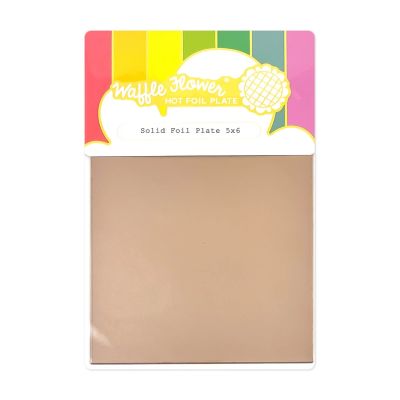
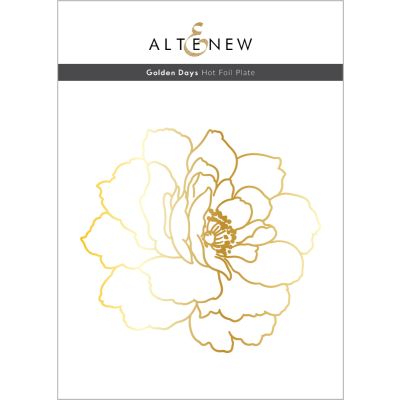
I've been playing with a couple of hot foil dies today - the Golden Days Hot Foil Plate from Altenew - a stunning big bold floral, and the Solid Hot Foil Plate from Waffle Flower to make sure I don't waste a mm of expensive foil!
Now the hot foil plates are a little more expensive that a standard die - that's because they're more expensive to make, but they can do a lot more than a standard die too, and more than just hotfoiling! For my first two cards, I'm not going anywhere near foil.
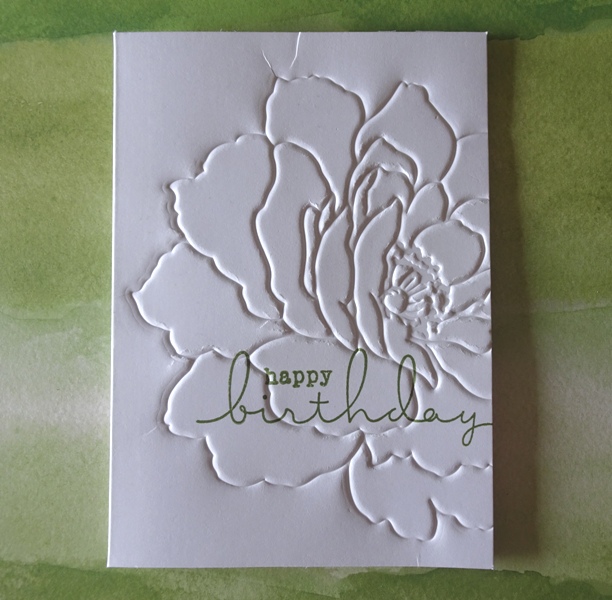
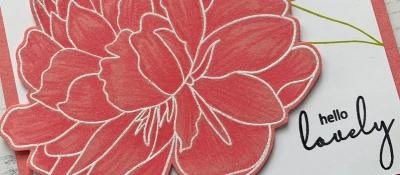
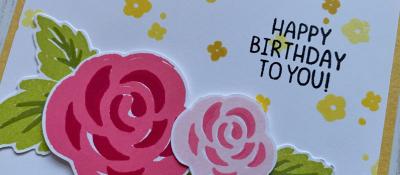
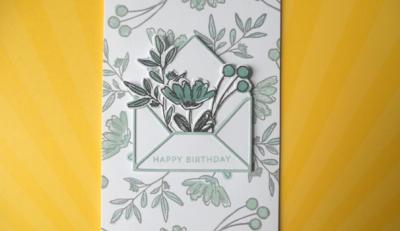
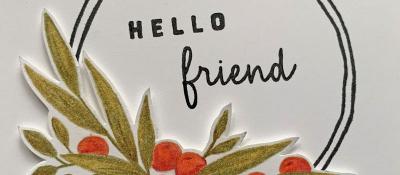
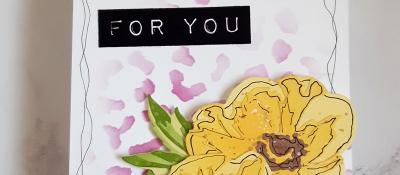
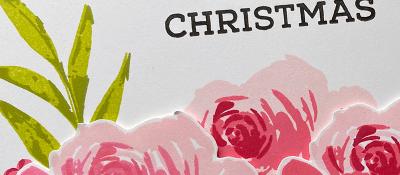
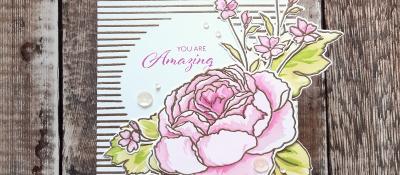
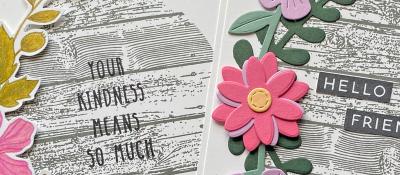
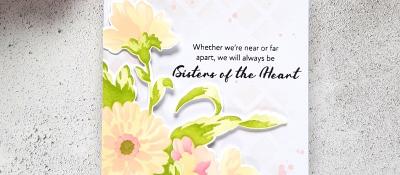
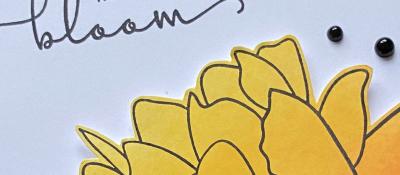
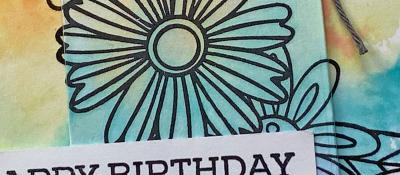
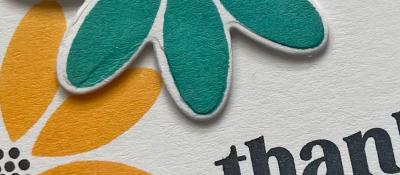
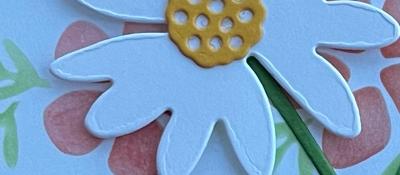
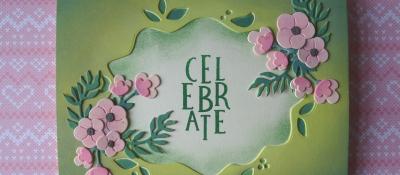
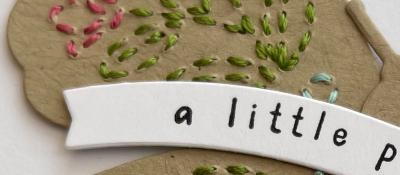
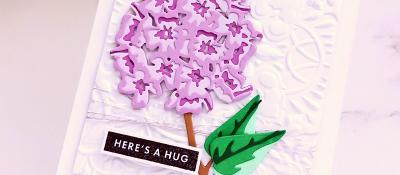
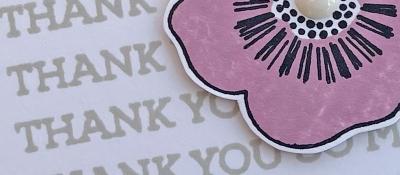
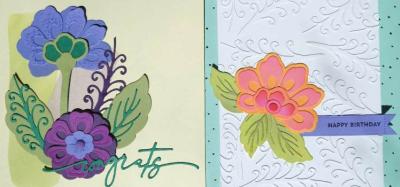
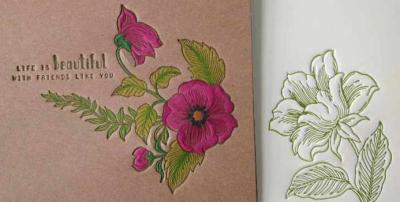
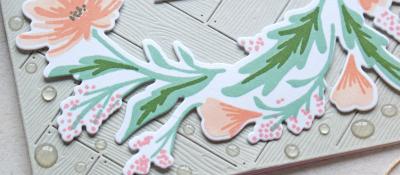
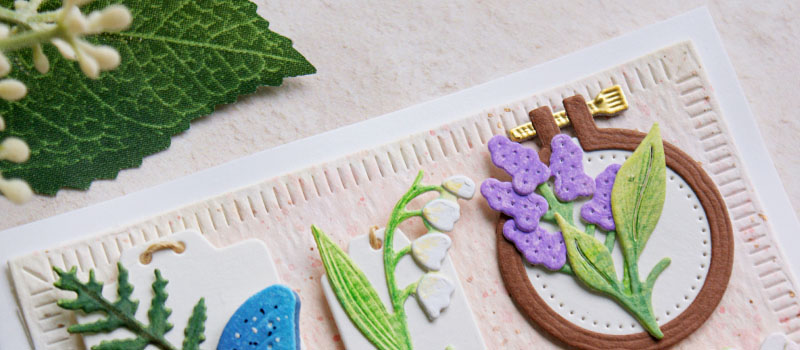
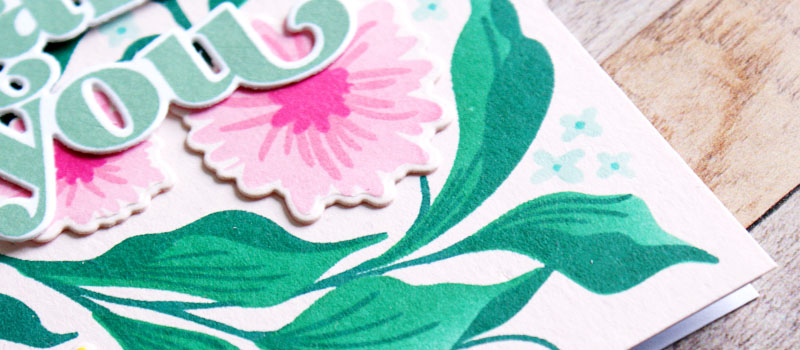
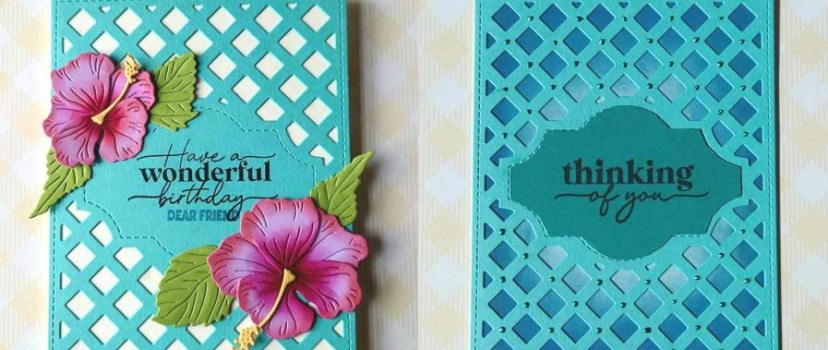
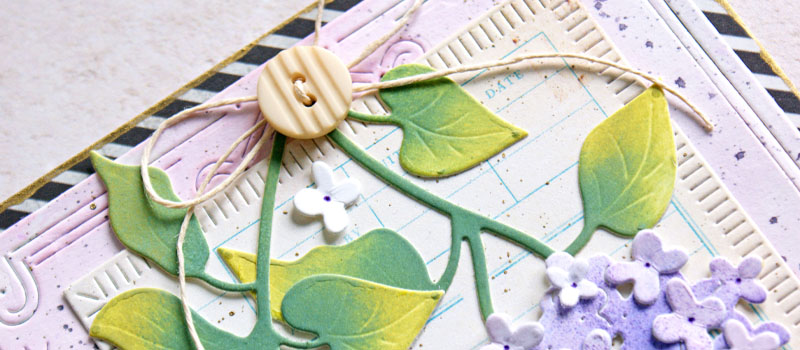
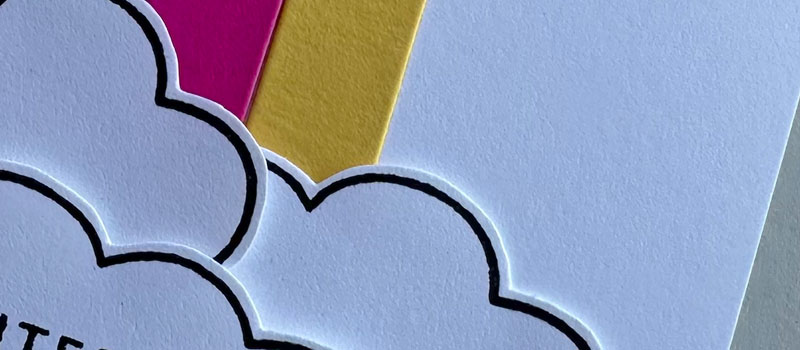
Card 1 - is about as simple as you can get but the results are simply stunning. All I did here was run the die through my machine with an embossing rubber in my sandwich and I got this super deep and detailed debossed floral. I decided to leave it exactly as it was for a classy look and just added a sentiment from Concord and 9th's all the birthdays stamp set. However, if you wanted to add colour you could use the matching stencil to layer the colour and details into the flower.
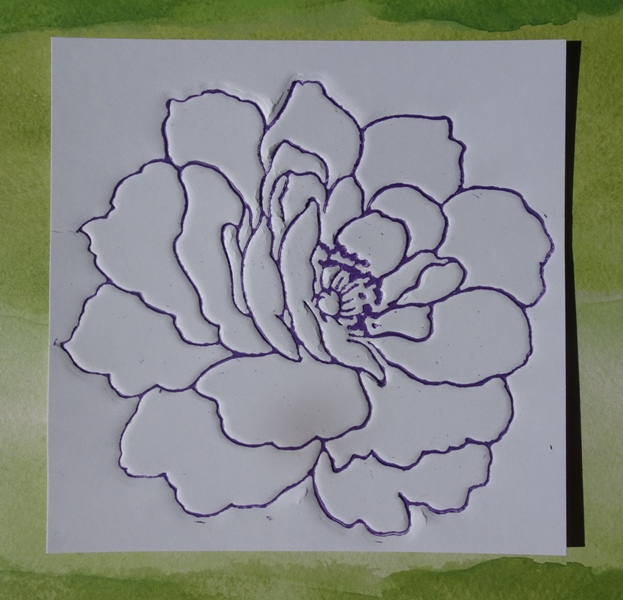
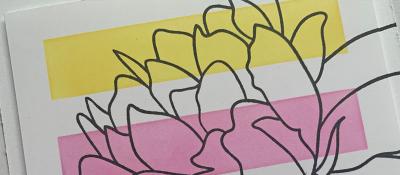
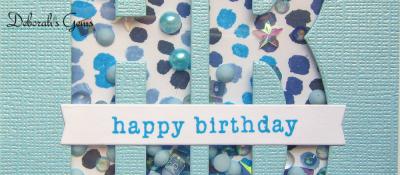
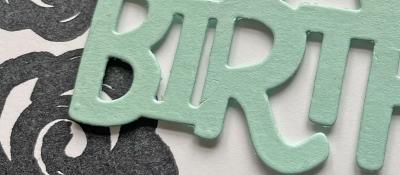
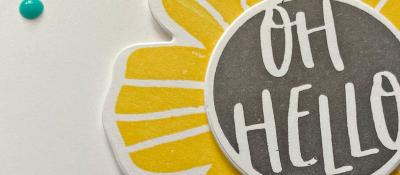
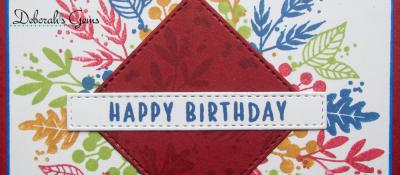
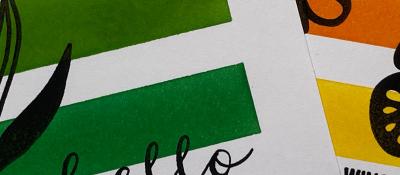
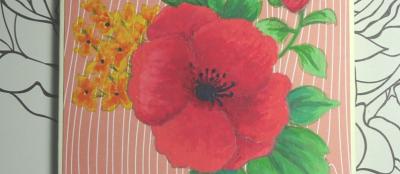
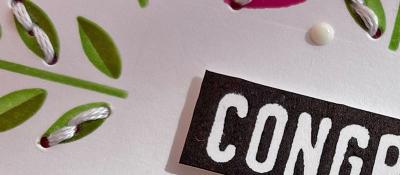
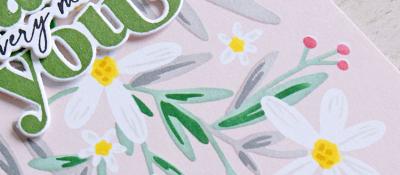
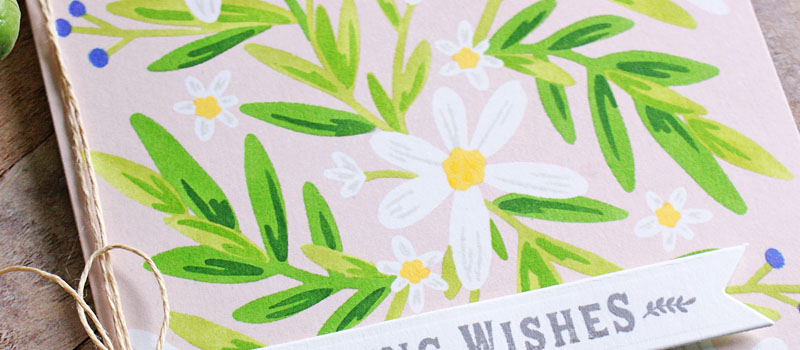
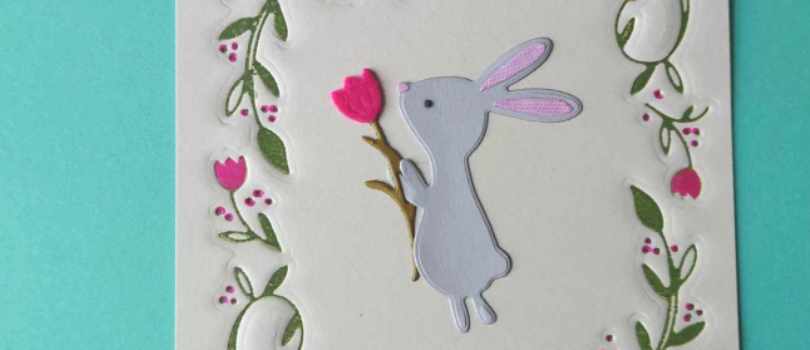
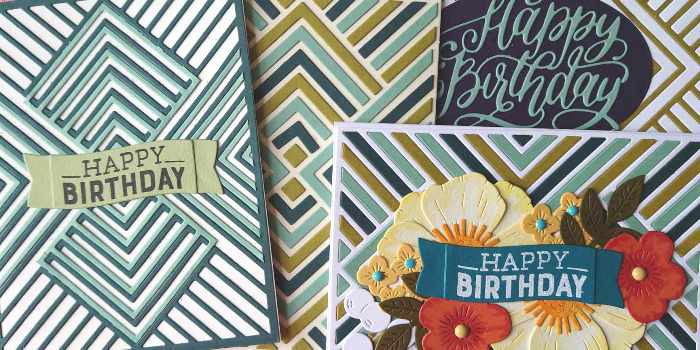
Card 2 - I took the debossing effect one stage further my using my brayer to ink up the die before running it through the machine with the same sandwich. This gives you a letterpress look. I used versafine clair ink in monarch. Just rinsed it off the brayer and the die as soon as I was done.
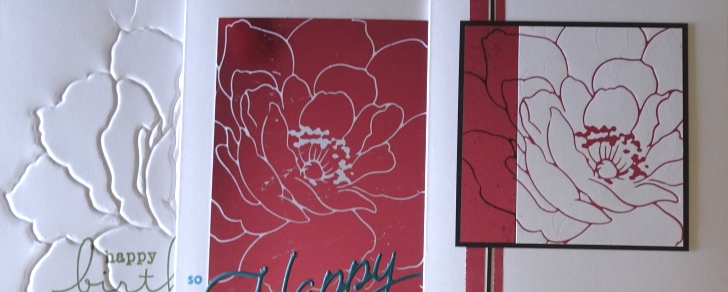
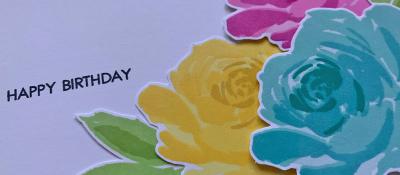
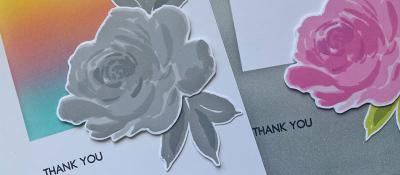
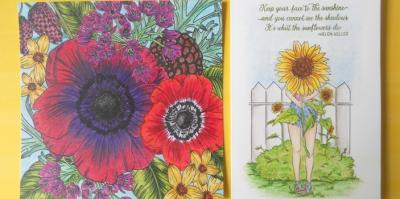
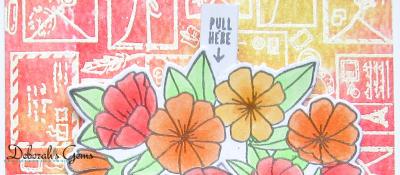
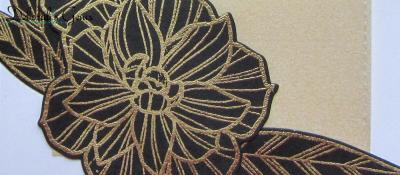
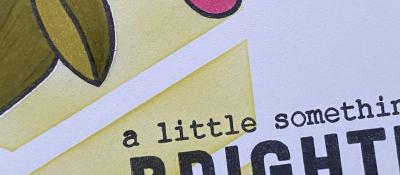
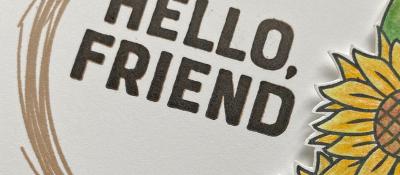
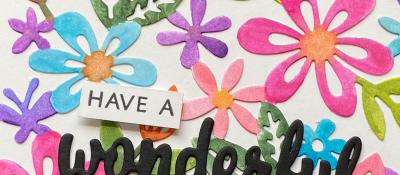
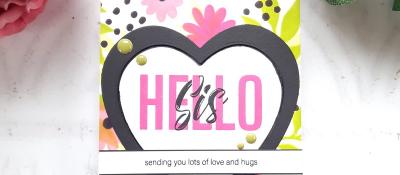
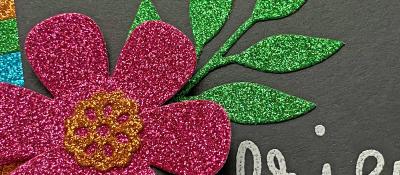
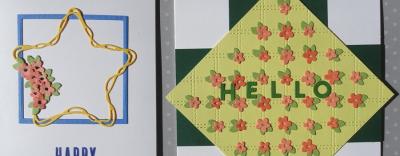
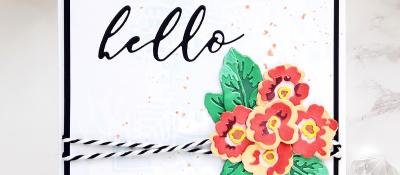
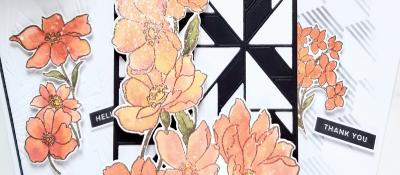
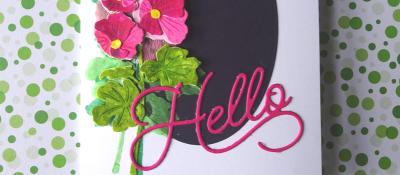
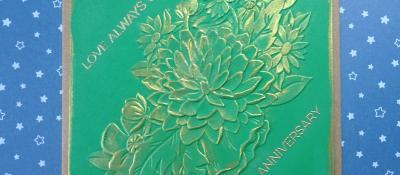
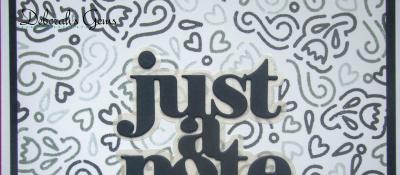
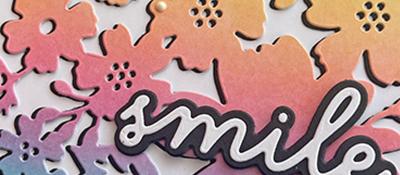
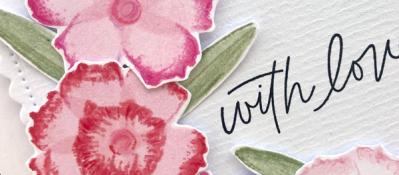
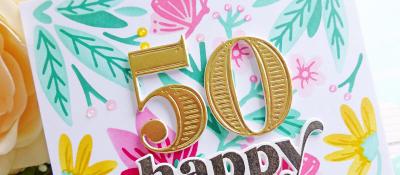
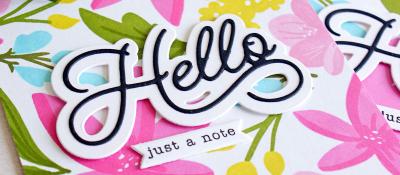
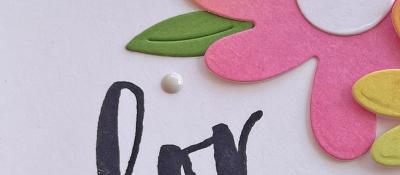
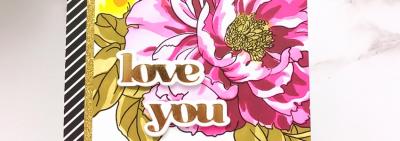
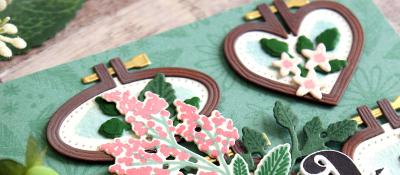
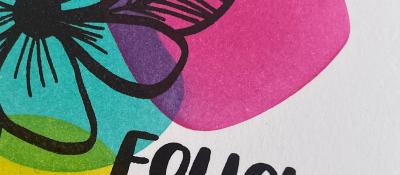
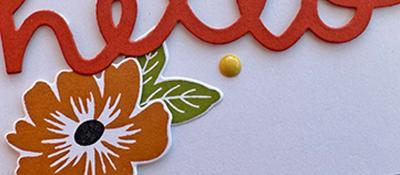
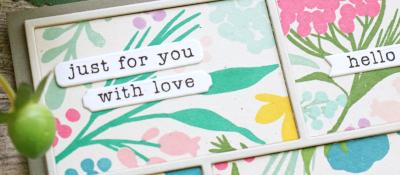
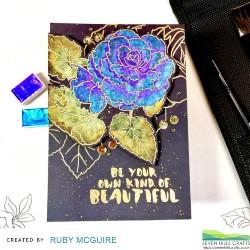
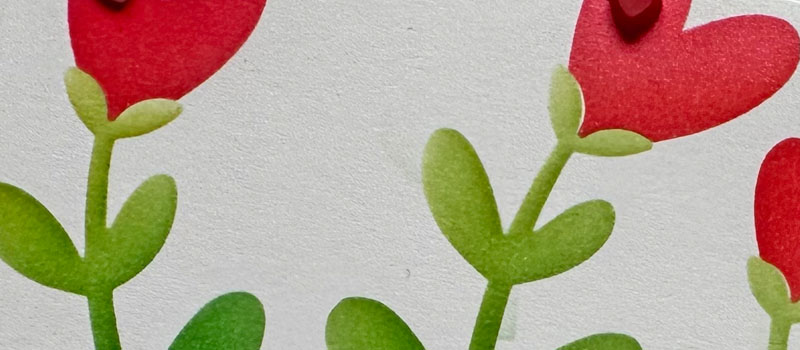
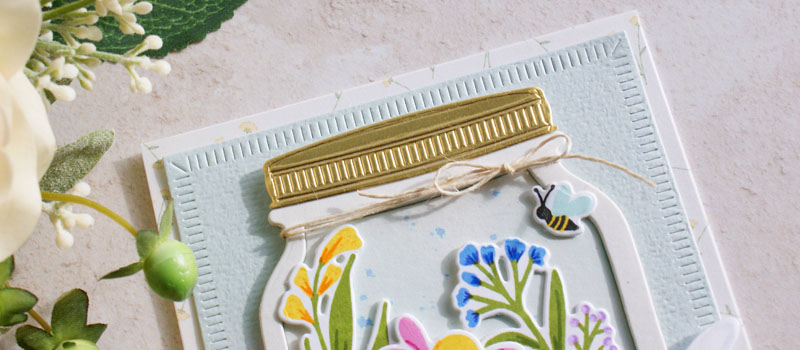
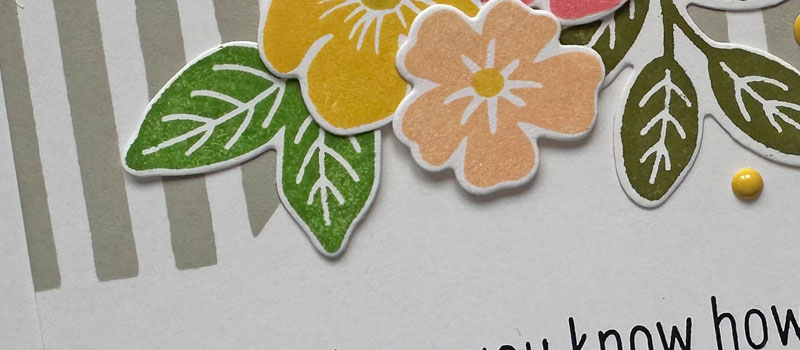
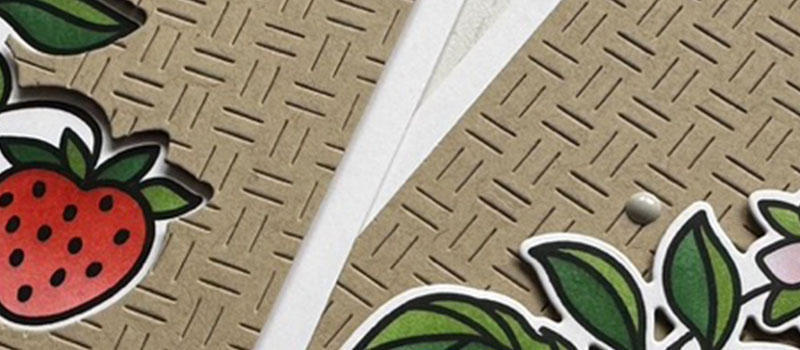
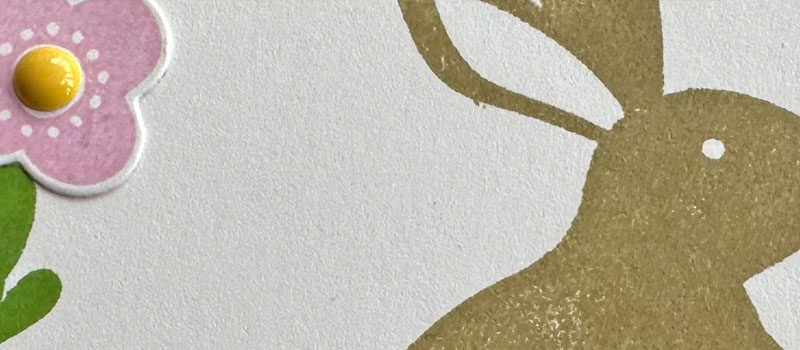
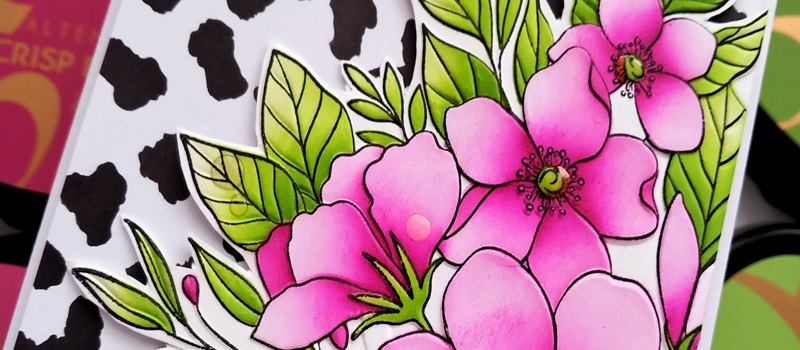
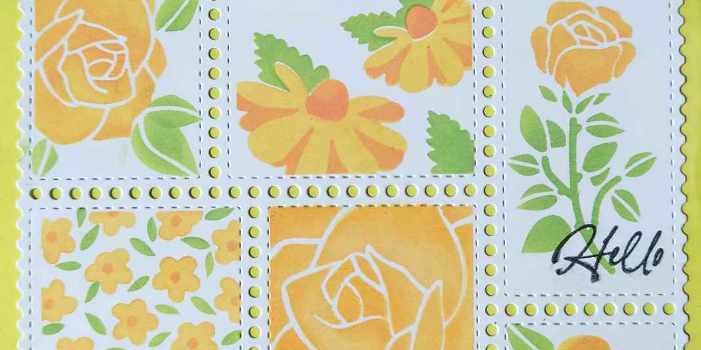
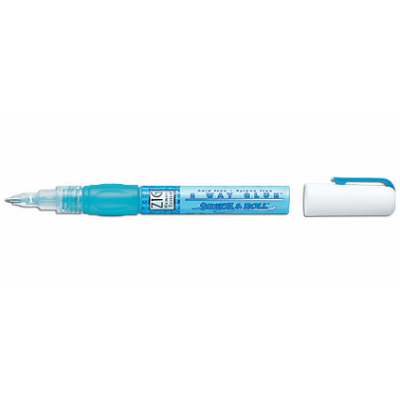
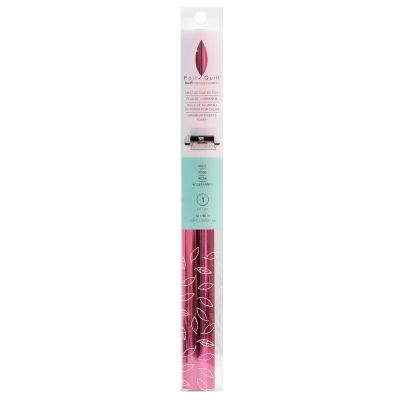
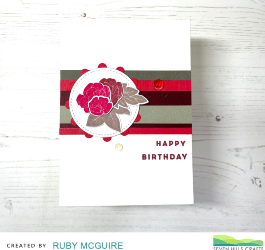
Card 3 - and we're onto foiling. I use a glimmer for hot foil - its very easy once you've done it a couple of times. I used rose foil from WRMK to do the foiling - its great foil and in big rolls so lasts ages. To get a more versatile look I took just a crop of the foiling and I decided to try reverse foiling with the Waffle Flower plate onto black so I could slice them together for a yin-yang look. Now I will admit I hit a few snags - first I broke my old die cut machine doing the reverse foiling - I overshimmed it as I was struggling to get the foil solid in the middle of my image. I tried again with my new machine and no shims. Same results. Turns out that cardstock is very important when solid foiling - if its not thick and super-smooth it won't take evenly (see card 4) so I gave up and just used the very thin sliver I got perfect on the edge of the foiling on my black card. To add more foil to the card itself I used some strips of ds-tape and simply put the foil over the top. For the sentiment I hand wrote Hello on black card using a Kuretake Squeeze and Roll 2 way glue pen - give it 30 seconds to dry clear and you can foil anything you write with it!
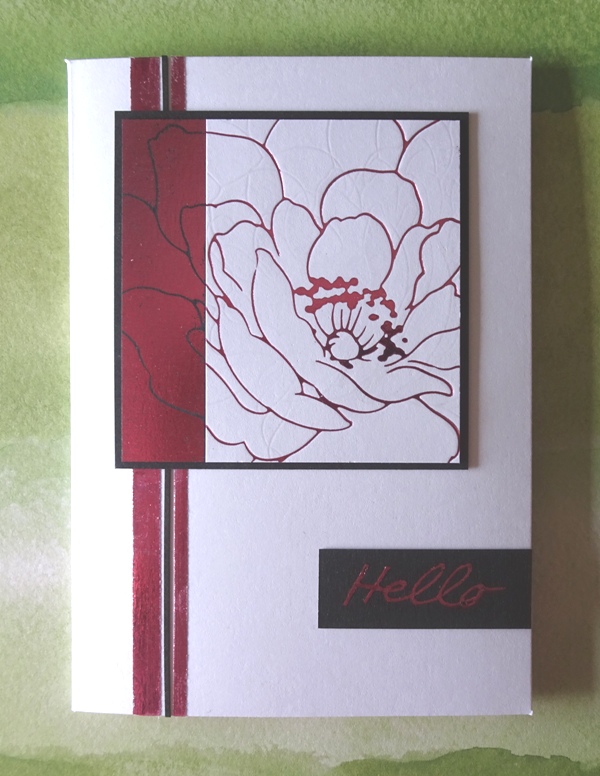
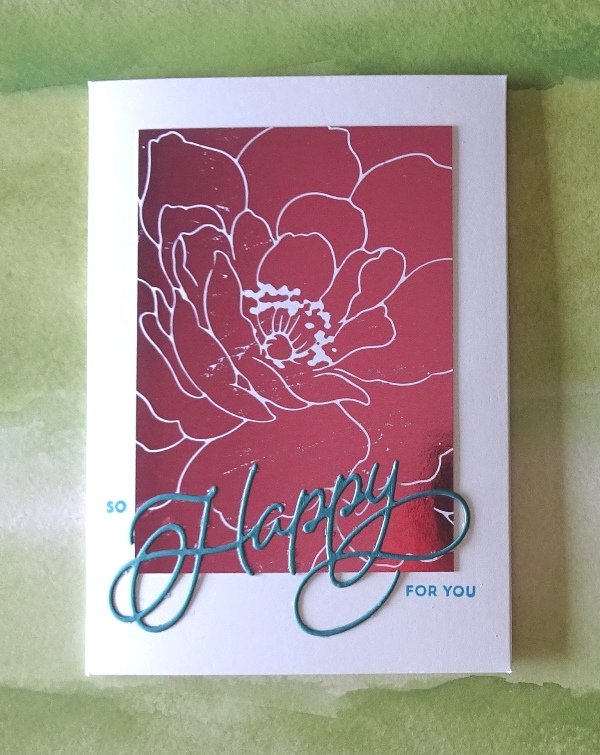
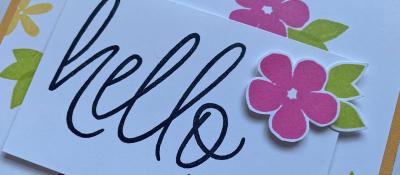
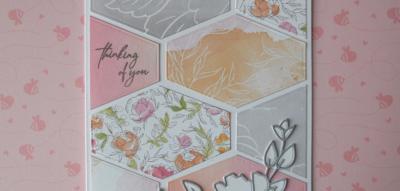
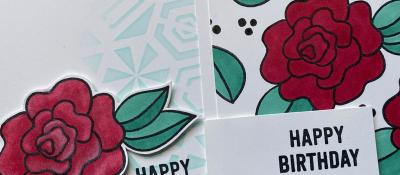
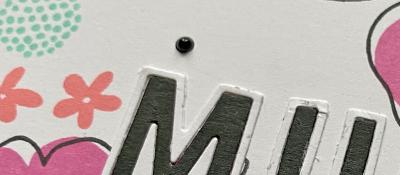
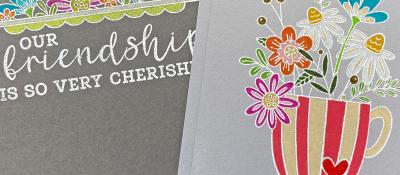
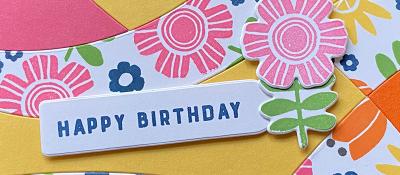
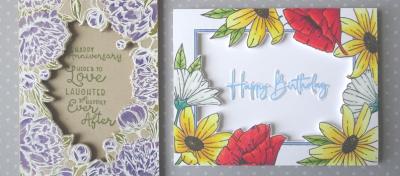
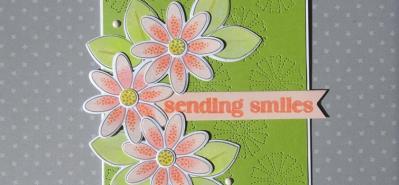
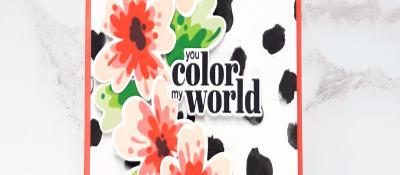
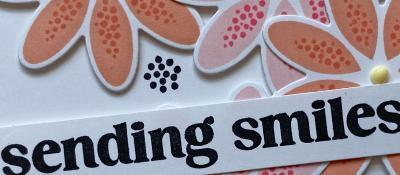
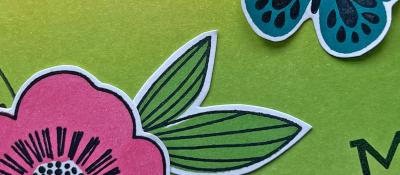
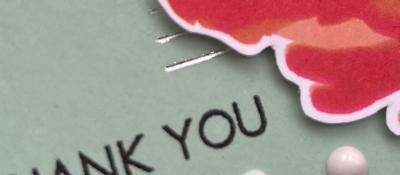
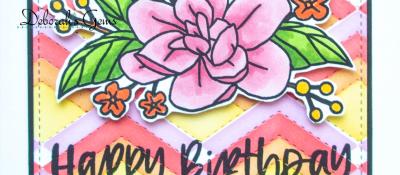
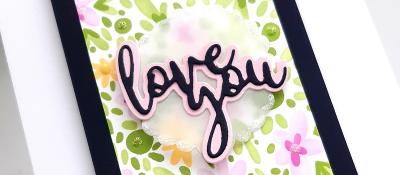
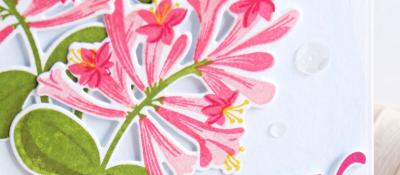
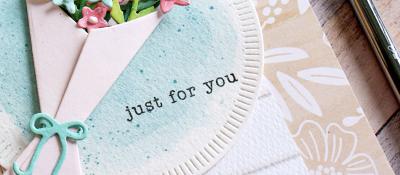
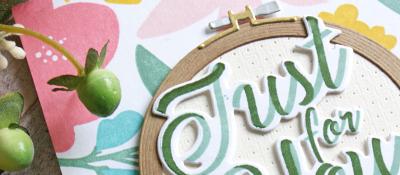
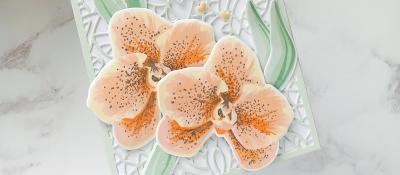
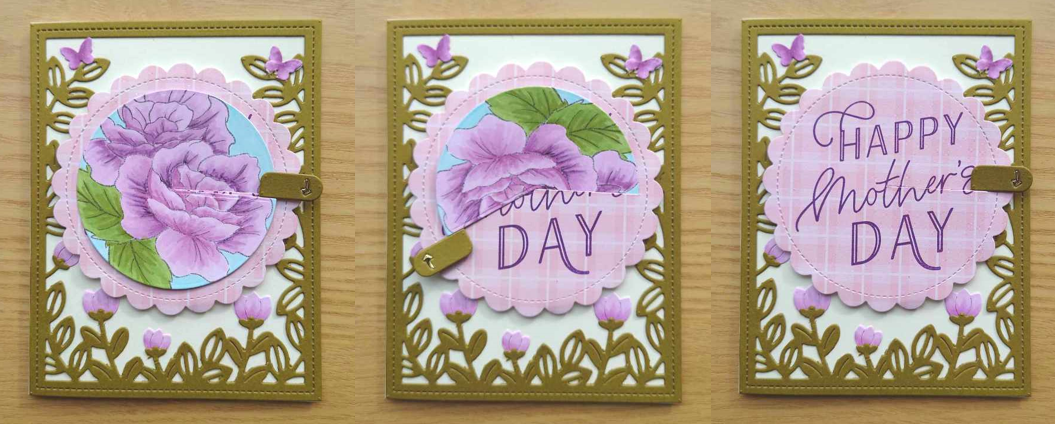
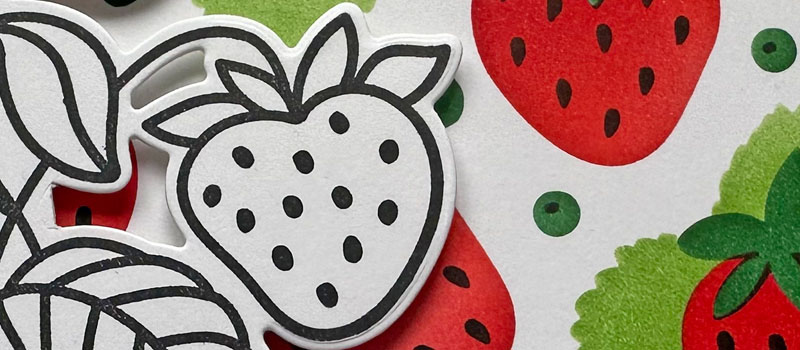
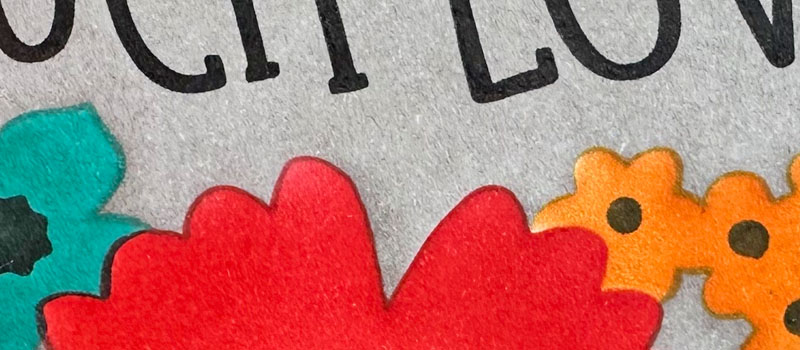
Card 4 - finally cracked the reverse foiling! I went back to 300gsm super-smooth white card and the reverse foiling worked like a dream all over - no need for shims and no patchy areas in the middle. It just foiled. I trimmed the panel to a rectangle to fit my card and added a die cut and stamped sentiment below using all kinds of happy dies from The Greetery plus a sentiment from Itty Bitty Celebrations from MFT.
Hopefully that gives you some insights into how to get the most from your hot foil plates - and I made the mistakes so you don't have to!
STORE UPDATES
There won't be as much new stock in store this week - we have the latest Waffle Flower release to add and will do it as soon as we finish packing the Lawn Fawn release orders as that put us behind a little.
We will be ordering some more new Altenew products this week as well as the upcoming release from The Greetery.
We have some more new products from Kuretake to add - some restocks, some new now they finally have UK distribution again. We have gansai tambi's coming back as well as their fineliner pens.
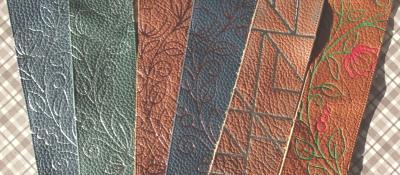
We have also sourced some new felt finally that we are happy die cuts cleanly after our old supplier closed before the pandemic. We'll be putting 24 colour rainbow packs in 8inch square sizes into the store this week.
Catch you next weekend.
Tara
27/02/2022
|
View: 354
|
Categories: Hot Foil, Letterpress
|
Tags: Altenew, Concord & 9th, My Favorite Things, Waffle Flower Crafts, We Are Memory Keepers, The Greetery
Related Posts
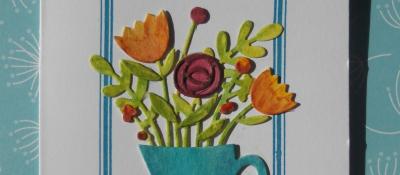
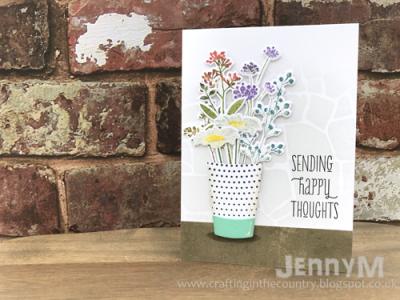
Jug of Flowers
01/03/2020| Posted in Water Colouring, Die Cutting| 1| 385


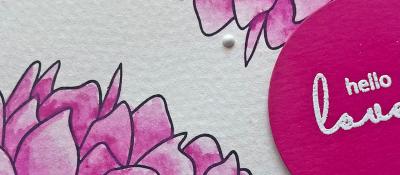
Hello Lovely
30/04/2020| Posted in Pencil Colouring, Card Making| 1| 352
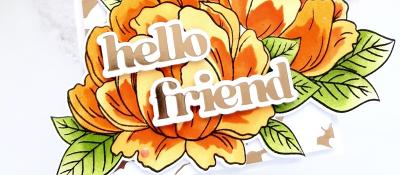
Hello Friend
07/05/2020| Posted in Card Making, Fussy Cutting| 243
Birthday Blooms
14/05/2020| Posted in Card Making, Stamped Background| 2| 242
Bowl of Blooms
18/06/2020| Posted in Colouring Stamped Images, Card Making| 338
Distress Speckled Egg and Repeating Pattern Stamping
21/06/2020| Posted in Stamping Techniques, Repeat Pattern Building| 541
Floral Splendour
28/06/2020| Posted in Pencil Colouring| 360
Aloha Sunshine
23/07/2020| Posted in Card Making| 290
Paper Hugs
05/08/2020| Posted in Copic Colouring, Die Cutting, Ink Blending, Card Making, Stamped Background, Interactive Cards, Heat Embossing| 415
For the love of pretty papers....
16/08/2020| Posted in Patterned Papers| 3| 492
Birthday Shakers
26/08/2020| Posted in Die Cutting, Stamping Techniques, Card Making, Stamped Background, Fussy Cutting, Heat Embossing, turnabouts, Repeat Pattern Building, Stamping on non paper surfaces| 411
Colorado Craft Company Week!
25/10/2020| Posted in Water Colouring| 2| 452

Delight in the Little Things
29/10/2020| Posted in Ink Blending, Card Making| 2| 248

Friends and Christmas
18/11/2020| Posted in Stamping Techniques, Card Making, Stamp Layering, Stamped Background, Masking| 1| 370
Floral Birthdays
09/12/2020| Posted in Colouring Stamped Images, Die Cutting, Stamping Techniques, Card Making, Stamped Background, Heat Embossing| 1| 233

All the THANKS
10/12/2020| Posted in Die Cutting, Card Making| 2| 421
Birthday Roses
07/01/2021| Posted in Colouring Stamped Images, Copic Colouring, Card Making, Stencilling, Stamped Background| 1| 265
Magical Day
27/01/2021| Posted in Copic Colouring, Die Cutting, Card Making, Fussy Cutting, Heat Embossing| 1| 221
A Little Something...
18/02/2021| Posted in Colouring Stamped Images, Copic Colouring, Stamping Techniques, Card Making, Stencilling, Masking| 1| 260

Birthday Blooms
04/03/2021| Posted in Die Cutting, Card Making| 1| 271

A Little Note
01/04/2021| Posted in Colouring Stamped Images, Pencil Colouring, Card Making, Special Effects, Fussy Cutting| 1| 382
Hello Sunflowers
08/04/2021| Posted in Colouring Stamped Images, Pencil Colouring, Card Making, Fussy Cutting| 1| 320
Fun Fabric Guest
09/04/2021| Posted in Stamped Background, Repeat Pattern Building, Stamping on non paper surfaces, fabric, mixed media| 1| 319
Floral Fancies
25/04/2021| Posted in Off The Page Projects, Stamp Layering, Partial Die Cutting, Gift Making, Stamping on non paper surfaces| 2| 399
Eclectic Florals
29/04/2021| Posted in Colouring Stamped Images, Pencil Colouring, Die Cutting, Card Making, No Line Colouring, Fussy Cutting| 1| 360

Aloha
06/05/2021| Posted in Colouring Stamped Images, Copic Colouring, Card Making, Fussy Cutting, Stamping| 1| 274

Botanical Branches
13/05/2021| Posted in Water Colouring, Die Cutting, Stamping Techniques, Card Making, Stamped Background| 1| 308
Going Dotty!
20/05/2021| Posted in Colouring Stamped Images, Copic Colouring, Stamping Techniques, Card Making, Stamp Layering, Stamping, sentiment Focal Points| 2| 323

Cup of Friendship
10/06/2021| Posted in Colouring Stamped Images, Pencil Colouring, Stamping Techniques, Card Making, Heat Embossing, Stamping| 299

A Wreath for All Seasons
01/09/2021| Posted in Copic Colouring, Die Cutting, Card Making, Stamped Background, Fussy Cutting, Heat Embossing, turnabouts, Stamping| 453
The Season In-Between!
02/09/2021| Posted in Ink Blending, Card Making| 241
Festive One Layer
09/09/2021| Posted in Colouring Stamped Images, Copic Colouring, Stamping Techniques, Card Making, Masking, Stamping| 245


One Layer Wonders!
17/02/2022| Posted in Ink Blending, Card Making, Stencilling, Stamping, Clean & Simple, Stencilled backgrounds| 315

Hello Dear Friend
10/03/2022| Posted in Stamping Techniques, Card Making, Stamped Background, Fussy Cutting, Stamping, Clean & Simple| 227
Ink Blending on Solid Stamps
13/03/2022| Posted in Die Cutting, Ink Blending Direct on Stamps| 681
Smooshed Blooms
17/03/2022| Posted in Colouring Stamped Images, Water Colouring, Die Cutting, Stamping Techniques, Card Making, Special Effects, Stamping, Clean & Simple| 283
Tiny Flowers
18/03/2022| Posted in Die Cutting| 289

Friendship & Smiles
07/04/2022| Posted in Card Making, Stamped Background, Stamping, sentiment Focal Points, Clean & Simple| 292
Cut, Colour, Stick.. it's as easy as 1,2,3
26/04/2022| Posted in Die Cutting, Card Making| 154
3 ways with Castle Garden Stamp Set
03/05/2022| Posted in Colouring Stamped Images, Water Colouring, Die Cutting, Card Making, Stencilling, Heat Embossing, Stamping, Embossing Folders| 352
Wildflowers and Weeds
13/05/2022| Posted in Water Colouring| 1| 357
Magnolia Smiles
07/06/2022| Posted in Water Colouring, Stamping Techniques, Card Making, Fussy Cutting, Heat Embossing| 317

Get Well Peonies
23/06/2022| Posted in Stamping Techniques, Card Making, Stamp Layering, Repeat Pattern Building, Masking| 288
Happy Hollyhocks
06/07/2022| Posted in Water Colouring, Die Cutting| 820
Floral Calendar Page
15/07/2022| Posted in Stamp Layering, Homeware/Decorations| 377
One for the Guys & One for the Girls.
28/07/2022| Posted in Die Cutting, Card Making, Stamped Background, Stamping, Inlaid Die Cutting| 446

A Mixed Media Crafternoon
07/08/2022| Posted in Die Cutting, Stencilling with embossing paste, Heat Embossing, mixed media, Hot Foil, Die Cut Felt and Fabric| 380
Pick A Pattern
25/08/2022| Posted in Stamping Techniques, Card Making, Stamping, Clean & Simple, Clean and Simple (CAS)| 294
Faux Rub-On Technique
27/11/2022| Posted in Embossing Folders| 292
Month By Month - Part 2
08/12/2022| Posted in Ink Blending, turnabouts| 217
Fantasy Jungle
13/12/2022| Posted in Ink Blending, Card Making, Stencilling, Embossing Folders, Layering Stencils| 193
Month By Month - Part 4
22/12/2022| Posted in Die Cutting, Ink Blending, Stencilling, turnabouts, Gift Making, Layering Stencils| 349

One Background - Four Ways
20/01/2023| Posted in Copic Colouring, Die Cutting, Card Making, Stamped Background, Heat Embossing, Stamping| 236
Glorious Gouache
01/02/2023| Posted in gouache painting| 270
Simple Hot Foil Background
02/02/2023| Posted in Die Cutting, Stamping Techniques, Card Making, Stamp Layering, Clean & Simple, Hot Foil| 235
Organic Cherry Blossom
08/02/2023| Posted in Die Cutting, Ink Blending| 197
Fabric that's a sweet as can bee
19/02/2023| Posted in Stencilling, fabric| 213
A Trio of Cards
24/02/2023| Posted in Copic Colouring, Card Making, Stencilling, Fussy Cutting, Stamping, Stencilled backgrounds| 322
Garden Goodness Birthday Blooms
12/04/2023| Posted in Die Cutting, Card Making, Stamp Layering, Stencilling, Layering Stencils, Stencilled backgrounds| 325
Threads Of Kindness
20/04/2023| Posted in Die Cutting, Card Making, Stencilling, mixed media, Layering Stencils, Clean & Simple| 290
Thank You Blossom
27/04/2023| Posted in Stamping Techniques, Card Making, Stamped Background, Clean and Simple (CAS)| 1| 216

Daisy Days Two Ways
10/05/2023| Posted in Die Cutting, Card Making, Stamp Layering, Stamping, sentiment Focal Points, Layering Stencils, Clean & Simple, Stencilled backgrounds, Clean and Simple (CAS)| 262
Ornate Florals
02/06/2023| Posted in Die Cutting, Faux Embossing| 175
Takes the Cake!
12/06/2023| Posted in Die Cutting, Card Making, Stamped Background, Stamping, Layering Stencils| 185

Hey Beautiful
29/06/2023| Posted in Colouring Stamped Images, Copic Colouring, Stamping Techniques, Card Making, Heat Embossing, Clean & Simple| 169
Letterpress without a Betterpress? No problem!
07/07/2023| Posted in Letterpress| 1| 414
Billowing Peonies
18/07/2023| Posted in Ink Blending, Card Making, Stencilling, Layering Stencils, Hot Foil, Stamp Wheel| 190

Bloomin' Wonderful!
03/08/2023| Posted in Die Cutting, Stamping Techniques, Card Making, Stamped Background, Clean & Simple| 175
Just for You
16/08/2023| Posted in Die Cutting, Card Making, Stamp Layering, Stamped Background, Stamping, sentiment Focal Points| 200
Picked Posies - Just for You
23/08/2023| Posted in Die Cutting, Card Making| 195
Friday Feel Good Floral
25/08/2023| Posted in Ink Blending, Stencilling, Clean & Simple, Stencilled backgrounds, Stamp Wheel| 215
Gnomes in the sunflower patch
29/09/2023| Posted in Pencil Colouring| 193


Flashback Friday Bargains - Concord and 9th
01/12/2023| Posted in Flashback Friday Bargains| 436
2024 Part One
07/12/2023| Posted in Die Cutting, Ink Blending, Stencilling, Gift Making, Stamping, Stencilled backgrounds| 139
2024 Part Two
14/12/2023| Posted in Ink Blending, Stencilling, Stamped Background, turnabouts, Gift Making, Stamping, Layering Stencils, Stencilled backgrounds, Stamp Wheel| 182
2024 Part Three
21/12/2023| Posted in Ink Blending, Stamping Techniques, Stamp Layering, Stencilling, turnabouts, Gift Making, Masking, mixed media, Wreath Building| 199
Out with the old, in with the new!
03/01/2024| Posted in Card Making, sentiment Focal Points| 159
Hello 2024
04/01/2024| Posted in Card Making, Stencilling, Layering Stencils, Clean & Simple, Clean and Simple (CAS)| 148
More than Merry Sprigs
10/01/2024| Posted in Stamping Techniques, Card Making, Stamp Layering, Stamped Background, Stamping| 147

Metallic Magic: Crafting a Dramatic Black Floral Card
29/01/2024| Posted in Water Colouring, Die Cutting, Stamping Techniques, Card Making, Flashback Friday Bargains| 173
Endless Creativity: A Repeatable Card Design Gem!
05/02/2024| Posted in Copic Colouring, Card Making, Stencilling, Fussy Cutting, Stamping, Embossing Folders, Flashback Friday Bargains| 167
Garden Goodness
07/02/2024| Posted in Card Making, Stamp Layering, Stencilling, Layering Stencils, Clean & Simple, Stencilled backgrounds, Clean and Simple (CAS)| 163
Mother's Day Whirl
03/03/2024| Posted in Copic Colouring, Interactive Cards| 464
I Hope You Know...
07/03/2024| Posted in Stamping Techniques, Card Making| 553
A Sweet Duo
14/03/2024| Posted in Colouring Stamped Images, Die Cutting, Stamping Techniques, Card Making, Stencilling, colouring die cuts| 184
One panel two ways
17/03/2024| Posted in Die Cutting| 197

Primrose Garden Greetings
20/03/2024| Posted in Die Cutting, Card Making| 209
Sweet Hello
21/03/2024| Posted in Die Cutting, Card Making, Partial Die Cutting, Stencilling, Stencilled backgrounds| 129
A Basket Full of Care
24/03/2024| Posted in Die Cutting| 184
Letterpressing Hotfoils
31/03/2024| Posted in Letterpress| 146

Flashback Friday Bargains - Leaves and Flowers
05/04/2024| Posted in Flashback Friday Bargains| 489
Sending Hugs & Snuggles
09/04/2024| Posted in Die Cutting, Ink Blending, Card Making, Stencilling, Stamping, Embossing Folders| 125
Bouquet Wishes
10/04/2024| Posted in Die Cutting, Card Making| 128

Birthdays and Backgrounds
14/04/2024| Posted in Die Cutting| 146

Paper Bouquet
17/04/2024| Posted in Die Cutting, Card Making| 68
Related Products

Controversial Santas
28/08/2022

Birthday Forecast
14/02/2022

Encouraging Leaves
15/03/2021

Framed Snowdrops
22/02/2021

Brighter Days Ahead
18/04/2024
Paper Bouquet
17/04/2024
Have A Kanga-riffic Birthday!
16/04/2024
Simple Striped Birthday Card
15/04/2024
Birthdays and Backgrounds
14/04/2024