
Stripe Builder Stencil
Out of stock
SKU
ALT_4476_StripeBuilder_STENCIL
Who doesn't love some good ol' stripes?
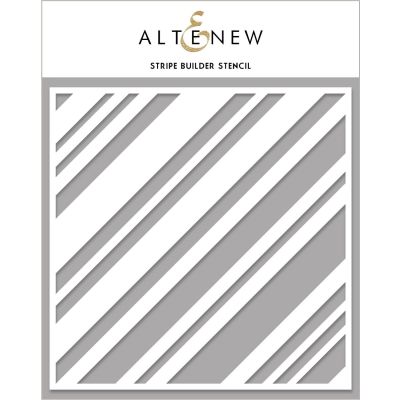
If you love adding striped designs to your projects but struggle with getting crisp, straight lines, you need our Stripe Builder Stencil. This stencil will help you easily create a striped background on your handmade cards, scrapbook layouts, and journal pages. The stripes vary in width, and the stencil can be rotated and inked in multiple colors to produce alternating stripes. So, what are you waiting for? Get striping!
Altenew stencils look beautiful when blended with our Crisp Dye Inks and our line of Ink Sprays, or you can add texture with Altenew Embossing Paste.
Size: 6" x 6"
Made in the USA
How To Use
Place the stencil over the project area and secure it with washi tape, painter's tape, or any other repositionable adhesive. Add patterns to your project by blending inks, spraying mists, applying embossing paste, or adding glitter. Gently pull the stencil off from the project area to see the result.
How To Clean & Care
Use baby wipes or stamp cleaner to remove any residual ink or craft medium. For more thorough cleaning, a gentle soap with lukewarm water may be used. Lightly pat the stencil dry with a clean cloth and return it to its original packaging or a storage sleeve to keep it clean. Store flat and away from direct heat/sunlight.
£5.95
Who doesn't love some good ol' stripes?
If you love adding striped designs to your projects but struggle with getting crisp, straight lines, you need our Stripe Builder Stencil. This stencil will help you easily create a striped background on your handmade cards, scrapbook layouts, and journal pages. The stripes vary in width, and the stencil can be rotated and inked in multiple colors to produce alternating stripes. So, what are you waiting for? Get striping!
Altenew stencils look beautiful when blended with our Crisp Dye Inks and our line of Ink Sprays, or you can add texture with Altenew Embossing Paste.
Size: 6" x 6"
Made in the USA
How To Use
Place the stencil over the project area and secure it with washi tape, painter's tape, or any other repositionable adhesive. Add patterns to your project by blending inks, spraying mists, applying embossing paste, or adding glitter. Gently pull the stencil off from the project area to see the result.
How To Clean & Care
Use baby wipes or stamp cleaner to remove any residual ink or craft medium. For more thorough cleaning, a gentle soap with lukewarm water may be used. Lightly pat the stencil dry with a clean cloth and return it to its original packaging or a storage sleeve to keep it clean. Store flat and away from direct heat/sunlight.
Write Your Own Review
Our shipping rates are based on a combination of order value and weight limits for each region Click Here to view our shipping information.