Hanging with my Gnomies

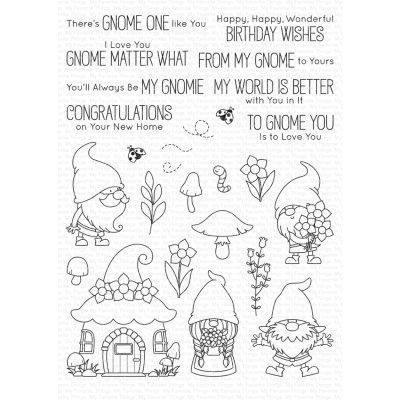
I have a bit of a soft spot for garden gnomes - not always the most fashionable garden accessory but I love anything with a hint of kitsch. So I have just about all the previous gnome releases we've had to date so I had to add the new ones from MFT to my collection, especially the Gnome Place Like Home die as I love piecing those kind of dies together like a jigsaw to build up the whole "image".
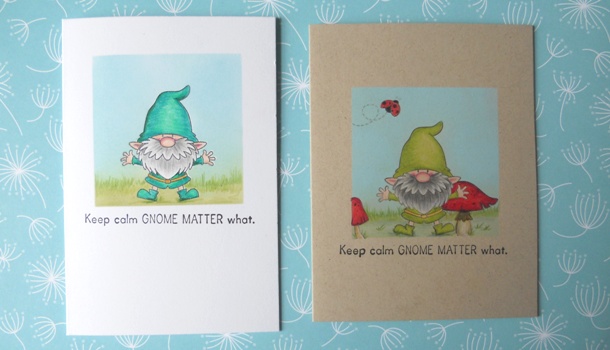
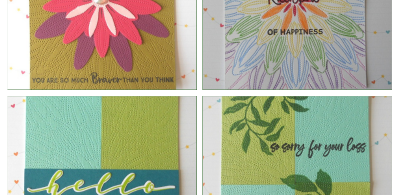
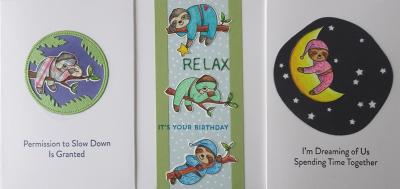
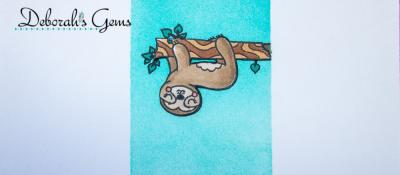
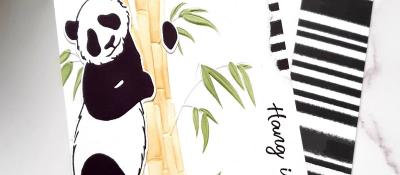
For my first couple of cards though I started with the Hanging With My Gnomies stamp as I wanted a couple of cards to send to people with stressful things going on in their lives.
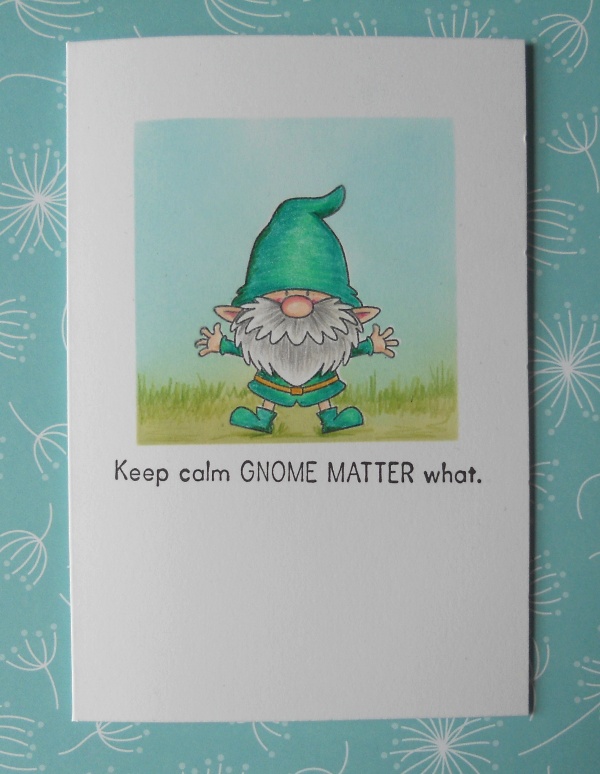
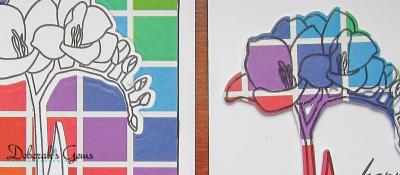
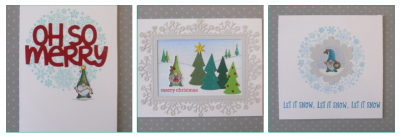
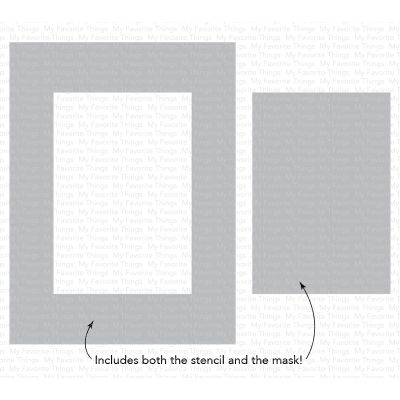
I stamped my gnome directly to my base card and then masked him out with a post-it and used the MFT Square Extraordinary Stencil to ink blend a simple background separating the green a blue with a few flicks of a pencil. I then coloured the gnome with pencils and finished with a sentiment from a Stamping Bella stamp (sorry it's out of stock - there are plenty of great sentiments with the gnomes but like I said I needed one about not worrying for my cards)
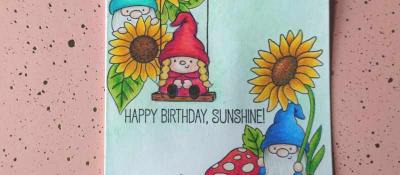
My second card is almost exactly the same, I just decided to add more elements from the stamp set (with more masking) before I did the ink blended background. Remember when masking scenes - start with the thing that will be in the foreground, mask it and then work backwards.
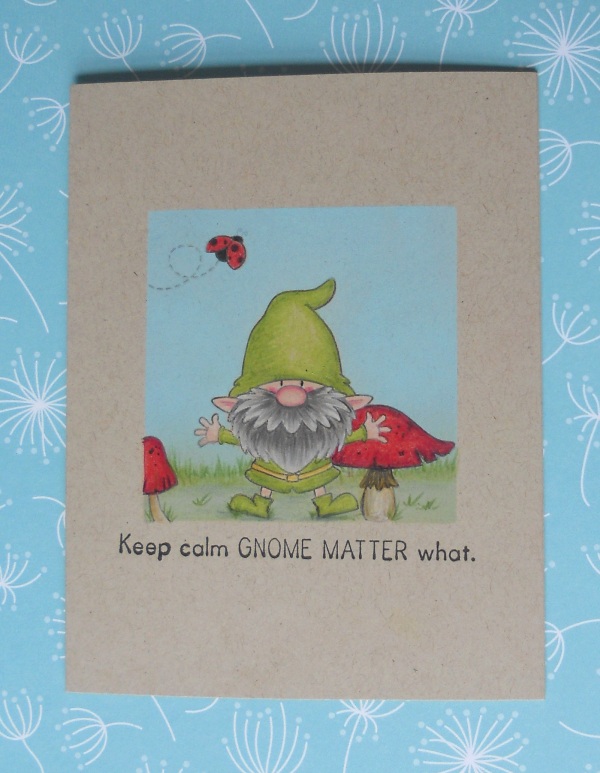
Coloured with pencils again but on a darker base card which gives a different feel even though the colours used were very similar. I do adore that little lady bug! (there are often fabulous little tiny stamps in big sets so do make sure you don't overlook them)
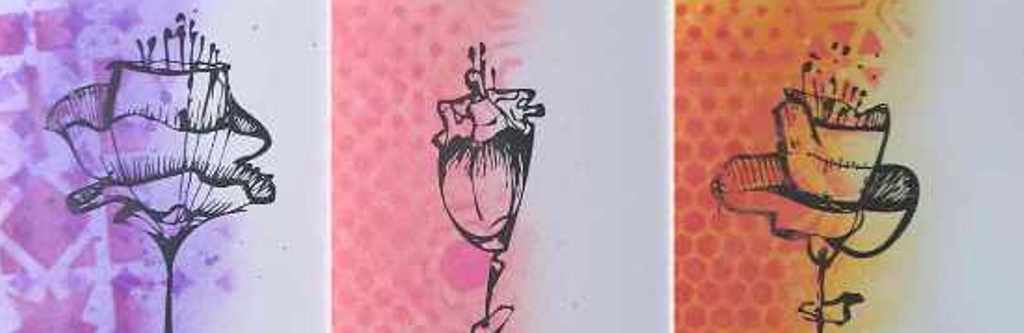
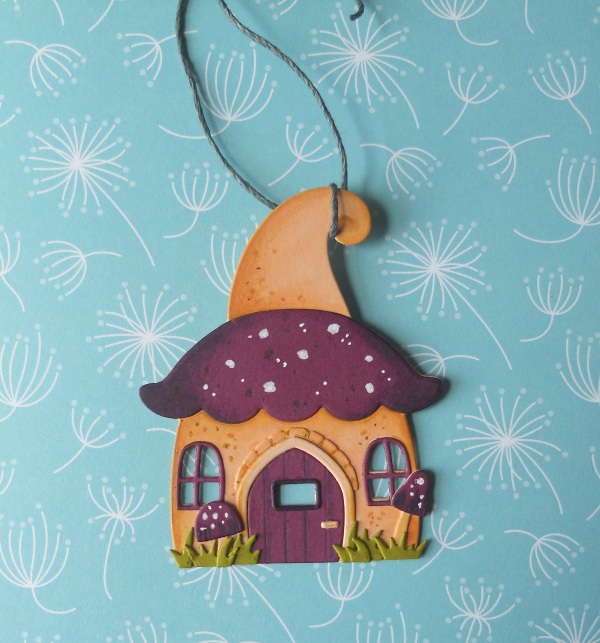
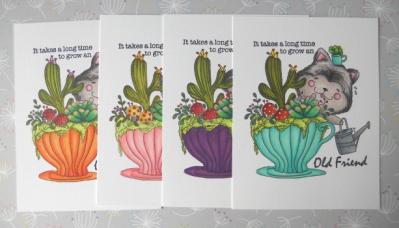
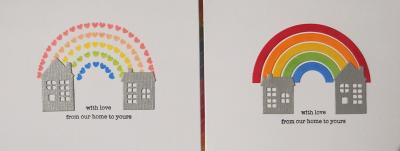
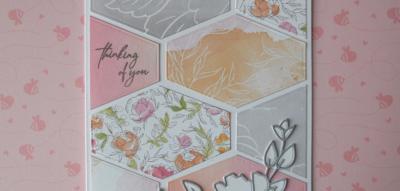
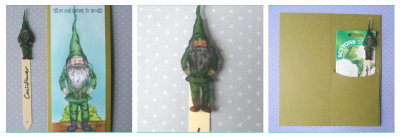
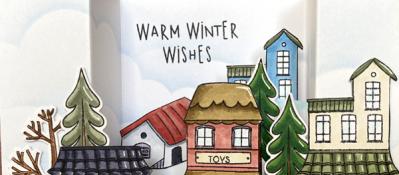
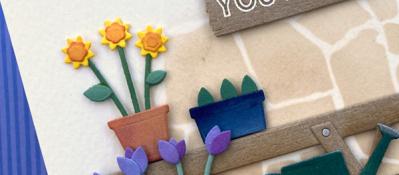
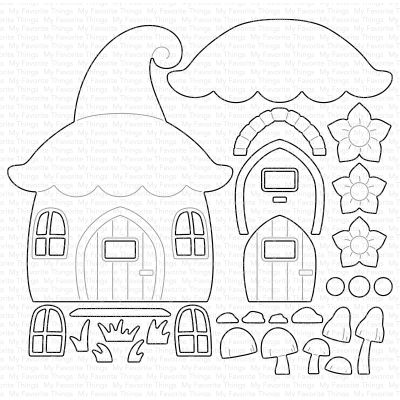
Now I wanted to play with the houses! I die cut all the pieces from coloured card in a couple of colour schemes (cream and red; peach and purple) and then spent a fun hour pieceing them together and adding some shading. I do think we forget about colouring die cuts - just think of them as 3d stamps and shade as you would if they were stamped images. These are such a cute size when put together - I made one into a gift tag.
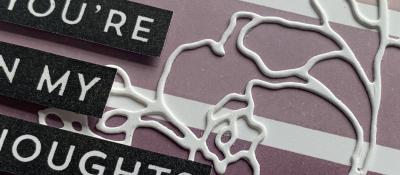
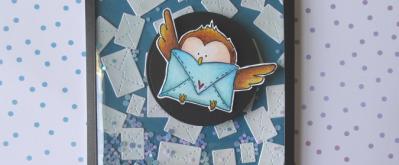
For my final die cut I made a card, pairing it with a gnome and a tiny fairy, using the MFT frames again but this time just to draw a frame line.
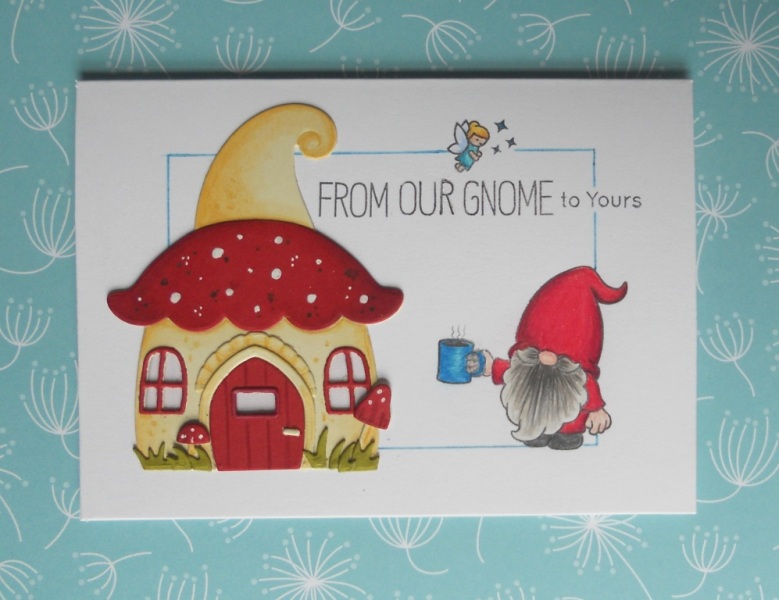
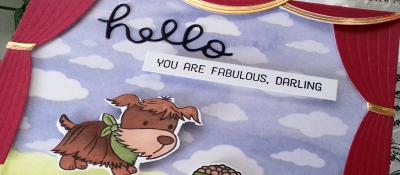
The gnome this time comes from a Sugar Pea Christmas Set - Gnome for Christmas as I wanted my gnome to be sharing a coffee - we're doing a lot of vritual coffee meetings right now!
I lightly drew around the stencil edge to work out my placements, stamped my gnome, sentiment and fairy so they would deliberately break the border and then coloured them with pencils. Once done I rubbed out the pencil frame and drew around the stencil again with a gel pen. Adding my house to finish the scene. I also changed the sentiment - I wanted it from "our" house not "my" house - so I just selectively stamped the bits I wanted making "our" from the "ou" in "to gnome yOU" and the "r" from the then of "my world is betteR" That might be too much faff for you - but I often mess around to twist sentiments to my will!
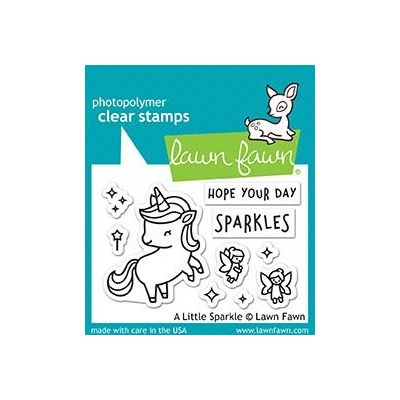
The little fairy come from Lawn Fawn's A Little Sparkle and is another one of those tiny but every so useful little stamps!
NEWS FROM THE STORE
I got some Waffle Flower products on Friday and have sorted them out this weekend. I will get them in store as soon as I can around packing orders and all the other essential admin this week. I have the paper pads and the lastest stamps and die as well as mini media mat restocks.
At this stage I am not expecting anything else to ship this week but that may change.
Thanks
Tara x
17/05/2020
|
View: 563
|
Categories: Colouring Stamped Images, Pencil Colouring, Die Cutting, Ink Blending, Card Making
|
Tags: Lawn Fawn, My Favorite Things, Sguar Pea Designs
Related Posts
Flower Truck
09/03/2020| Posted in Pencil Colouring, Stamped Background| 356
Plant Kindness
22/03/2020| Posted in Copic Colouring| 332
Mistletoe.. but not as you know it!
13/04/2020| Posted in Die Cutting, Card Making| 1| 504
Hugs All Over
12/04/2020| Posted in Die Cutting| 416
You Are Beautiful
16/04/2020| Posted in Ink Blending, Fussy Cutting| 450
love from our home to yours
26/04/2020| Posted in Die Cutting, Stamping Techniques| 3| 582
A note of blossoms....
08/05/2020| Posted in Pencil Colouring, Stamping Techniques| 1| 523

Quick and Easy Male Gift card
12/05/2020| Posted in Ink Blending, Card Making| 1| 258
Rainbows on Cloudy Days
24/05/2020| Posted in Die Cutting, Stamping Techniques, Partial Die Cutting, turnabouts, Fancy Folds| 1| 490

For the love of pretty papers....
16/08/2020| Posted in Patterned Papers| 3| 499
Sometimes keeping it simple is best
01/09/2020| Posted in Copic Colouring, Card Making| 290
Autumn Acorns
28/09/2020| Posted in Water Colouring, Card Making| 302
Cozy Friends
19/10/2020| Posted in Die Cutting, Card Making| 479
Aloha, 3 ways to colour your stamps.
27/10/2020| Posted in Colouring Stamped Images, Copic Colouring, Pencil Colouring, Water Colouring, Card Making| 3| 396
Big and Bold Peacocks
30/10/2020| Posted in Copic Colouring, Card Making| 2| 414
Gifts from our Gnome
20/11/2020| Posted in Copic Colouring, Die Cutting, Ink Blending, Fussy Cutting, shrink plastic| 3| 459
A Winter Scene
23/11/2020| Posted in Colouring Stamped Images, Copic Colouring, Card Making, Interactive Cards, Shaped Cards| 2| 383
Hello on this Rainy day
24/11/2020| Posted in Copic Colouring, Die Cutting| 2| 293
Feeling Blue
29/11/2020| Posted in Die Cutting| 2| 381

Elephantastic
25/03/2021| Posted in Colouring Stamped Images, Pencil Colouring, Card Making, Stamped Background, Masking| 2| 345
Thinking of You
23/04/2021| Posted in Pencil Colouring, Die Cutting| 1| 226
Eclectic Florals
29/04/2021| Posted in Colouring Stamped Images, Pencil Colouring, Die Cutting, Card Making, No Line Colouring, Fussy Cutting| 1| 366
More Brilliant Butterflies
12/05/2021| Posted in Die Cutting, Stamping Techniques, Card Making, Stamp Layering, Heat Embossing, Stamping| 1| 298
Amazing Butterflies
17/06/2021| Posted in Colouring Stamped Images, Copic Colouring, Die Cutting, Stamping Techniques, Card Making, Stencilling, Heat Embossing, Stamping| 307
Don't be afraid of colour!
29/06/2021| Posted in Die Cutting, Card Making| 226
Recharge with Watercolour
03/07/2021| Posted in Water Colouring, Card Making| 350
Shaking Up The World
10/07/2021| Posted in Shaker Cards| 268
Literally The Best
13/08/2021| Posted in Pencil Colouring, Die Cutting| 336
Sweater Weather!!
25/08/2021| Posted in Copic Colouring, Die Cutting, Stamping Techniques, Card Making, Stamped Background, Stamping, Embossing Folders| 412
Snow Buddies
13/09/2021| Posted in Colouring Stamped Images, Stencilling| 245
Mica Magic
12/10/2021| Posted in Stencilling| 438
Butterfly Dies
14/10/2021| Posted in Die Cutting, Card Making, Special Effects, Fancy Folds, Stamping, Clean & Simple| 1| 240
Alcohol Markers on Embossed metal
26/10/2021| Posted in Card Making, Embossing Folders| 305
Mini Superhero
04/12/2021| Posted in Copic Colouring, Fussy Cutting| 362

Time to Grow
23/01/2022| Posted in Die Cutting, Stamping Techniques| 329

One Layer Wonders!
17/02/2022| Posted in Ink Blending, Card Making, Stencilling, Stamping, Clean & Simple, Stencilled backgrounds| 321
Hang in There
23/02/2022| Posted in Copic Colouring, Ink Blending, Card Making, Fussy Cutting, Clean & Simple| 429

3 ways with CCC Teacups and Mice
01/03/2022| Posted in Colouring Stamped Images| 475

Hello Dear Friend
10/03/2022| Posted in Stamping Techniques, Card Making, Stamped Background, Fussy Cutting, Stamping, Clean & Simple| 232

Dali
03/04/2022| Posted in Pencil Colouring, Gift Making| 373
Friendship & Smiles
07/04/2022| Posted in Card Making, Stamped Background, Stamping, sentiment Focal Points, Clean & Simple| 297
Chevron Pattern Play
23/04/2022| Posted in Paper Piecing, Card Making, Patterned Papers, Stitching/Embroidery, Clean & Simple| 380
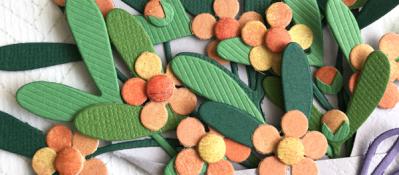
Pussy Willow
29/04/2022| Posted in Die Cutting, Die Cut Felt and Fabric| 398
Special Spot
06/05/2022| Posted in Copic Colouring, Clean & Simple| 252
More Sunshine, Less Umbrella's - Please!
12/05/2022| Posted in Colouring Stamped Images, Copic Colouring, Stamping Techniques, Card Making, Stamped Background, Clean & Simple| 246
Magnolia Smiles
07/06/2022| Posted in Water Colouring, Stamping Techniques, Card Making, Fussy Cutting, Heat Embossing| 324
Stitched Florals
23/07/2022| Posted in Die Cutting, Card Making, Off The Page Projects, Stitching/Embroidery, Stamping, sentiment Focal Points, Clean & Simple| 448
One for the Guys & One for the Girls.
28/07/2022| Posted in Die Cutting, Card Making, Stamped Background, Stamping, Inlaid Die Cutting| 451
Pick A Pattern
25/08/2022| Posted in Stamping Techniques, Card Making, Stamping, Clean & Simple, Clean and Simple (CAS)| 299
I'll Be There
29/08/2022| Posted in Die Cutting| 261
Reflective Florals
19/09/2022| Posted in Die Cutting, Stamping Techniques| 211
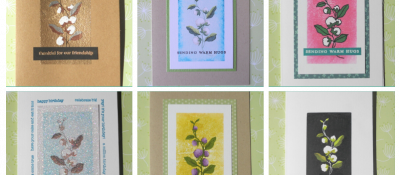
Autumnal Warm Wishes
10/11/2022| Posted in Stamping Techniques, Card Making, turnabouts, Clean & Simple, Clean and Simple (CAS)| 333
Rainbow Cheer
17/11/2022| Posted in Die Cutting, Stamping Techniques, Card Making, Stamped Background, Clean & Simple| 221
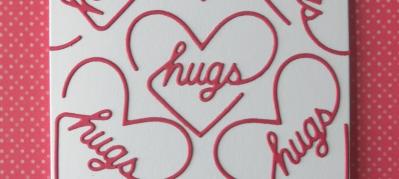
Plant A Succulent - Hugs Card
29/11/2022| Posted in Die Cutting, Card Making| 185
Fantasy Jungle
13/12/2022| Posted in Ink Blending, Card Making, Stencilling, Embossing Folders, Layering Stencils| 199

Encouraging Notecards
06/02/2023| Posted in Die Cutting, Card Making| 1| 223

Sunshine and Hugs
07/03/2023| Posted in Die Cutting, Card Making| 287

All The Thanks
23/03/2023| Posted in Stamping Techniques, Card Making| 247
Llamas do Yoga
13/05/2023| Posted in Copic Colouring| 198
Hold on Tight
27/05/2023| Posted in Copic Colouring, Die Cutting| 219


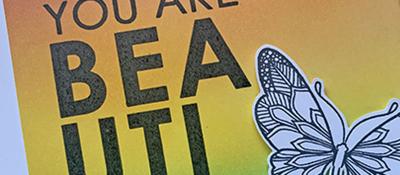
Hey Beautiful
29/06/2023| Posted in Colouring Stamped Images, Copic Colouring, Stamping Techniques, Card Making, Heat Embossing, Clean & Simple| 173
Adventure Awaits
04/07/2023| Posted in Colouring Stamped Images, Copic Colouring, Die Cutting, Ink Blending, Card Making, Stencilling, Stamping, Stencilled backgrounds| 147

Garden Goodness Birthday Wishes
19/07/2023| Posted in Die Cutting, Card Making, Stamping, sentiment Focal Points, Layering Stencils, Stencilled backgrounds| 240

Bon Voyage
25/07/2023| Posted in Die Cutting, Ink Blending, Card Making, Stencilling, Stencilled backgrounds| 416
Cross the Ocean
29/07/2023| Posted in Copic Colouring| 144
Bloomin' Wonderful!
03/08/2023| Posted in Die Cutting, Stamping Techniques, Card Making, Stamped Background, Clean & Simple| 183
Embossing Magic... 2 ways!
22/08/2023| Posted in Die Cutting, Ink Blending, Card Making, Heat Embossing, Embossing Folders| 191
Friday Feel Good Floral
25/08/2023| Posted in Ink Blending, Stencilling, Clean & Simple, Stencilled backgrounds, Stamp Wheel| 220

Autumn Vibes
25/09/2023| Posted in Die Cutting, Card Making| 261
Gnomes in the sunflower patch
29/09/2023| Posted in Pencil Colouring| 198

1 Stamp Set, 3 Looks.
19/12/2023| Posted in Card Making| 349


It's a Tweet Life
20/01/2024| Posted in Stencilling| 215

Pop Heart Hugs
08/02/2024| Posted in Die Cutting, Stamping Techniques, Card Making, Stamped Background, turnabouts, Stamp Wheel| 153
un BEAR able
10/02/2024| Posted in Colouring Stamped Images, Copic Colouring, Die Cutting, Fussy Cutting, Patterned Papers, Stamping| 213
You're Going Places...
27/02/2024| Posted in Colouring Stamped Images, Copic Colouring, Die Cutting, Ink Blending, Card Making, Stencilling, 3D| 173
I Hope You Know...
07/03/2024| Posted in Stamping Techniques, Card Making| 562
A Sweet Duo
14/03/2024| Posted in Colouring Stamped Images, Die Cutting, Stamping Techniques, Card Making, Stencilling, colouring die cuts| 192
Sweet Hello
21/03/2024| Posted in Die Cutting, Card Making, Partial Die Cutting, Stencilling, Stencilled backgrounds| 137
Sending Hugs & Snuggles
09/04/2024| Posted in Die Cutting, Ink Blending, Card Making, Stencilling, Stamping, Embossing Folders| 141
How to add dimension to your projects!
23/04/2024| Posted in Die Cutting, Ink Blending, Card Making, Stencilling, Stamping, Layering Stencils| 63
Related Products

Controversial Santas
28/08/2022

Birthday Forecast
14/02/2022

Encouraging Leaves
15/03/2021

Framed Snowdrops
22/02/2021

Birthday Blossoms
25/04/2024
Paper Bouquet Take 2
24/04/2024
How to add dimension to your projects!
23/04/2024
Cute Milkshake Card
22/04/2024