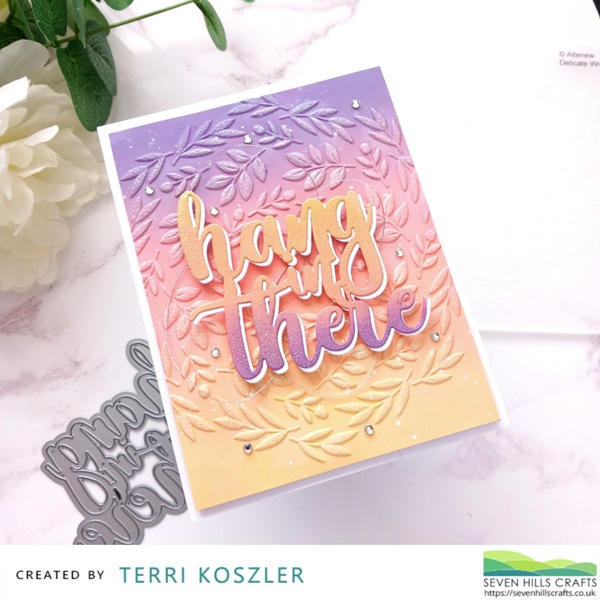
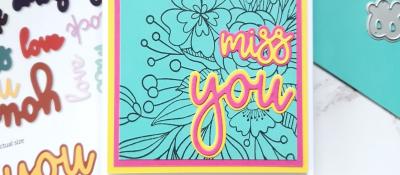
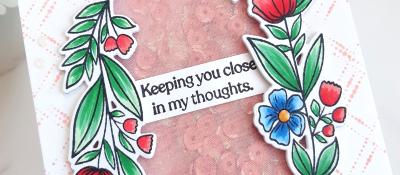
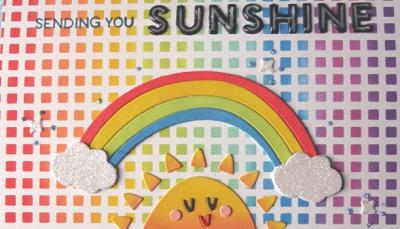
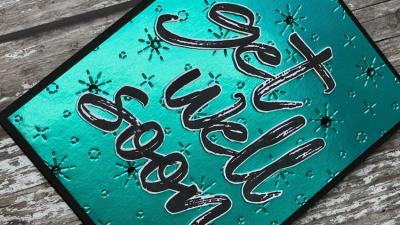
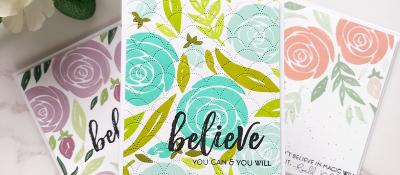
Embossing Magic... 2 ways!

Hey Terri here, today I am sharing a card that uses two types of embossing to create a stunning effect. Let's take a closer look and see how I achieved it.
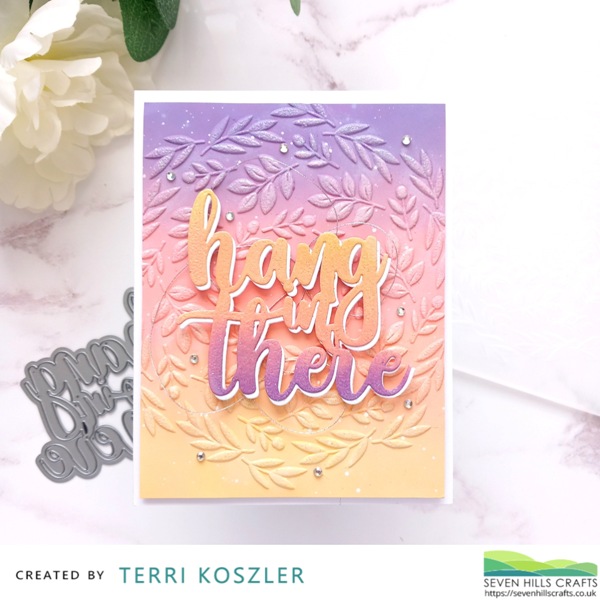
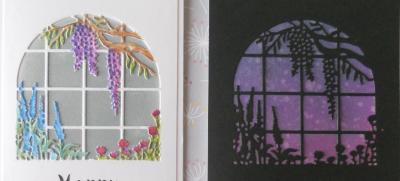
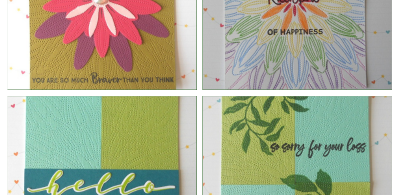
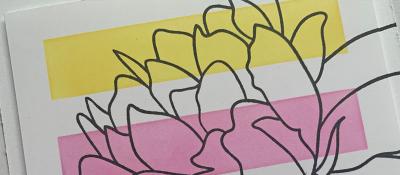
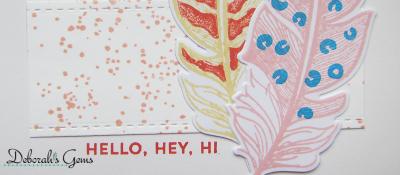
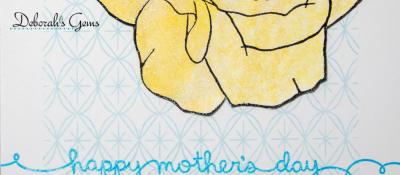
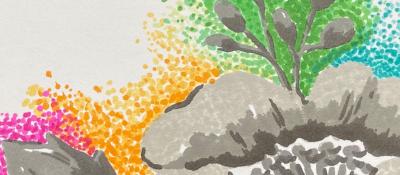
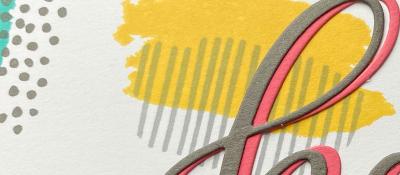
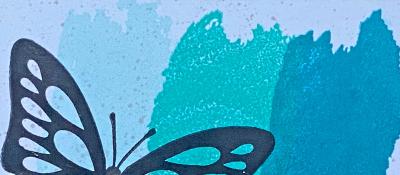
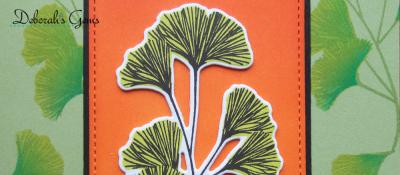
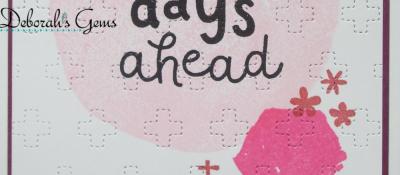
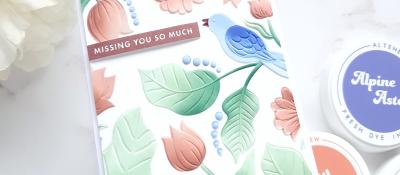
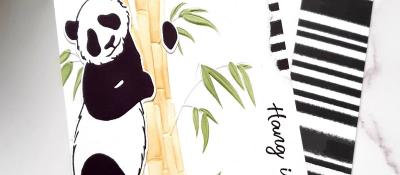
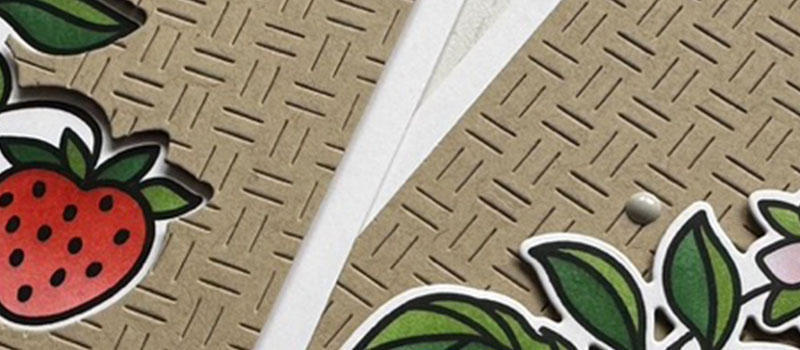
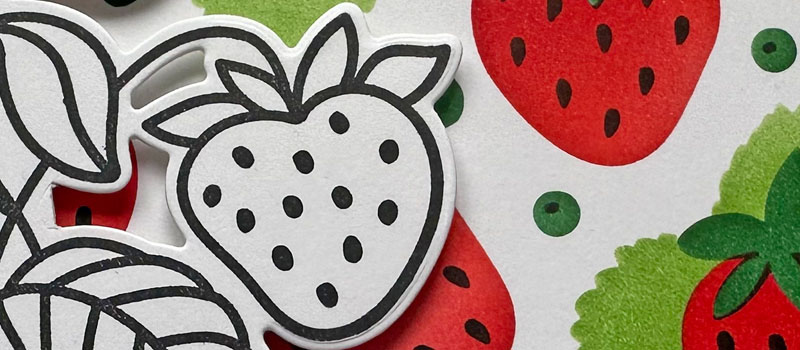
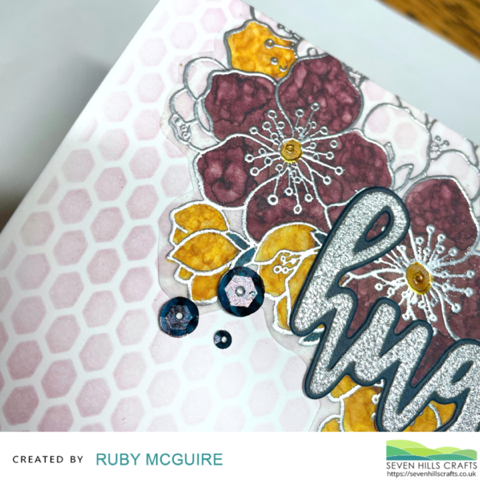
I started out by ink blending a background using Distress Oxide Inks, I used Scattered Straw, Saltwater Taffy and Dusy Concorde. I blended onto 80lb super smooth cardstock making sure to go back and forth between the colours an few times for a smooth transition. I then added water splatters along with some white ink splatter for added detail.
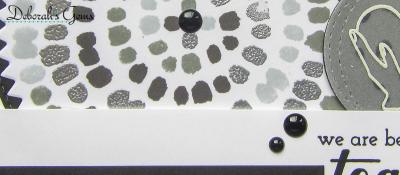
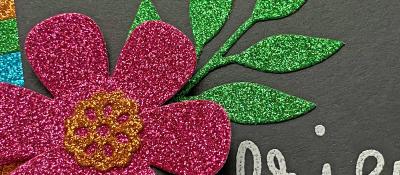
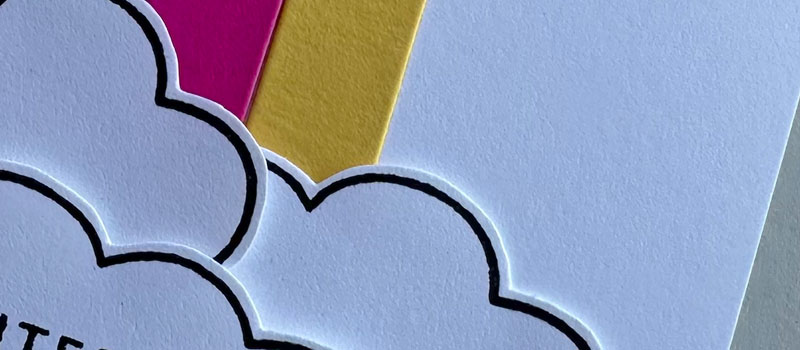
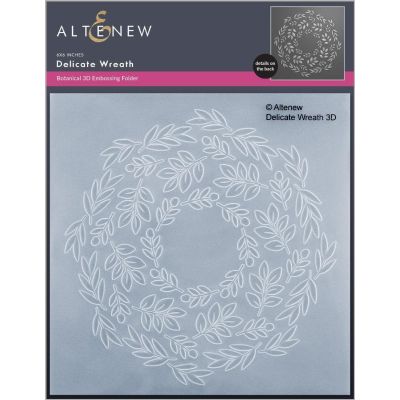
Once dry I generously coated the panel with antistatic powder before running it through my die cutting machine with the Delicate Wreath 3D Embossing Folder. I then used a mini 1" cube Versafine Watermark Ink Pad to add embossing ink over the embossed area, I like the 1" cube as it gives me more control for this technique.
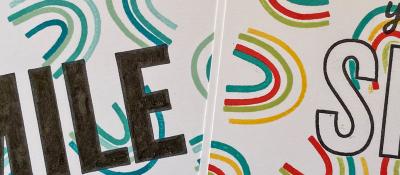
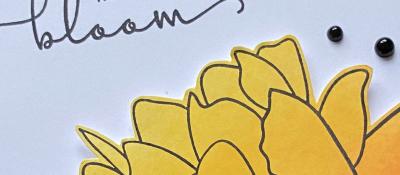
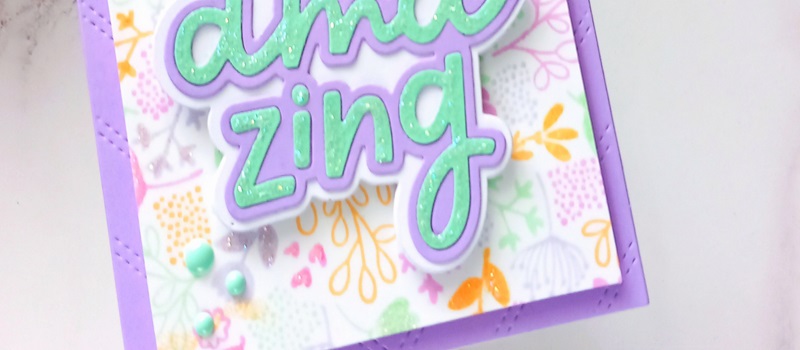
I then mixed a little Prisma Glitter with some Clear Embossing Powder and sprinkled it over the embossing ink, I then melted it with my heat tool. This gives the most magical look. I trimmed the background to measure 4" by 5.25" and mounted it to a white A2 card blank using foam tape.
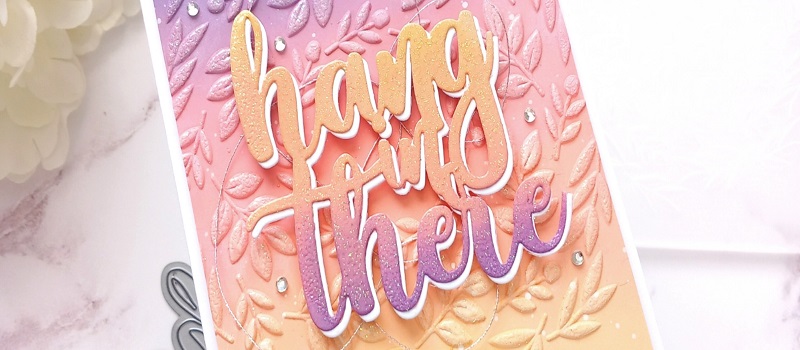
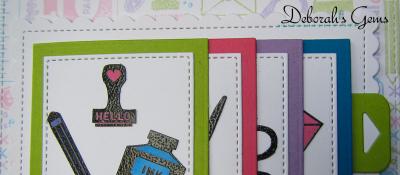
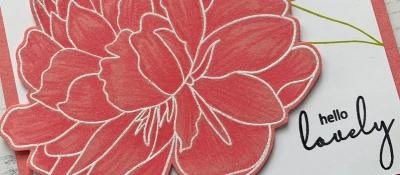
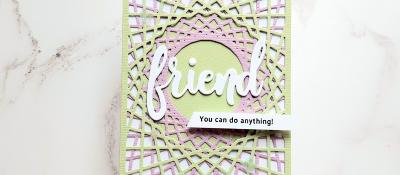
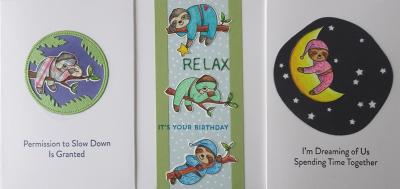
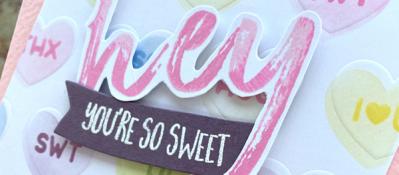
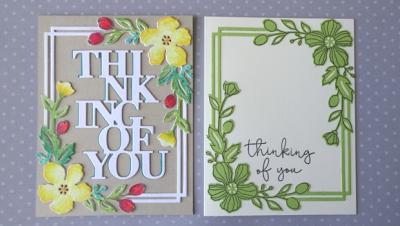
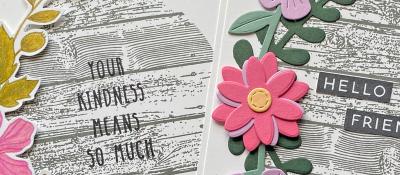
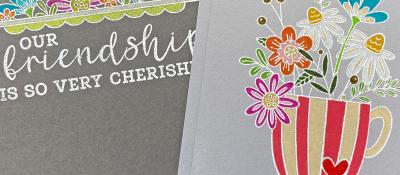
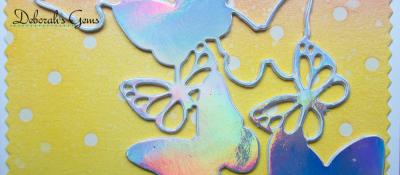
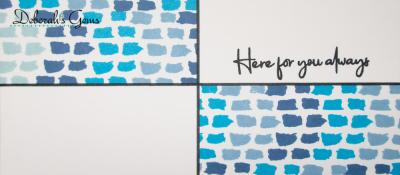
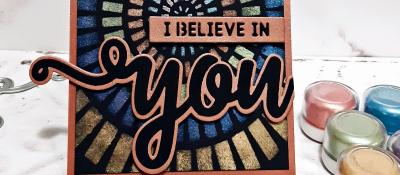
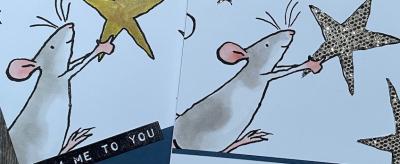
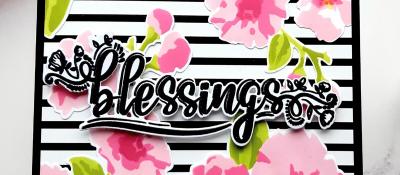
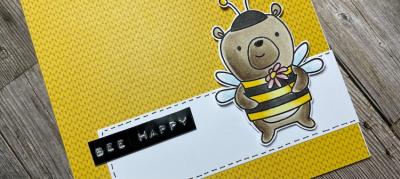
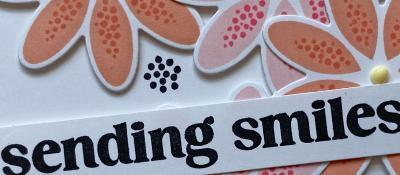
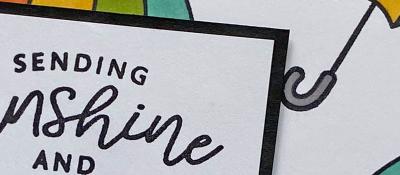
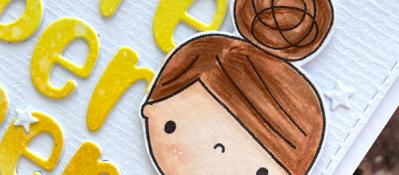
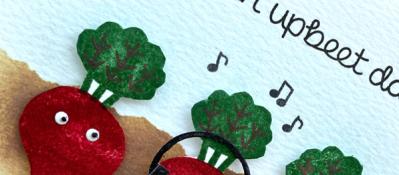
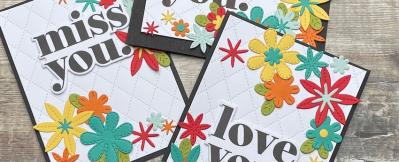
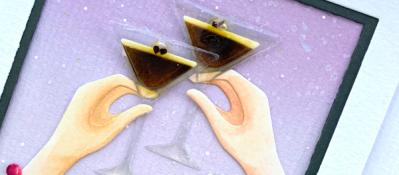
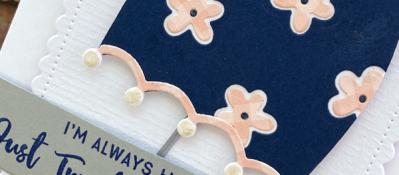
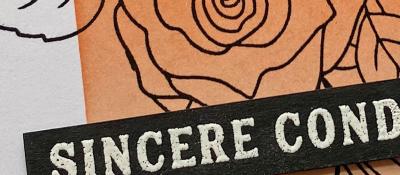
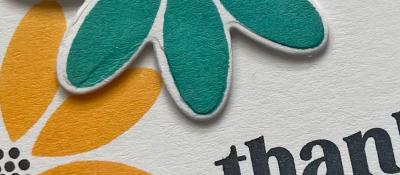
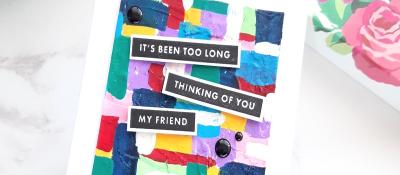
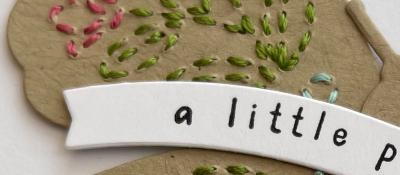
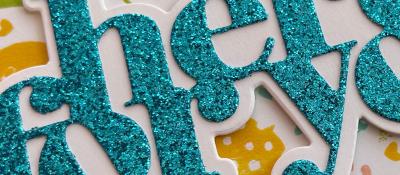
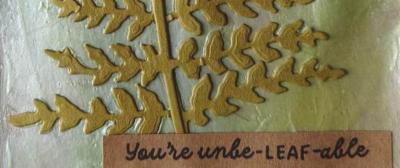
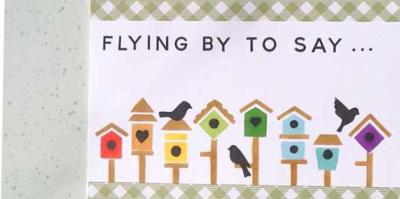
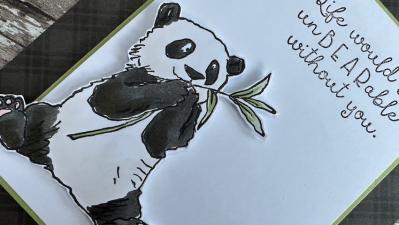
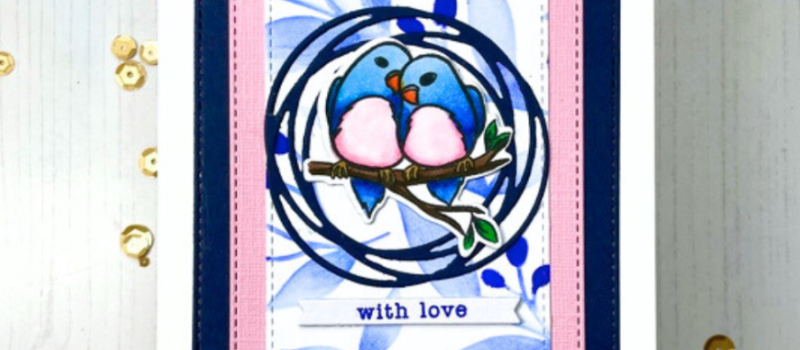
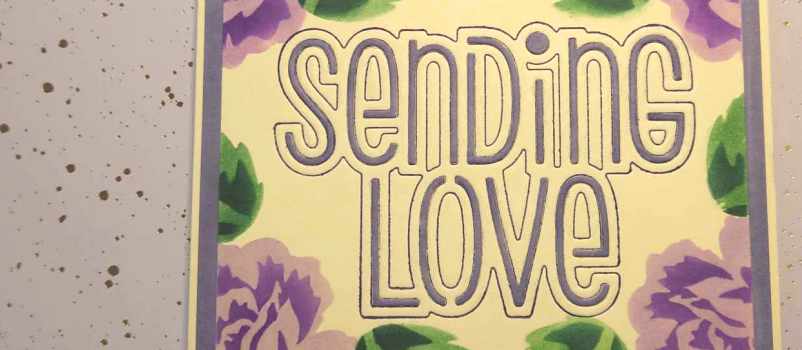
My sentiment was die cut using the Hang In There Die, I cut it once from 110lb super smooth card and once from 280gsm white card. I ink blended the super smooth die cut using the same ink colours as used for the background, only this time I used them in the reverse order. I then used the mini embossing pad to add sticky ink all over and sprinkled with a mix of glitter and clear embossing powder before melting.
I adhered the ink blended sentiment to the white sentiment with a slight drop shadow and then added it to the card using foam tape, over the top of some thread. Lastly I added a few AB mini gems to add even more sparkle.
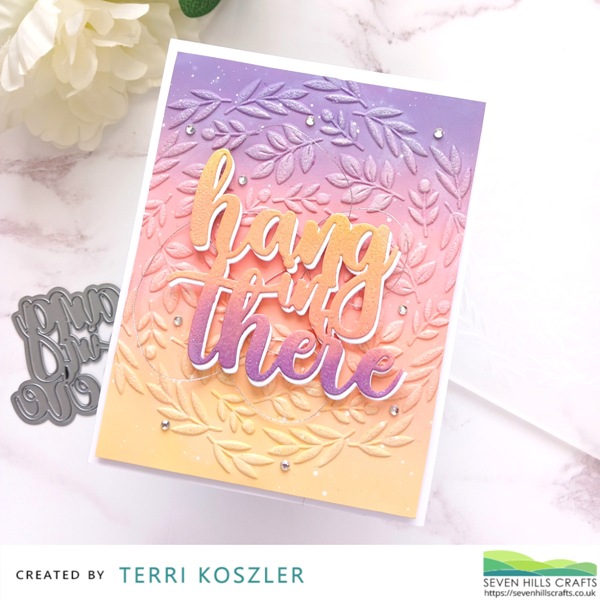
Adding the sentiment with the reverse ink blend allows the sentiment to stand out whilst still coordinating with the theme, I love this effect, I hope you do too.
22/08/2023
|
View: 192
|
Categories: Die Cutting, Ink Blending, Card Making, Heat Embossing, Embossing Folders
|
Tags: Altenew, Lawn Fawn
Related Posts

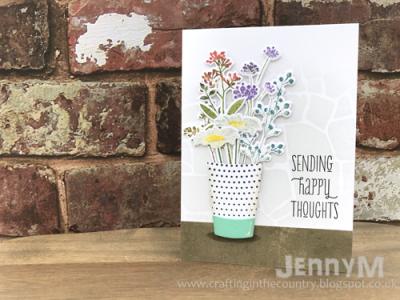
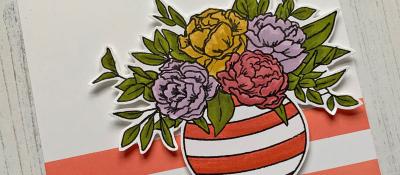
Jug of Flowers
01/03/2020| Posted in Water Colouring, Die Cutting| 1| 391
Handcrafted Happiness
10/03/2020| Posted in Card Making| 2| 303
Flower Truck
09/03/2020| Posted in Pencil Colouring, Stamped Background| 356
Crafty Friends
18/03/2020| Posted in Copic Colouring, Die Cutting, Special Effects, Stamped Background, Interactive Cards| 331


Plant Kindness
22/03/2020| Posted in Copic Colouring| 334
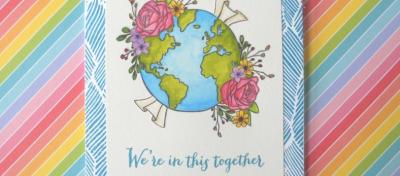
We're in This Together
29/03/2020| Posted in Water Colouring, Stamped Background| 408
Mistletoe.. but not as you know it!
13/04/2020| Posted in Die Cutting, Card Making| 1| 508

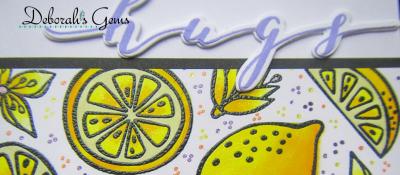
Hugs All Over
12/04/2020| Posted in Die Cutting| 418
You Are Beautiful
16/04/2020| Posted in Ink Blending, Fussy Cutting| 450
love from our home to yours
26/04/2020| Posted in Die Cutting, Stamping Techniques| 3| 583
Hello Lovely
30/04/2020| Posted in Pencil Colouring, Card Making| 1| 356

Every Hour is Happy Hour in Lockdown!
03/05/2020| Posted in Die Cutting, Stamping Techniques| 1| 671
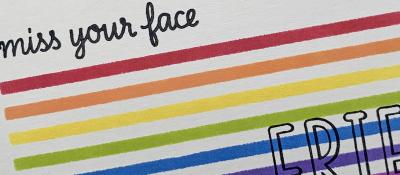
Hello Friend
07/05/2020| Posted in Card Making, Fussy Cutting| 249
A note of blossoms....
08/05/2020| Posted in Pencil Colouring, Stamping Techniques| 1| 524

Quick and Easy Male Gift card
12/05/2020| Posted in Ink Blending, Card Making| 1| 258
Hanging with my Gnomies
17/05/2020| Posted in Colouring Stamped Images, Pencil Colouring, Die Cutting, Ink Blending, Card Making| 565
2020 Spring/Summer Coffee Lovers Blog Hop
22/05/2020| Posted in Paper Piecing, Card Making| 40| 856
Rainbows on Cloudy Days
24/05/2020| Posted in Die Cutting, Stamping Techniques, Partial Die Cutting, turnabouts, Fancy Folds| 1| 491
Sending Warm Hugs
30/05/2020| Posted in Colouring Stamped Images, Pencil Colouring, Water Colouring, Ink Blending| 538
Hello Friend
06/06/2020| Posted in Colouring Stamped Images, Die Cutting| 1| 384
Fluttering By
11/06/2020| Posted in Card Making, Stencilling| 266
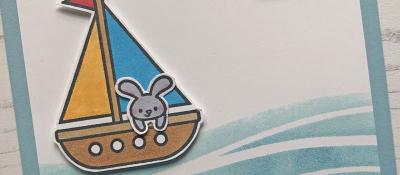
Shark Tank
12/06/2020| Posted in Die Cutting| 313

Shine Like a Diamond
17/06/2020| Posted in Copic Colouring, Die Cutting, Card Making, Stamp Layering, Stamped Background, Heat Embossing| 338
Bowl of Blooms
18/06/2020| Posted in Colouring Stamped Images, Card Making| 345
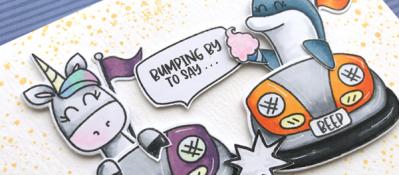
Bumping by to say..
22/06/2020| Posted in Colouring Stamped Images, Card Making| 680
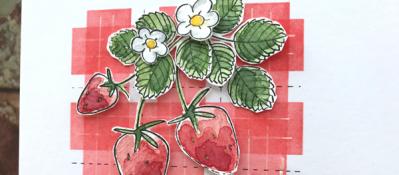
Berry Sweet
29/06/2020| Posted in Water Colouring, Stencilling| 405
Floral Silhouette Trio
21/07/2020| Posted in Ink Blending| 267
Paper Hugs
05/08/2020| Posted in Copic Colouring, Die Cutting, Ink Blending, Card Making, Stamped Background, Interactive Cards, Heat Embossing| 421
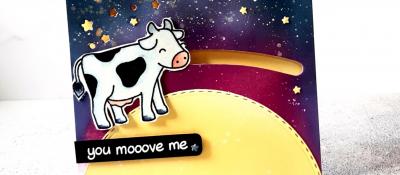
The Cow Jumps over the moon
04/08/2020| Posted in Colouring Stamped Images, Die Cutting, Ink Blending, Card Making, Interactive Cards, Heat Embossing| 383


For the love of pretty papers....
16/08/2020| Posted in Patterned Papers| 3| 500
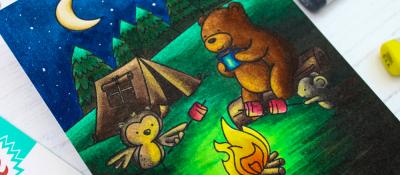
Camping Critters
21/08/2020| Posted in Copic Colouring| 359
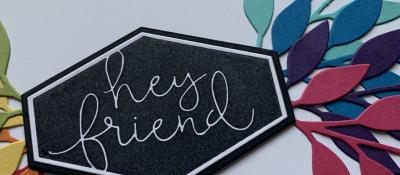
Hey Friend!
27/08/2020| Posted in Die Cutting, Card Making| 310
Sometimes keeping it simple is best
01/09/2020| Posted in Copic Colouring, Card Making| 291
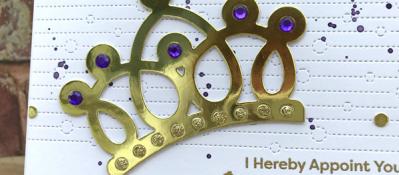
Geometric Encouragement
15/09/2020| Posted in Die Cutting, Card Making| 212
Autumn Acorns
28/09/2020| Posted in Water Colouring, Card Making| 302
Autumn Nuts
18/10/2020| Posted in Ink Blending, Inktense Pencils| 444
Cozy Friends
19/10/2020| Posted in Die Cutting, Card Making| 479
Aloha, 3 ways to colour your stamps.
27/10/2020| Posted in Colouring Stamped Images, Copic Colouring, Pencil Colouring, Water Colouring, Card Making| 3| 396
Delight in the Little Things
29/10/2020| Posted in Ink Blending, Card Making| 2| 255
Big and Bold Peacocks
30/10/2020| Posted in Copic Colouring, Card Making| 2| 415
Blossoms and Berries
02/11/2020| Posted in Stamping Techniques, Card Making| 2| 546
Quick One-Layer Cards
04/11/2020| Posted in Stamping Techniques, Card Making| 1| 333

Friends and Christmas
18/11/2020| Posted in Stamping Techniques, Card Making, Stamp Layering, Stamped Background, Masking| 1| 380
A Winter Scene
23/11/2020| Posted in Colouring Stamped Images, Copic Colouring, Card Making, Interactive Cards, Shaped Cards| 2| 383
Hello on this Rainy day
24/11/2020| Posted in Copic Colouring, Die Cutting| 2| 294
Feeling Blue
29/11/2020| Posted in Die Cutting| 2| 381
Snowball Fun
30/11/2020| Posted in Colouring Stamped Images, Card Making| 2| 337

All the THANKS
10/12/2020| Posted in Die Cutting, Card Making| 2| 427
Going Dotty!
20/01/2021| Posted in Copic Colouring, Die Cutting, Stamping Techniques, Card Making, Stamped Background| 1| 232
More Hearts!
10/02/2021| Posted in Die Cutting, Stamping Techniques, Card Making, Stamped Background, Heat Embossing, turnabouts| 1| 217
A Little Something...
18/02/2021| Posted in Colouring Stamped Images, Copic Colouring, Stamping Techniques, Card Making, Stencilling, Masking| 1| 265
Trig 102
24/02/2021| Posted in Copic Colouring, Die Cutting, Card Making, Fussy Cutting, Heat Embossing, Repeat Pattern Building| 1| 552

Painted Rose
10/03/2021| Posted in Ink Blending, Stamping Techniques, Card Making, Stamped Background, Fussy Cutting, Masking, Gel Press| 1| 280

Elephantastic
25/03/2021| Posted in Colouring Stamped Images, Pencil Colouring, Card Making, Stamped Background, Masking| 2| 345
Just Keep Swimming
30/03/2021| Posted in Card Making, Heat Embossing| 1| 587
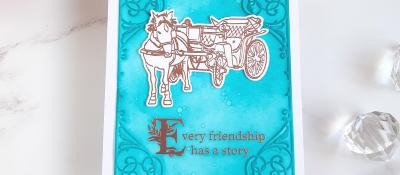
Every Friendship has a story
06/04/2021| Posted in Die Cutting, Ink Blending, Stamping Techniques, Card Making, Heat Embossing| 1| 267
Hello Sunflowers
08/04/2021| Posted in Colouring Stamped Images, Pencil Colouring, Card Making, Fussy Cutting| 1| 327
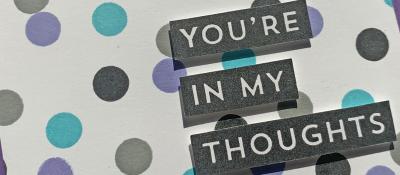
Thinking of You
23/04/2021| Posted in Pencil Colouring, Die Cutting| 1| 227
Floral Fancies
25/04/2021| Posted in Off The Page Projects, Stamp Layering, Partial Die Cutting, Gift Making, Stamping on non paper surfaces| 2| 406
Hi-Ya!!
26/04/2021| Posted in Colouring Stamped Images, Die Cutting, Ink Blending, sentiment Focal Points| 4| 710
Eclectic Florals
29/04/2021| Posted in Colouring Stamped Images, Pencil Colouring, Die Cutting, Card Making, No Line Colouring, Fussy Cutting| 1| 366

Aloha
06/05/2021| Posted in Colouring Stamped Images, Copic Colouring, Card Making, Fussy Cutting, Stamping| 1| 280
More Brilliant Butterflies
12/05/2021| Posted in Die Cutting, Stamping Techniques, Card Making, Stamp Layering, Heat Embossing, Stamping| 1| 298
Super Chicks
15/05/2021| Posted in Stamping Techniques, Stamping| 1| 296
Going Dotty!
20/05/2021| Posted in Colouring Stamped Images, Copic Colouring, Stamping Techniques, Card Making, Stamp Layering, Stamping, sentiment Focal Points| 2| 329
You Are Flamazing
05/06/2021| Posted in Copic Colouring, Fussy Cutting| 315
Cup of Friendship
10/06/2021| Posted in Colouring Stamped Images, Pencil Colouring, Stamping Techniques, Card Making, Heat Embossing, Stamping| 305
Amazing Butterflies
17/06/2021| Posted in Colouring Stamped Images, Copic Colouring, Die Cutting, Stamping Techniques, Card Making, Stencilling, Heat Embossing, Stamping| 307
Wild Paradise
25/06/2021| Posted in Ink Blending, Stamping Techniques, Card Making, Stencilling, Stamped Background, Fussy Cutting, Heat Embossing, Masking| 272
Feeling Blue
26/06/2021| Posted in Copic Colouring, Card Making| 371
Don't be afraid of colour!
29/06/2021| Posted in Die Cutting, Card Making| 228
Hey Friend!
01/07/2021| Posted in Die Cutting, Stamping Techniques, Card Making, Stamped Background, turnabouts, Stamping| 263
Recharge with Watercolour
03/07/2021| Posted in Water Colouring, Card Making| 350
Flock of Seagulls
05/07/2021| Posted in Colouring Stamped Images, Copic Colouring, Ink Blending, Card Making, Stamped Background| 377
Shaking Up The World
10/07/2021| Posted in Shaker Cards| 268

All dies, No Stamps
20/07/2021| Posted in Die Cutting| 421
Floating On By
26/07/2021| Posted in Copic Colouring, Die Cutting, Ink Blending, Stencilling, sentiment Focal Points| 251
So Very Proud of You
07/08/2021| Posted in Copic Colouring, Stamping Techniques| 822

Playful Patterns
10/08/2021| Posted in Die Cutting, Ink Blending| 236
Friend Like You
12/08/2021| Posted in Stamping Techniques, Card Making, Stamped Background, turnabouts, Stamping| 197

Literally The Best
13/08/2021| Posted in Pencil Colouring, Die Cutting| 337
S'more fun with you
17/08/2021| Posted in Copic Colouring, Die Cutting| 192


Perfectly Ink Blended Background
24/08/2021| Posted in Ink Blending, Card Making| 1| 205
Sweater Weather!!
25/08/2021| Posted in Copic Colouring, Die Cutting, Stamping Techniques, Card Making, Stamped Background, Stamping, Embossing Folders| 414
The Season In-Between!
02/09/2021| Posted in Ink Blending, Card Making| 249

The Little Things
03/09/2021| Posted in Pencil Colouring, No Line Colouring| 1| 243
Creating with restrictions
07/09/2021| Posted in Die Cutting, Card Making| 241
Snow Buddies
13/09/2021| Posted in Colouring Stamped Images, Stencilling| 247
Autumn Leaves
21/09/2021| Posted in Die Cutting, Card Making| 1| 326
Sweet Gingko
05/10/2021| Posted in Die Cutting, Ink Blending, Card Making, Stamp Layering, Stamped Background, Stamping, Layering Stencils| 407
Mica Magic
12/10/2021| Posted in Stencilling| 439
Butterfly Dies
14/10/2021| Posted in Die Cutting, Card Making, Special Effects, Fancy Folds, Stamping, Clean & Simple| 1| 240
Alcohol Markers on Embossed metal
26/10/2021| Posted in Card Making, Embossing Folders| 306

Caffeine Inspiration
17/11/2021| Posted in Copic Colouring, Die Cutting, Stamped Background, turnabouts, Stamping, Mini Slimline Card, Clean & Simple| 340
All Stacked Up
27/11/2021| Posted in Copic Colouring, Card Making, Interactive Cards, Fussy Cutting, Patterned Papers, Stamping, Clean & Simple| 338
Mini Superhero
04/12/2021| Posted in Copic Colouring, Fussy Cutting| 363
Twinkle Twinkle
18/12/2021| Posted in Copic Colouring, Off The Page Projects| 1| 936


Life
12/02/2022| Posted in Copic Colouring, Sketches| 300
One Layer Wonders!
17/02/2022| Posted in Ink Blending, Card Making, Stencilling, Stamping, Clean & Simple, Stencilled backgrounds| 322
Hang in There
23/02/2022| Posted in Copic Colouring, Ink Blending, Card Making, Fussy Cutting, Clean & Simple| 429

Friends Fur-ever
25/02/2022| Posted in Copic Colouring, Card Making, Partial Die Cutting, Fussy Cutting, Stamping, Clean & Simple| 1| 302
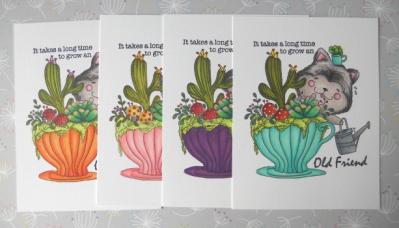
3 ways with CCC Teacups and Mice
01/03/2022| Posted in Colouring Stamped Images| 475

Hello Dear Friend
10/03/2022| Posted in Stamping Techniques, Card Making, Stamped Background, Fussy Cutting, Stamping, Clean & Simple| 233
You Raise Me Up
19/03/2022| Posted in Water Colouring| 253

Dali
03/04/2022| Posted in Pencil Colouring, Gift Making| 374
Friendship & Smiles
07/04/2022| Posted in Card Making, Stamped Background, Stamping, sentiment Focal Points, Clean & Simple| 298
3 ways to Purrfection
09/04/2022| Posted in Stamped Background, Sketches| 275

Wanna Hang Out
16/04/2022| Posted in Copic Colouring, Clean & Simple| 296
Down On The Farm
19/04/2022| Posted in Copic Colouring, Die Cutting, Ink Blending, Card Making, Stencilling, Interactive Cards| 145
One Layer Cards
20/04/2022| Posted in Card Making, Stamped Background| 324
Hey There Beautiful Friend
21/04/2022| Posted in Ink Blending, Card Making, Stencilling, Layering Stencils, Stencilled backgrounds| 230
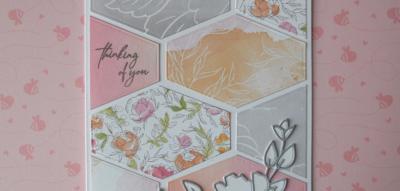
Chevron Pattern Play
23/04/2022| Posted in Paper Piecing, Card Making, Patterned Papers, Stitching/Embroidery, Clean & Simple| 381
Special Spot
06/05/2022| Posted in Copic Colouring, Clean & Simple| 252

More Sunshine, Less Umbrella's - Please!
12/05/2022| Posted in Colouring Stamped Images, Copic Colouring, Stamping Techniques, Card Making, Stamped Background, Clean & Simple| 246

Just Saying Hello
26/05/2022| Posted in Die Cutting, Ink Blending, Stencilling, Layering Stencils, Stencilled backgrounds| 231
Monochrome Moustache
28/05/2022| Posted in Patterned Papers| 222
Super Duper
30/05/2022| Posted in Colouring Stamped Images, Copic Colouring, Die Cutting, Card Making, sentiment Focal Points| 250

Three Little Pigs
04/06/2022| Posted in Copic Colouring, Card Making, Stamping, Clean & Simple, Clean and Simple (CAS)| 265
Magnolia Smiles
07/06/2022| Posted in Water Colouring, Stamping Techniques, Card Making, Fussy Cutting, Heat Embossing| 324

Circle Quad
11/06/2022| Posted in Patterned Papers| 286

Get Well Peonies
23/06/2022| Posted in Stamping Techniques, Card Making, Stamp Layering, Repeat Pattern Building, Masking| 294
Sunny Days Ahead
24/06/2022| Posted in Die Cutting, Stamping Techniques, Card Making, Stamped Background, sentiment Focal Points| 304
Greetings from the Couch
04/07/2022| Posted in Die Cutting, Shaped Cards| 289
Mini Gift Notes
17/07/2022| Posted in Die Cutting, Gift Making| 296
Stitched Florals
23/07/2022| Posted in Die Cutting, Card Making, Off The Page Projects, Stitching/Embroidery, Stamping, sentiment Focal Points, Clean & Simple| 449
One for the Guys & One for the Girls.
28/07/2022| Posted in Die Cutting, Card Making, Stamped Background, Stamping, Inlaid Die Cutting| 451
Cocktail Cheers
08/08/2022| Posted in Die Cutting, colouring die cuts| 394
Maybe it's Coffee
15/08/2022| Posted in Homeware/Decorations, colouring die cuts| 259
Hey Possum
20/08/2022| Posted in Copic Colouring, Embossing Folders| 1| 258
Pick A Pattern
25/08/2022| Posted in Stamping Techniques, Card Making, Stamping, Clean & Simple, Clean and Simple (CAS)| 300
I'll Be There
29/08/2022| Posted in Die Cutting| 263
To The Rescue
17/09/2022| Posted in Copic Colouring, Ink Blending, Stencilling with embossing paste, Fussy Cutting, Inky Backsides| 169
Reflective Florals
19/09/2022| Posted in Die Cutting, Stamping Techniques| 212

Autumnal Warm Wishes
10/11/2022| Posted in Stamping Techniques, Card Making, turnabouts, Clean & Simple, Clean and Simple (CAS)| 334

Rainbow Cheer
17/11/2022| Posted in Die Cutting, Stamping Techniques, Card Making, Stamped Background, Clean & Simple| 222
Polar Opposites
19/11/2022| Posted in Water Colouring, Card Making, Heat Embossing, Stamping, Clean & Simple, Clean and Simple (CAS)| 342
Star Gazing
26/11/2022| Posted in Copic Colouring, Fussy Cutting| 263
Plant A Succulent - Hugs Card
29/11/2022| Posted in Die Cutting, Card Making| 186
Autumn Sunflower
06/12/2022| Posted in Die Cutting, Ink Blending, Card Making, Heat Embossing, Layering Stencils| 186

Christmas with Friends
10/12/2022| Posted in Copic Colouring, Die Cutting, Stamping Techniques, Partial Die Cutting, Fussy Cutting| 235
Fantasy Jungle
13/12/2022| Posted in Ink Blending, Card Making, Stencilling, Embossing Folders, Layering Stencils| 200

Encouraging Notecards
06/02/2023| Posted in Die Cutting, Card Making| 1| 224
Abstract Gouache Greeting Card
07/02/2023| Posted in Card Making, gouache painting| 202
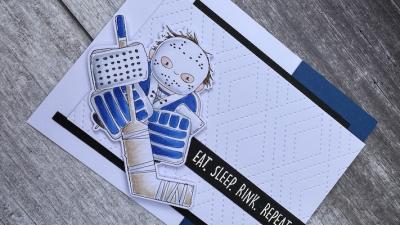
Eat, Sleep, Rink, Repeat
25/02/2023| Posted in Copic Colouring, Die Cutting| 195
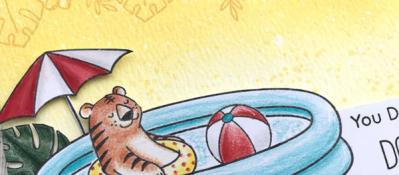
Soak & Relax
06/03/2023| Posted in Die Cutting, Homeware/Decorations| 272

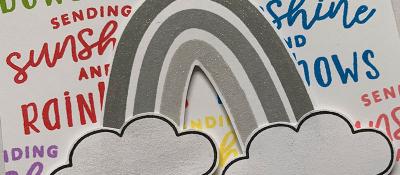
Sunshine and Hugs
07/03/2023| Posted in Die Cutting, Card Making| 288

All The Thanks
23/03/2023| Posted in Stamping Techniques, Card Making| 249
Hot Dog!
25/03/2023| Posted in Copic Colouring, Off The Page Projects| 289
Boho Butterflies
30/03/2023| Posted in Die Cutting, Ink Blending, Card Making, Stencilling, Layering Stencils, Clean & Simple| 1| 262
Howdy Raccoon
15/04/2023| Posted in Colouring Stamped Images, Copic Colouring, Stamping Techniques, Stamped Background, Fussy Cutting, Stamping| 297
Llamas do Yoga
13/05/2023| Posted in Copic Colouring| 199
Hold on Tight
27/05/2023| Posted in Copic Colouring, Die Cutting| 221
Rain or Shine - I'll Be There For You
25/04/2023| Posted in Die Cutting, Card Making| 159


Leaves on YouTube
18/06/2023| Posted in Die Cutting, mixed media| 163

Hey Beautiful
29/06/2023| Posted in Colouring Stamped Images, Copic Colouring, Stamping Techniques, Card Making, Heat Embossing, Clean & Simple| 174
Adventure Awaits
04/07/2023| Posted in Colouring Stamped Images, Copic Colouring, Die Cutting, Ink Blending, Card Making, Stencilling, Stamping, Stencilled backgrounds| 148


Bon Voyage
25/07/2023| Posted in Die Cutting, Ink Blending, Card Making, Stencilling, Stencilled backgrounds| 417

Ice Cream Helps
31/07/2023| Posted in Colouring Stamped Images, Copic Colouring, Pencil Colouring, Card Making, Heat Embossing, Clean & Simple| 240
Cross the Ocean
29/07/2023| Posted in Copic Colouring| 146
Bloomin' Wonderful!
03/08/2023| Posted in Die Cutting, Stamping Techniques, Card Making, Stamped Background, Clean & Simple| 184
Picked Posies - Just for You
23/08/2023| Posted in Die Cutting, Card Making| 202
Friday Feel Good Floral
25/08/2023| Posted in Ink Blending, Stencilling, Clean & Simple, Stencilled backgrounds, Stamp Wheel| 220
Flying By...
03/09/2023| Posted in Stencilling, Layering Stencils| 235
Fall Foliage
13/09/2023| Posted in Die Cutting, Ink Blending, Card Making, colouring die cuts, water colour pencils| 225
Hope Your Day Is Filled With Fun
12/09/2023| Posted in Colouring Stamped Images, Die Cutting, Ink Blending, Card Making, Interactive Cards| 146

Autumn Vibes
25/09/2023| Posted in Die Cutting, Card Making| 263
Wish Upon a Star Fish
04/11/2023| Posted in Copic Colouring, Card Making, Stamped Background, Fussy Cutting, Stamping, Sketches, Clean & Simple, Clean and Simple (CAS)| 220

1 Stamp Set, 3 Looks.
19/12/2023| Posted in Card Making| 350
Hello 2024
04/01/2024| Posted in Card Making, Stencilling, Layering Stencils, Clean & Simple, Clean and Simple (CAS)| 154


It's a Tweet Life
20/01/2024| Posted in Stencilling| 216
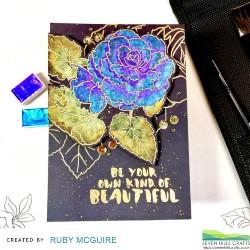
Metallic Magic: Crafting a Dramatic Black Floral Card
29/01/2024| Posted in Water Colouring, Die Cutting, Stamping Techniques, Card Making, Flashback Friday Bargains| 182
Endless Creativity: A Repeatable Card Design Gem!
05/02/2024| Posted in Copic Colouring, Card Making, Stencilling, Fussy Cutting, Stamping, Embossing Folders, Flashback Friday Bargains| 174
Garden Goodness
07/02/2024| Posted in Card Making, Stamp Layering, Stencilling, Layering Stencils, Clean & Simple, Stencilled backgrounds, Clean and Simple (CAS)| 172

Pop Heart Hugs
08/02/2024| Posted in Die Cutting, Stamping Techniques, Card Making, Stamped Background, turnabouts, Stamp Wheel| 155
un BEAR able
10/02/2024| Posted in Colouring Stamped Images, Copic Colouring, Die Cutting, Fussy Cutting, Patterned Papers, Stamping| 215

Simple Mandala Card
26/02/2024| Posted in Colouring Stamped Images, Copic Colouring, Card Making, Stencilling, Clean & Simple, Stencilled backgrounds, Clean and Simple (CAS)| 155
You're Going Places...
27/02/2024| Posted in Colouring Stamped Images, Copic Colouring, Die Cutting, Ink Blending, Card Making, Stencilling, 3D| 174
I Hope You Know...
07/03/2024| Posted in Stamping Techniques, Card Making| 563
A Sweet Duo
14/03/2024| Posted in Colouring Stamped Images, Die Cutting, Stamping Techniques, Card Making, Stencilling, colouring die cuts| 192
Sweet Hello
21/03/2024| Posted in Die Cutting, Card Making, Partial Die Cutting, Stencilling, Stencilled backgrounds| 139
A Basket Full of Care
24/03/2024| Posted in Die Cutting| 193
You Are Amazing!
02/04/2024| Posted in Die Cutting, Stamping Techniques, Card Making, turnabouts, Inlaid Die Cutting| 117
Sending Hugs & Snuggles
09/04/2024| Posted in Die Cutting, Ink Blending, Card Making, Stencilling, Stamping, Embossing Folders| 142
Bouquet Wishes
10/04/2024| Posted in Die Cutting, Card Making| 146


Paper Bouquet
17/04/2024| Posted in Die Cutting, Card Making| 108
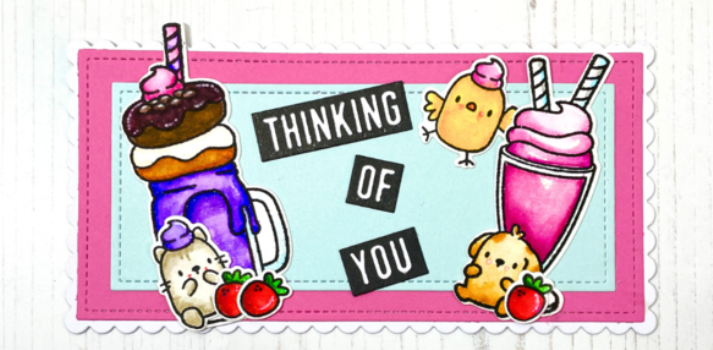
Cute Milkshake Card
22/04/2024| Posted in Water Colouring, Card Making| 63
How to add dimension to your projects!
23/04/2024| Posted in Die Cutting, Ink Blending, Card Making, Stencilling, Stamping, Layering Stencils| 65
Related Products


Controversial Santas
28/08/2022

Birthday Forecast
14/02/2022

Encouraging Leaves
15/03/2021

Framed Snowdrops
22/02/2021

Birthday Blossoms
25/04/2024
Paper Bouquet Take 2
24/04/2024
How to add dimension to your projects!
23/04/2024
Cute Milkshake Card
22/04/2024