Christmas in July - 1
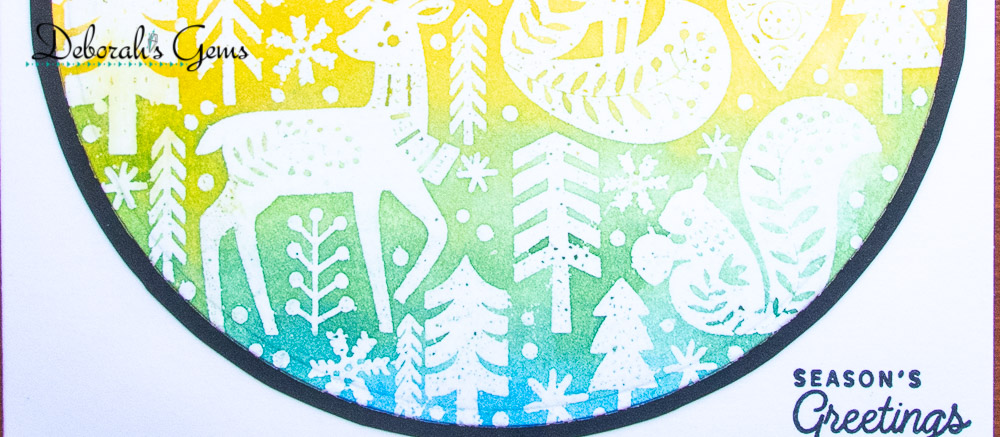
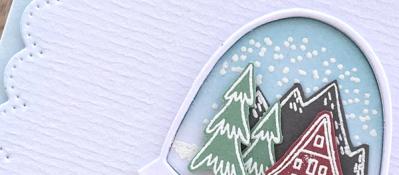
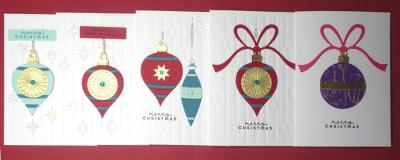
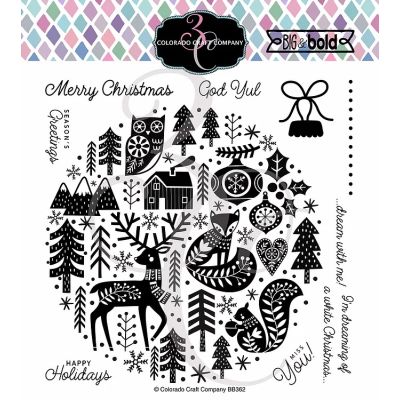
Good morning! I have a theme this month – Christmas in July! I’ve used Colorado Crafting Company’s Big & Bold Nordic Ornament on all the cards. This is a huge stamp, so you can use some of it, or all of it. I’ll start with a card where I’ve used all the image.

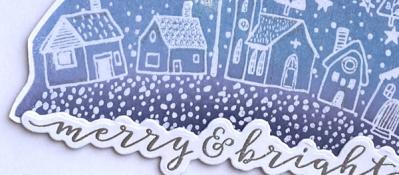
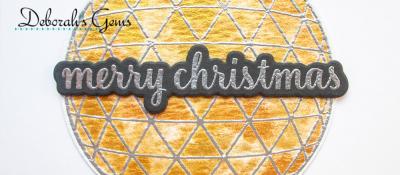
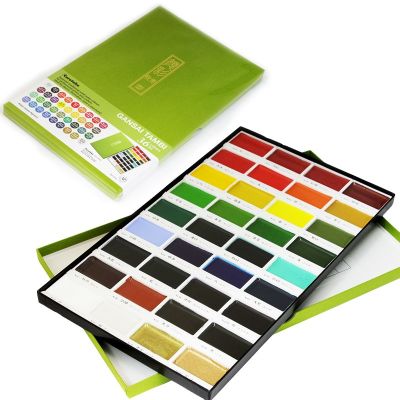
I stamped the ornament in Versamark ink on to watercolour card and heat embossed with clear powder. I used my Gansai Tambi watercolour set to add colour. I love the way the design is revealed as you paint the watercolours across the image. Once dry, I used a large circle die to cut out the ornament. To make the mat layer I simply drew around the outside of the circle die I used previously and then fussy cut it out. I adhered the two pieces together and added them to the front of a 5¾” square card. I finished the front by stamping one of the greetings from Nordic Ornament.
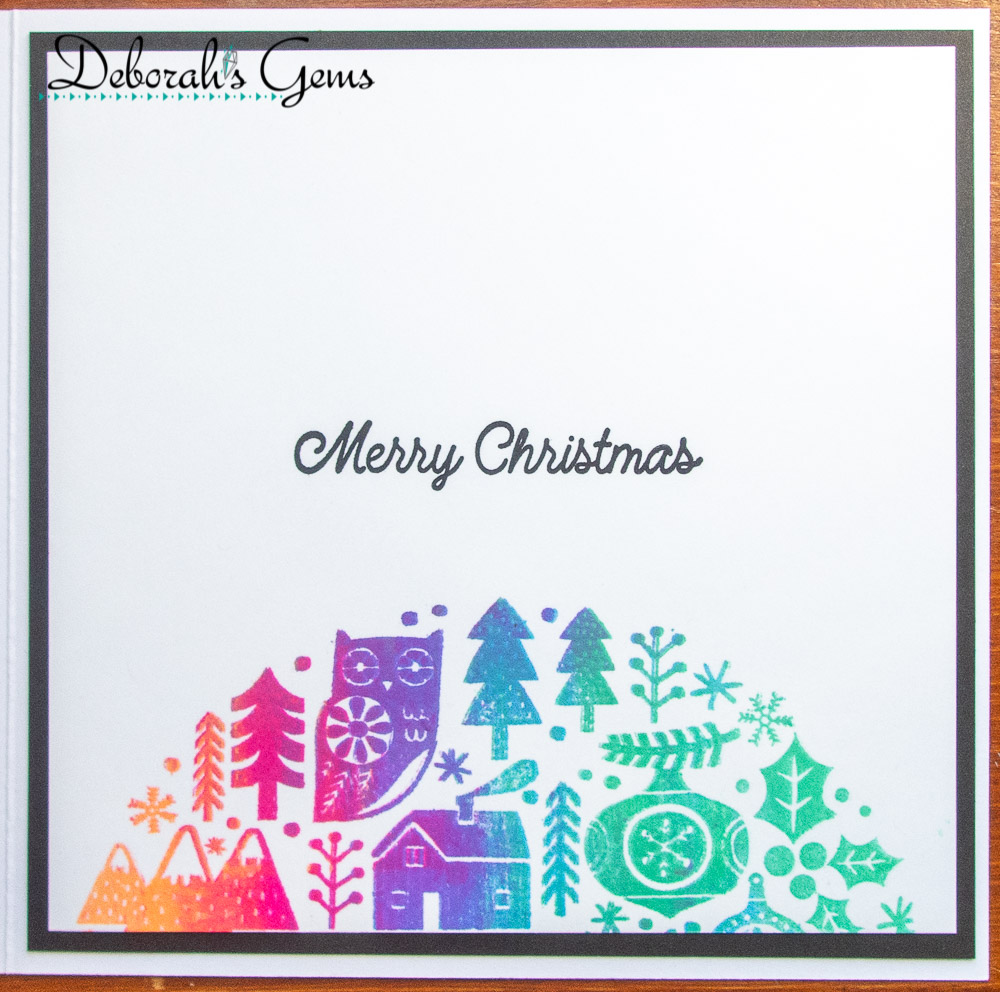
Inside the card, I cut a mat layer of black card. I cut a piece of white card slightly smaller and stamped part of the image at the bottom of this layer using several inks. I finished by adding a Christmas greeting.
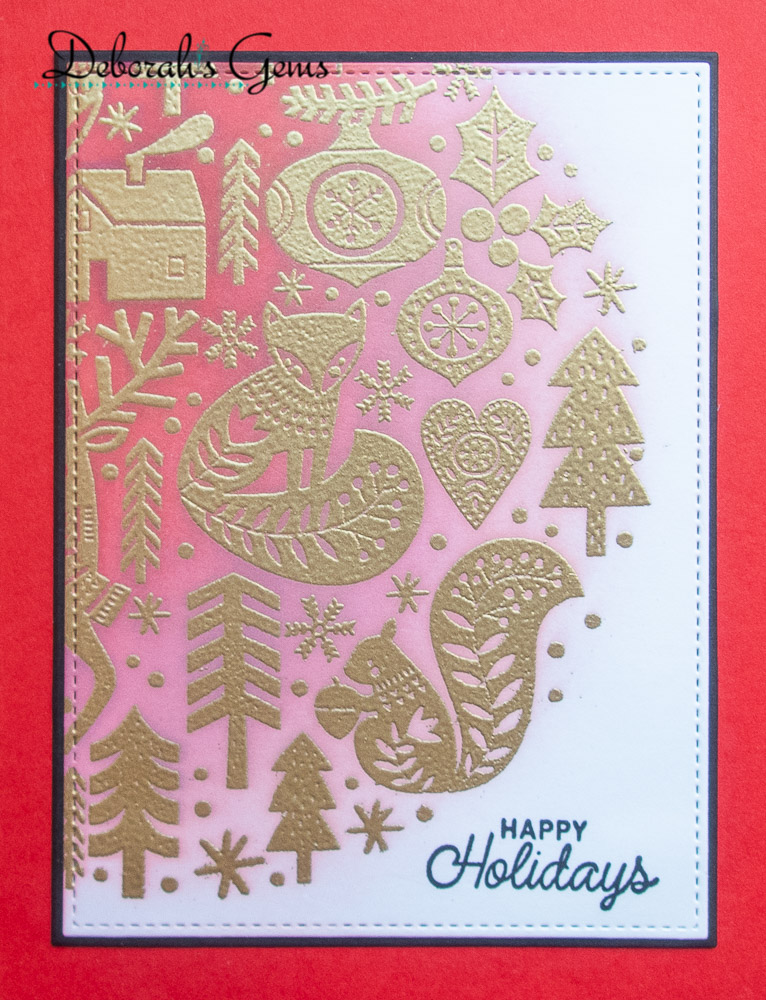
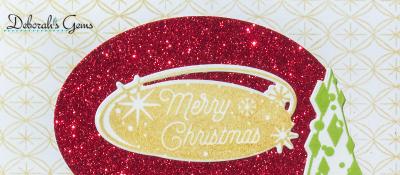
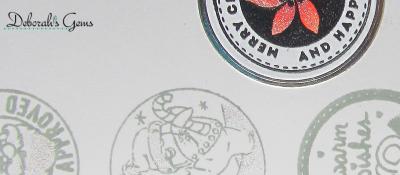
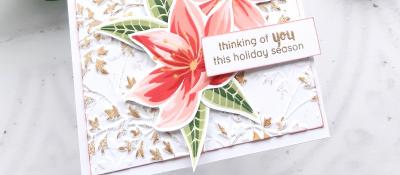
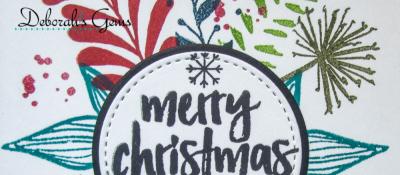
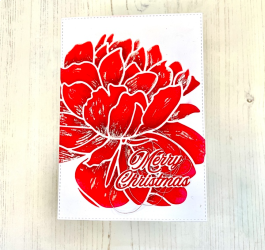
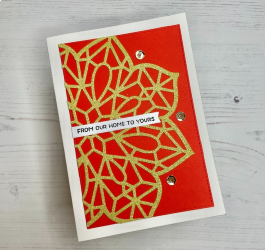
The next card features part of the Nordic Ornament. I stamped the whole image onto white card and embossed it with gold powder. I used a stitched edge die to cut out part of the image and then blended three shades of red and pink ink over the image. I stamped another of the sentiments from the stamp set. I layered the finished piece of card onto a black mat layer and added it all to a red A2 (US size) notecard.
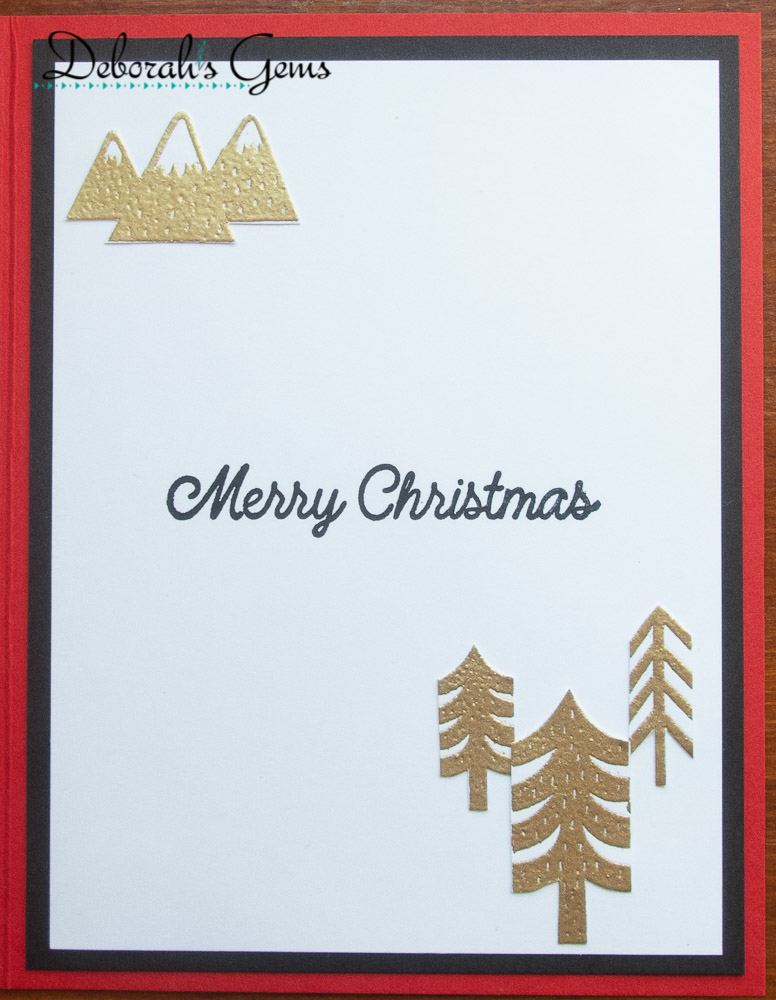
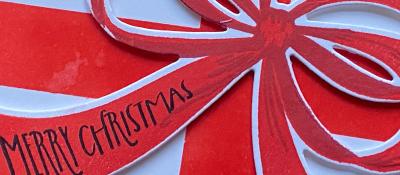
Inside, I cut a piece of black card for the mat layer and on the white panel I stamped the ‘Merry Christmas’ greeting in black. I finished by adding some of the gold embossed elements that I cut out from the left over ornament.

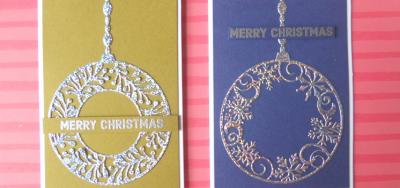
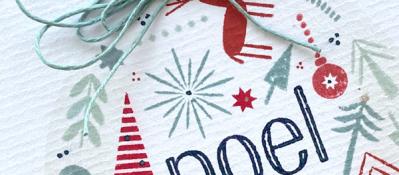
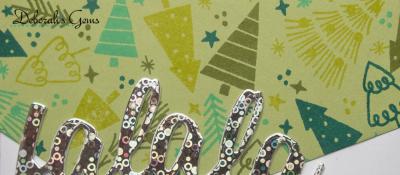
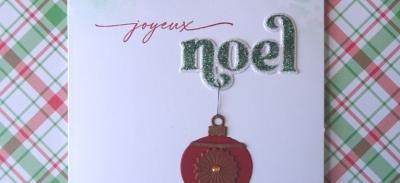
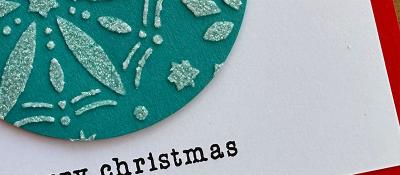
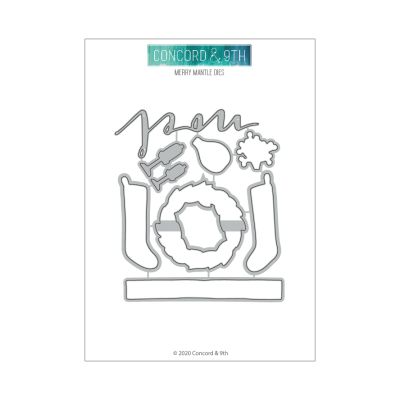
My final card is, I think, my favourite. I stamped the large Nordic Ornament on black card and embossed it with silver powder. This time I selected the central part of the image and simply cut a piece to size. I cut a piece of silver holographic card for the mat layer to echo the silver embossing. I found some shimmery vellum in my stash and wrapped that around the bottom of the image and finished by adding a die cut greeting – ‘noel’ from Concord & 9th’s Merry Mantle die set. I added the completed panel to the front of a black A2 (US size) notecard.
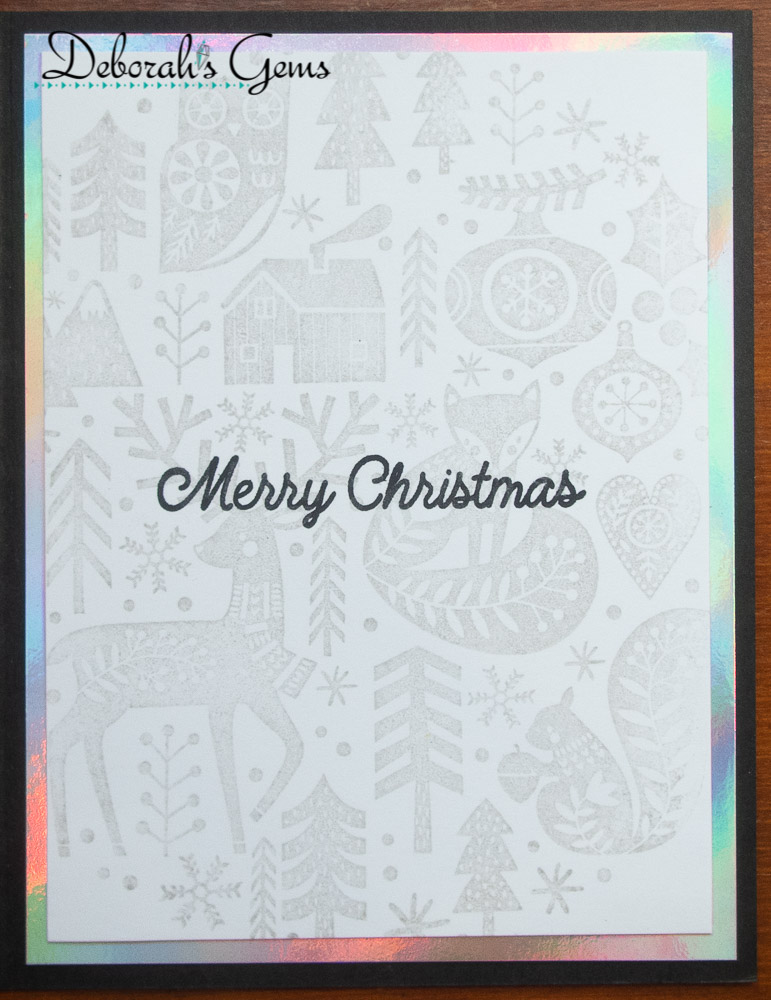
Inside, I cut a piece of the holographic card for the mat layer. I stamped the whole image in silver ink on to white card and selected the central portion, cut it to size and adhered it to the holographic panel.
That’s all from me today. See you again next week.
Deborah, x
07/07/2021
|
View: 235
|
Categories: Water Colouring, Die Cutting, Card Making, Heat Embossing
|
Tags: Colorado Craft Company, Concord & 9th
Share this post
Related Posts
Shine Like a Diamond
17/06/2020| Posted in Copic Colouring, Die Cutting, Card Making, Stamp Layering, Stamped Background, Heat Embossing| 338
Retro Christmas
01/07/2020| Posted in Copic Colouring, Die Cutting, Card Making, Stamped Background, Heat Embossing| 256
Xmas in July: Hey Winter
03/07/2020| Posted in Copic Colouring, Card Making| 426
Snowflake Flurry
15/07/2020| Posted in Card Making| 290
Christmas Cards
20/08/2020| Posted in Copic Colouring, Die Cutting, Card Making, Stamped Background, Heat Embossing| 235
Merry, Bright & Joyful!
19/08/2020| Posted in Card Making| 293
Birthday Shakers
26/08/2020| Posted in Die Cutting, Stamping Techniques, Card Making, Stamped Background, Fussy Cutting, Heat Embossing, turnabouts, Repeat Pattern Building, Stamping on non paper surfaces| 421
A Baubling Merry Christmas
07/09/2020| Posted in Die Cutting, Heat Embossing| 582
Holly, but no ivy ..
09/09/2020| Posted in Colouring Stamped Images, Copic Colouring, Water Colouring, Paper Piecing, Card Making| 1| 481
Lawn Fawn is Live!
10/09/2020| Posted in Pencil Colouring| 661
Let it Snow!
11/09/2020| Posted in Die Cutting, Card Making| 335
Merry Drink To Forgetmas
13/09/2020| Posted in Die Cutting| 2| 1455
Little Framing Tricks
20/09/2020| Posted in Pencil Colouring, Die Cutting| 511
Christmas Joy
25/09/2020| Posted in Die Cutting| 630
Sweet Christmas Wishes
01/10/2020| Posted in Colouring Stamped Images, Copic Colouring, Card Making, Stamped Background, Fussy Cutting| 1| 328
Merry Christmas
07/10/2020| Posted in Die Cutting, Card Making| 433
Merry Kissmas!
12/10/2020| Posted in Die Cutting, Card Making| 356
Iconic Christmas and More!
14/10/2020| Posted in Copic Colouring, Die Cutting, Card Making, Stamped Background, Heat Embossing, turnabouts| 323
Cozy Friends
19/10/2020| Posted in Die Cutting, Card Making| 479
Cool Christmas Wishes
20/10/2020| Posted in Colouring Stamped Images, Copic Colouring, Die Cutting, Ink Blending, Card Making| 263
BIG Snow Flurry
22/10/2020| Posted in Die Cutting, Ink Blending, Card Making, Stamped Background, turnabouts, Masking| 286
Blossoms and Berries
02/11/2020| Posted in Stamping Techniques, Card Making| 2| 546
Quick One-Layer Cards
04/11/2020| Posted in Stamping Techniques, Card Making| 1| 332
O' Christmas Tree
05/11/2020| Posted in Card Making, Stamped Background| 236
'Tis the Season
10/11/2020| Posted in Colouring Stamped Images, Pencil Colouring| 3| 291
Friends and Christmas
18/11/2020| Posted in Stamping Techniques, Card Making, Stamp Layering, Stamped Background, Masking| 1| 380
Reindeer, plaid and stars
15/11/2020| Posted in Copic Colouring, Die Cutting| 2| 282
Even the Mice Were Stirring
22/11/2020| Posted in Copic Colouring| 2| 481
A Winter Scene
23/11/2020| Posted in Colouring Stamped Images, Copic Colouring, Card Making, Interactive Cards, Shaped Cards| 2| 383
Christmas Trees Galore!!
25/11/2020| Posted in Die Cutting, Card Making, Stamp Layering, Special Effects, Shaped Cards, Heat Embossing| 1| 562
'Tis the Season to Be Jolly
27/11/2020| Posted in Copic Colouring, Card Making| 3| 456
Jingle All the Way
04/12/2020| Posted in Copic Colouring, Card Making| 2| 446
A modern twist on the Christmas Tree
01/12/2020| Posted in Stamping Techniques, Card Making| 2| 366
Trimming the Christmas Tree!
03/12/2020| Posted in Die Cutting, Card Making| 1| 320
Festive Decorations
06/12/2020| Posted in Die Cutting, Off The Page Projects, Stamped Background, Heat Embossing| 1| 365
Choosing a Tree!
07/12/2020| Posted in Colouring Stamped Images, Partial Die Cutting, Fussy Cutting, Shaped Cards| 2| 302
Tartan Christmas Wishes
08/12/2020| Posted in Stamping Techniques, Card Making, Heat Embossing, Repeat Pattern Building| 2| 233
The Classic Christmas Half Tree
11/12/2020| Posted in Die Cutting| 1| 350
Festive Gift Tags
12/12/2020| Posted in Colouring Stamped Images, Die Cutting, Stamping Techniques, Card Making, Heat Embossing| 3| 504
5 Minute Christmas make
15/12/2020| Posted in Heat Embossing| 3| 481
Oh Penguin Tree
18/12/2020| Posted in Copic Colouring, Card Making| 1| 784
Merry Christmas
19/12/2020| Posted in Colouring Stamped Images, Pencil Colouring, Water Colouring, Die Cutting, Card Making| 1| 450
Last Minute Die Cuts
20/12/2020| Posted in Die Cutting| 3| 619
A Topping Christmas
23/12/2020| Posted in Copic Colouring, Card Making, Stamped Background, Fussy Cutting, turnabouts| 440
Happy New Year!
03/01/2021| Posted in Pencil Colouring, Water Colouring| 2| 651
Here Comes Santa Jaws
05/03/2021| Posted in Copic Colouring, Card Making| 2| 441
Lovely Christmas Legs
07/04/2021| Posted in Water Colouring, Card Making| 1| 308
Christmas Cards in the Sun
04/06/2021| Posted in Die Cutting| 213
Christmas in July - 2
14/07/2021| Posted in Copic Colouring, Die Cutting, Card Making, Stamped Background, Heat Embossing, Stamping| 258
Christmas in July 4
28/07/2021| Posted in Copic Colouring, Die Cutting, Ink Blending, Card Making, Heat Embossing, Stamping| 275
Wonderful Christmas
31/07/2021| Posted in Die Cutting, Stamping| 252
Here Comes Santa Jaws
21/08/2021| Posted in Copic Colouring, Fussy Cutting| 412
A Wreath for All Seasons
01/09/2021| Posted in Copic Colouring, Die Cutting, Card Making, Stamped Background, Fussy Cutting, Heat Embossing, turnabouts, Stamping| 460
Gone But Not Forgotten
08/09/2021| Posted in Copic Colouring, Die Cutting, Card Making, Stamped Background, Repeat Pattern Building, Stamping| 500
Festive One Layer
09/09/2021| Posted in Colouring Stamped Images, Copic Colouring, Stamping Techniques, Card Making, Masking, Stamping| 250
Nordic Inspired Poinsettias
25/09/2021| Posted in Die Cutting, Ink Blending| 229
Playing With Paste
26/09/2021| Posted in Die Cutting, Stencilling with embossing paste| 327
Christmas Time
28/09/2021| Posted in Copic Colouring, Water Colouring, Die Cutting, Ink Blending, Card Making, Stamped Background, Stamping| 378
Clean & Simple Christmas
09/10/2021| Posted in Copic Colouring| 284
Classic Christmas Scene
10/10/2021| Posted in Pencil Colouring, Masking| 295
Bright Florals
25/10/2021| Posted in Card Making, Stamped Background| 234
Let It Snow
30/10/2021| Posted in Die Cutting, Die Embossing| 285
Santa Duo
06/11/2021| Posted in Copic Colouring, Card Making, Fussy Cutting, Patterned Papers, Stamping, Clean & Simple| 548
What's in a snowflake?
07/11/2021| Posted in Pencil Colouring, Die Cutting| 773
Vintage Christmas
09/11/2021| Posted in Stamp Layering| 250
From All Of Us
13/11/2021| Posted in Copic Colouring| 335
Snowy Friends
19/11/2021| Posted in Pencil Colouring, No Line Colouring| 371
All Stacked Up
27/11/2021| Posted in Copic Colouring, Card Making, Interactive Cards, Fussy Cutting, Patterned Papers, Stamping, Clean & Simple| 338
Destination North Pole
28/11/2021| Posted in Die Cutting, Stamping Techniques| 1| 278
Tree-mendous Christmas!
03/12/2021| Posted in Copic Colouring, No Line Colouring| 342
December Calendar
01/12/2021| Posted in Stamped Background, Layering Stencils| 296
Merry Everything
07/12/2021| Posted in Die Cutting, Card Making| 254
City Christmas
10/12/2021| Posted in Die Cutting| 1| 239
Rustic Christmas
11/12/2021| Posted in Stencilling, Layering Stencils| 289
Winter Wreath
13/12/2021| Posted in Pencil Colouring, Card Making| 369
Tangled With You
12/12/2021| Posted in Pencil Colouring, Masking| 373
Mice on Ice
14/12/2021| Posted in Colouring Stamped Images, Die Cutting, Ink Blending, Card Making, Stencilling| 401
Fall Foliage All Year Round - Part 2
16/12/2021| Posted in Stamping Techniques, Card Making, Fussy Cutting, Stamping, Clean & Simple| 1| 279
Beastly Christmas
17/12/2021| Posted in Pencil Colouring, No Line Colouring| 3| 575
Twinkle Twinkle
18/12/2021| Posted in Copic Colouring, Off The Page Projects| 1| 936
Let there be Peas on Earth
21/12/2021| Posted in Colouring Stamped Images, Die Cutting| 638
Under The Mistletoe
23/12/2021| Posted in Colouring Stamped Images, Copic Colouring, Card Making, Stamping, Clean & Simple| 368
Christmas in May
18/05/2022| Posted in Die Cutting, Stamping Techniques, Card Making, Stamped Background, turnabouts| 367
Last Years Christmas Stocking
16/07/2022| Posted in Copic Colouring, Card Making, Fussy Cutting, Patterned Papers, Stamping, Clean & Simple, Clean and Simple (CAS)| 294
Christmas in July
22/07/2022| Posted in Stamped Background| 400
More Christmas in July
24/07/2022| Posted in No Line Colouring| 294
Striped Sentiments
27/07/2022| Posted in Ink Blending, sentiment Focal Points| 341
Not Exactly Sweater Weather
10/08/2022| Posted in Pencil Colouring, Water Colouring, Die Cutting, Stencilling, Stencilled backgrounds| 244
Controversial Santas
28/08/2022| Posted in Copic Colouring, Pencil Colouring, Die Cutting, Stencilling, Heat Embossing| 5264
Holiday Greetings
29/08/2022| Posted in Colouring Stamped Images, Die Cutting, Ink Blending, Card Making, Interactive Cards, Heat Embossing| 342
Ugly Sweaters
06/09/2022| Posted in Colouring Stamped Images, Copic Colouring, Die Cutting, Card Making, Interactive Cards, Heat Embossing| 227
Tipsy Santa
07/09/2022| Posted in Copic Colouring, Die Cutting| 194
All Is Bright
01/10/2022| Posted in Copic Colouring, Card Making, Off The Page Projects, Stamped Background, Patterned Papers, Stamping, Clean & Simple, Clean and Simple (CAS)| 280
Bright Christmas
07/10/2022| Posted in Die Cutting, Card Making| 258
Cool Christmas
14/10/2022| Posted in Die Cutting, Card Making| 428
Bloom in Winter
08/10/2022| Posted in Copic Colouring| 204
Aurora Penguin
09/10/2022| Posted in Water Colouring| 343
Curio Attic Ornaments
12/10/2022| Posted in Die Cutting| 345
O' Christmas Tree
24/10/2022| Posted in Die Cutting, Stencilling with embossing paste| 452
Coffee Lovers Blog Hop Fall 22
11/11/2022| Posted in Stamp Layering| 19| 385
Snowy Day Fun
25/10/2022| Posted in Colouring Stamped Images, Die Cutting, Ink Blending, Card Making, Interactive Cards| 190
Santa Chimney Pop Up
26/10/2022| Posted in Die Cutting, Interactive Cards| 324
Krafty Noel
06/11/2022| Posted in Die Cutting| 2| 391
Meowy Christmas
12/11/2022| Posted in Copic Colouring| 254
Christmas Garnish
14/11/2022| Posted in Die Cutting, Clean & Simple| 381
Christmas Snowflake
18/11/2022| Posted in Card Making, Stamping| 1| 318
Polar Opposites
19/11/2022| Posted in Water Colouring, Card Making, Heat Embossing, Stamping, Clean & Simple, Clean and Simple (CAS)| 342
Bella's Tangled Kitty
23/11/2022| Posted in Copic Colouring| 230
Star Gazing
26/11/2022| Posted in Copic Colouring, Fussy Cutting| 263
Winter Pine
05/12/2022| Posted in Colouring Stamped Images, Stamping| 271
Month By Month - Part 1
01/12/2022| Posted in Colouring Stamped Images, Copic Colouring, Die Cutting, Stencilling, Stamped Background, Gift Making| 279
Christmas with Friends
10/12/2022| Posted in Copic Colouring, Die Cutting, Stamping Techniques, Partial Die Cutting, Fussy Cutting| 235
Polar Pals
17/12/2022| Posted in Copic Colouring, Die Embossing| 338
A whole lot of baubles going on......
19/12/2022| Posted in Die Cutting| 469
Last minute Robins
21/12/2022| Posted in Pencil Colouring| 363
Peaceful Olive Two Ways
26/04/2023| Posted in Die Cutting, Card Making, Stamp Layering, Stamped Background, Stamping, Layering Stencils, Clean & Simple, Stencilled backgrounds, Inlaid Die Cutting, Clean and Simple (CAS)| 256
Tips and Tricks for Easy Paper Piecing with Large Dies
09/07/2023| Posted in Die Cutting, Paper Piecing| 242
Holly Jolly Sparkly Christmas!
27/07/2023| Posted in Die Cutting, Stencilling| 277
Santa Tagging
04/08/2023| Posted in Die Cutting| 177
Peaceful Fox
12/08/2023| Posted in Copic Colouring, Card Making, Stamping, Clean & Simple, Clean and Simple (CAS)| 294
'Tis the Season...
30/08/2023| Posted in Die Cutting, Card Making| 287
Folk Art Reindeer
10/09/2023| Posted in Die Cutting| 214
Very Merry
16/09/2023| Posted in Die Cutting, Inky Backsides| 1| 207
Hang a Stocking
20/09/2023| Posted in Die Cutting, Card Making, Stitching/Embroidery, Layering Stencils, Stencilled backgrounds| 241
Let's Be Merry
21/09/2023| Posted in Die Cutting, Stamping Techniques, Card Making, Heat Embossing, Shaker Cards| 184
'Tis the Season
28/09/2023| Posted in Die Cutting, Card Making| 262
Light Up Your Christmas
01/10/2023| Posted in Die Cutting, Homeware/Decorations| 1| 284
Tiny Houses
04/10/2023| Posted in Die Cutting, Card Making| 269
Gift Exchange
14/10/2023| Posted in Copic Colouring| 161
All aboard the Cheer Mobile!
18/10/2023| Posted in Die Cutting, Card Making, Stencilling, Stamping, Layering Stencils, Stencilled backgrounds| 215
Introducing Flashback Friday Bargains
20/10/2023| Posted in Copic Colouring| 1| 1004
Christmas Cloche
25/10/2023| Posted in Die Cutting, Card Making| 208
Big Beautiful Bow
01/11/2023| Posted in Die Cutting, Card Making| 495
Pretty CAS Gift
02/11/2023| Posted in Die Cutting, Ink Blending, Card Making, Clean & Simple, Clean and Simple (CAS)| 268
Figgy Pudding
08/11/2023| Posted in Die Cutting, Card Making, Stencilling, Layering Stencils, Stencilled backgrounds| 216
Hot Cocoa Anyone?
06/11/2023| Posted in Copic Colouring, Die Cutting, Card Making, Stamping, Clean & Simple, Clean and Simple (CAS), sales and giveaways, Flashback Friday Bargains| 211
Ta-Da! Seasons Tweetings.
07/11/2023| Posted in Colouring Stamped Images, Copic Colouring, Die Cutting, Card Making, Interactive Cards| 177
Joyful Christmas Sampler
15/11/2023| Posted in Card Making, Stencilling, Stencilling with embossing paste, Stencilled backgrounds| 208
Mini Christmas Gift Notebook & Co-Ordinating Card
13/11/2023| Posted in Die Cutting, Card Making, Gift Making, Stamping, Flashback Friday Bargains| 2| 211
Over the Rooftops
22/11/2023| Posted in Die Cutting, Card Making| 2| 258
Lil' Tags A Plenty and Store News
19/11/2023| Posted in Water Colouring| 247
Dashing Through the Snow
25/11/2023| Posted in Copic Colouring, Stencilling, Stencilling with embossing paste, Fussy Cutting| 184
Glitter & Snowflakes
30/11/2023| Posted in Die Cutting, Card Making, Stencilling, Stencilling with embossing paste, Clean and Simple (CAS)| 147
Flashback Friday Bargains - Concord and 9th
01/12/2023| Posted in Flashback Friday Bargains| 442
Simple 'Poinsettia' Card
04/12/2023| Posted in Copic Colouring, Pencil Colouring, Die Cutting, Stamping Techniques, Card Making, Stencilling with embossing paste| 122
Bulk Making Christmas Cards
03/12/2023| Posted in Die Cutting, Heat Embossing| 1| 252
Snow Much Love
05/12/2023| Posted in Die Cutting, Stamping Techniques, Card Making, Heat Embossing, Clean & Simple| 133
12 Days of Anita Jerams Christmas Part 3
09/12/2023| Posted in Copic Colouring| 166
Banner & Bough
13/12/2023| Posted in Die Cutting, Ink Blending, Card Making, Stamp Layering, Stamping, Stencilled backgrounds| 166
Last Minute Christmas Cards
11/12/2023| Posted in Die Cutting, Card Making| 141
All Is Calm
20/12/2023| Posted in Die Cutting, Card Making, Fancy Folds, Clean & Simple, Clean and Simple (CAS)| 221
12 Days of Anita Jerams Christmas Part 4
16/12/2023| Posted in Copic Colouring, Fussy Cutting| 258
Elegant Christmas Gift Tags
18/12/2023| Posted in Die Cutting, Card Making| 200
2024 Part Three
21/12/2023| Posted in Ink Blending, Stamping Techniques, Stamp Layering, Stencilling, turnabouts, Gift Making, Masking, mixed media, Wreath Building| 207
Sweater Season
17/01/2024| Posted in Die Cutting, Card Making| 123
Controversial Santas
28/08/2022
Birthday Forecast
14/02/2022
Encouraging Leaves
15/03/2021
Framed Snowdrops
22/02/2021
Birthday Blossoms
25/04/2024
Paper Bouquet Take 2
24/04/2024
How to add dimension to your projects!
23/04/2024
Cute Milkshake Card
22/04/2024
Topics
- Birthdays
- Christmas
- New Home
- New Baby
- Mother's Day
- Father's Day
- Valentine's Day
- St Patrick's Day
- Masculine
- New Year
- Good Luck
- New Job
- Retirement
- Holidays
- Celebrations
- Belated
- Easter
- Florals
- Get Well
- Friendship
- Gifts
- Gift Packaging
- Halloween
- Interactive
- Invitation
- Weddings
- Anniversary
- Motivation
- Inspiration
- Kind Thoughts
- Number Birthdays
- Sympathy
- Cheers
- Food and Drink
- Children's Cards
- Covid19
- Love
- Thanks and Gratitude
- Hello
- Superheros
- Birds
- Gardening and Gnomes
- Weather
- Congratulations
- Summer
- Tag
- Wellbeing
- Home Decoration
- Puns/Humour
- Patterns
- Clock
- Seasonal
- Autumn
- Prize
- Winter
- Trees
- Trees
- Pets
- Notecards
- Animals
- Rainbows
- Plants
- Scenery
- Butterflies and insects
- Inky Backsides
- Framed art
- Gift Boxes
- Reading
- Borders and Edges
- People
- Storage
- Upcycling
- Party Decorations and Favours
- Wreaths
- Sport
- Thinking Of You
- Bookmark
- Alphabets
- Movies
- Eid
- Monochromatic
- Coronation
- Sentiments
- Sea creatures
- Leaves
Tags
Mochi Girls
Altenew
Avery Elle
Art Impressions
Colorado Craft Company
Concord & 9th
Echo Park
Fiskars
Flora & Fauna
Hero Arts
Kuretake
Lawn Fawn
Lil' Inker Designs
Mama Elephant
My Favorite Things
Neat & Tangled
Newton's Nook
Paper Smooches
Ranger
Reverse Confetti
Seven Hills Crafts
Simple Stories
Sizzix
Stampers Anonymous
Stamping Bella
Sguar Pea Designs
Therm-o-web
Tonic Studios
Tsukineko
Waffle Flower Crafts
We Are Memory Keepers
Wplus9
Purple Onion Designs
The Greetery
Thinking Of You
Transotype


