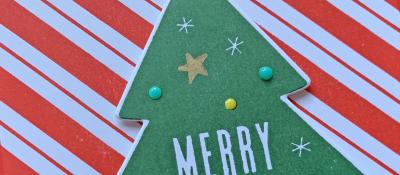
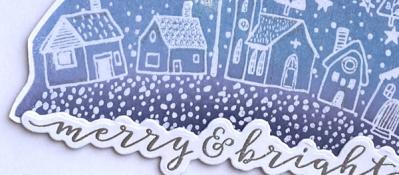
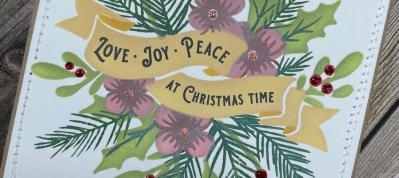
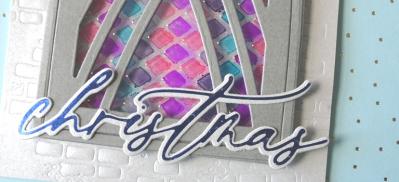
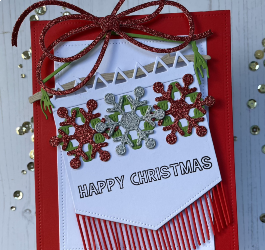
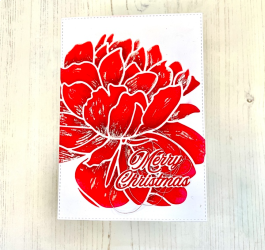
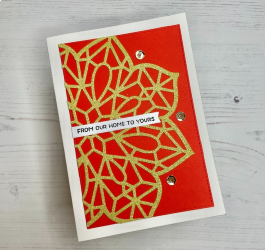
Partial Embossing

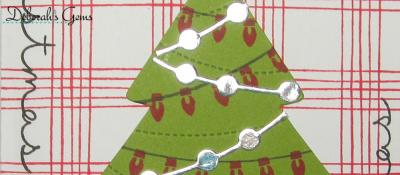
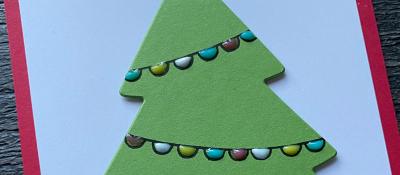
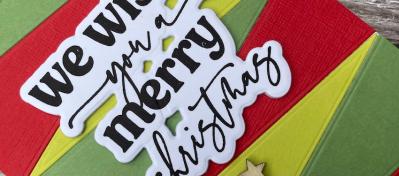
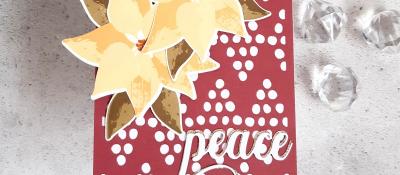
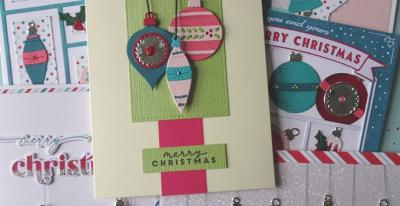
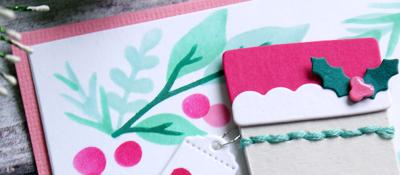
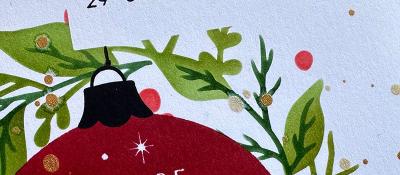
Hey there, Terri here! Today I am sharing a Christmas Card featureing a Partial Embossing technique. Let's take a closer look.
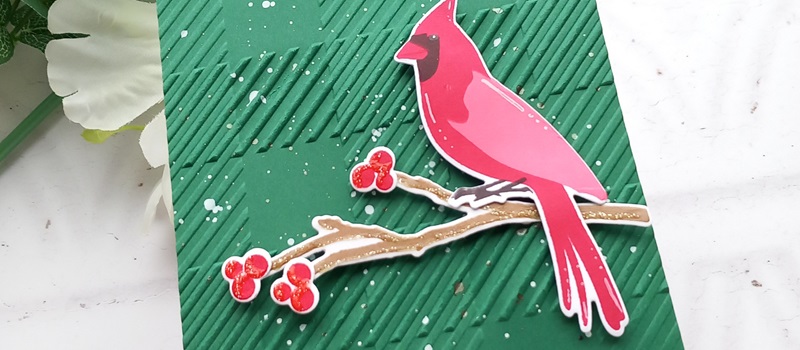
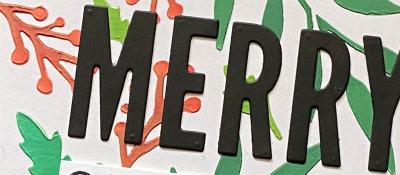
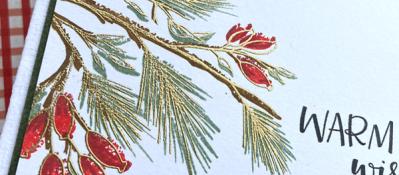
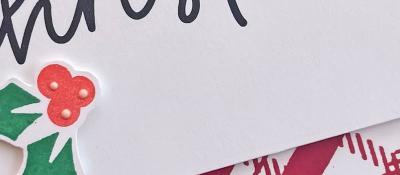
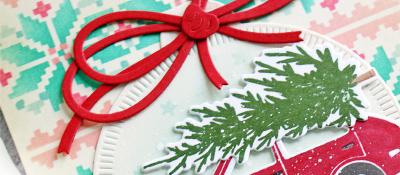
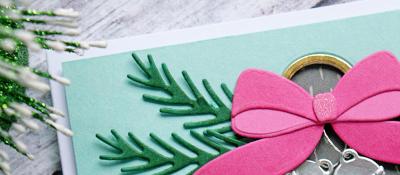
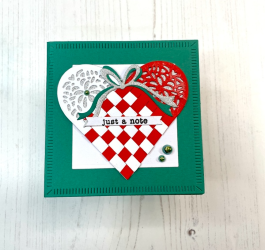
I started of by White heat embossing my chosen sentiment onto an A2 piece of dark green cardstock. I use a White Embossing Powder and embossed at the bottom of my cardstock.
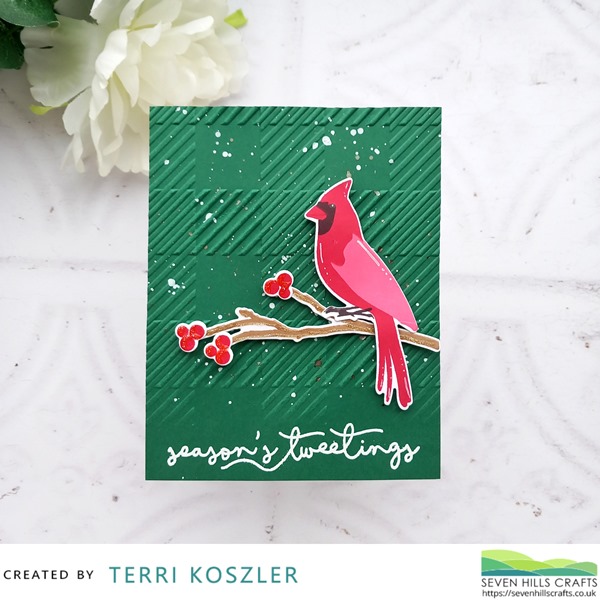
Next is where the Partial Embossing happens. I used the Buffalo Plaid 3D Embossing Folder to achieve this. I added the Green cardstock to the embossing folder leaving the heat embossed sentiment hanging out atthe bottom. I then place the folder in between my die cutting plates making sure that the top plate stops short of the bottom of the embossing folder, this means that when you run it through your machine, you don't end up with a harsh line where the embossing ends, instead it fades out. There only needs to be around a centimeter between the bottom of the top plate and the bottom of the embossing folder. I added some white and bronze inky spaltters and set it aside to dry.
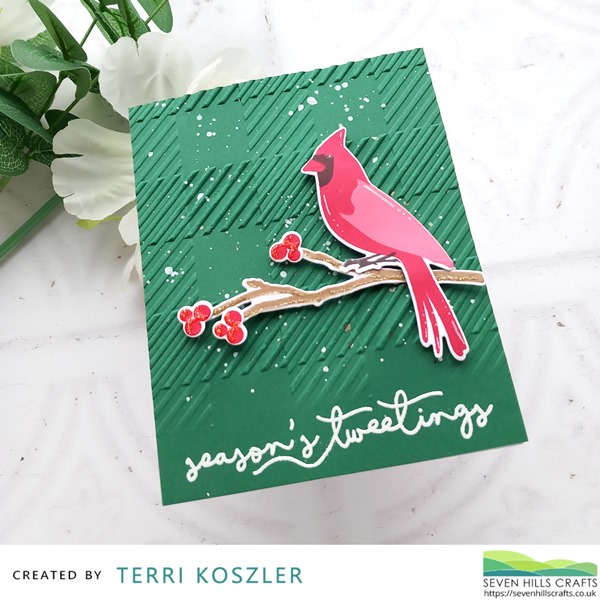
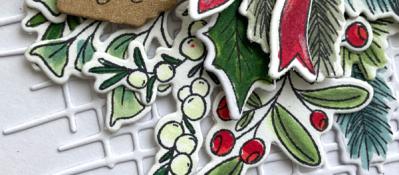
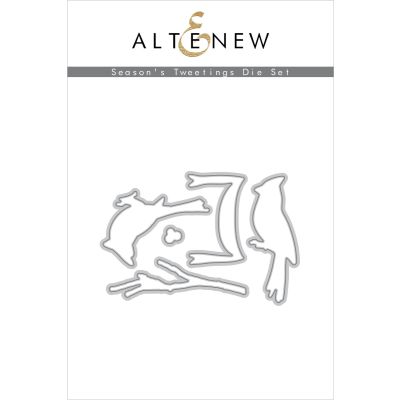
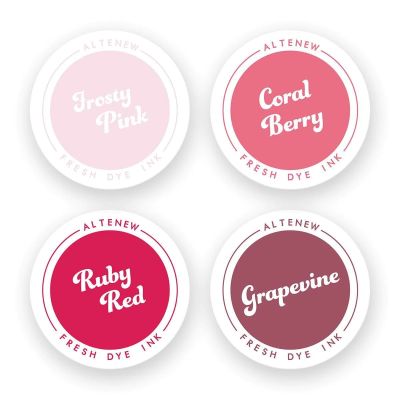
I stamp the Cardinal using the Seasons Tweetings Stamp set. I used inks from the Red Cosmos Fresh Dye Inks and Obsidian Black. I stamped a branch using Mocha Ink from the Coffee Break Ink Set and 3 lots of berries using Ruby Red Ink. I die cut all of the images using the Seasons Tweetings Die Set.
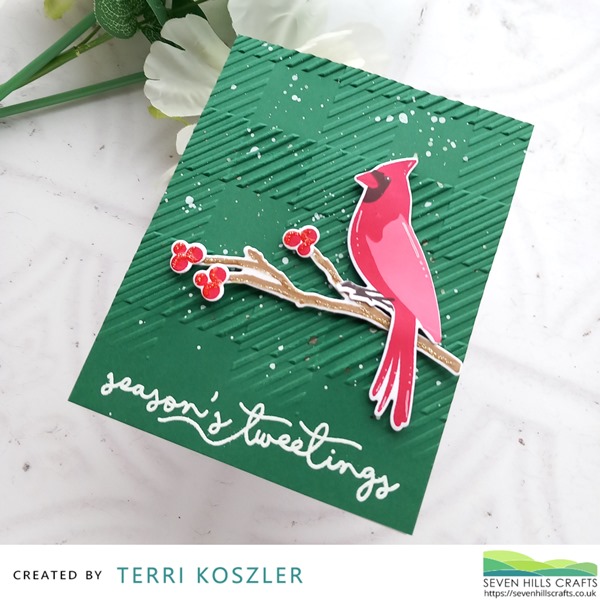
I added the embossed panel to a white A2 card black using a combination of double sided tape and tacky glue for a strong hold. I the added the branch and berries with small foam pads before adding the Cardinal. To finish I added some glitter glue to the branch and berries.
Related Posts


Shine Like a Diamond
17/06/2020| Posted in Copic Colouring, Die Cutting, Card Making, Stamp Layering, Stamped Background, Heat Embossing| 337

Retro Christmas
01/07/2020| Posted in Copic Colouring, Die Cutting, Card Making, Stamped Background, Heat Embossing| 256
Xmas in July: Hey Winter
03/07/2020| Posted in Copic Colouring, Card Making| 425

Snowflake Flurry
15/07/2020| Posted in Card Making| 290
Christmas Cards
20/08/2020| Posted in Copic Colouring, Die Cutting, Card Making, Stamped Background, Heat Embossing| 235
Merry, Bright & Joyful!
19/08/2020| Posted in Card Making| 293

Birthday Shakers
26/08/2020| Posted in Die Cutting, Stamping Techniques, Card Making, Stamped Background, Fussy Cutting, Heat Embossing, turnabouts, Repeat Pattern Building, Stamping on non paper surfaces| 421
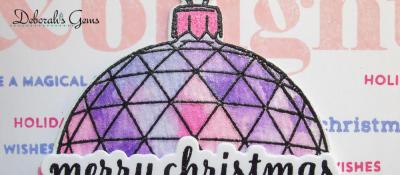
A Baubling Merry Christmas
07/09/2020| Posted in Die Cutting, Heat Embossing| 582
Holly, but no ivy ..
09/09/2020| Posted in Colouring Stamped Images, Copic Colouring, Water Colouring, Paper Piecing, Card Making| 1| 481
Lawn Fawn is Live!
10/09/2020| Posted in Pencil Colouring| 660

Let it Snow!
11/09/2020| Posted in Die Cutting, Card Making| 334

Merry Drink To Forgetmas
13/09/2020| Posted in Die Cutting| 2| 1455
Little Framing Tricks
20/09/2020| Posted in Pencil Colouring, Die Cutting| 511
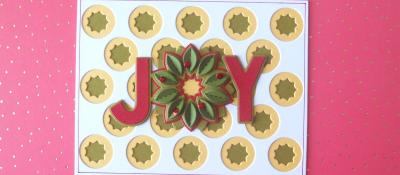
Christmas Joy
25/09/2020| Posted in Die Cutting| 630

Sweet Christmas Wishes
01/10/2020| Posted in Colouring Stamped Images, Copic Colouring, Card Making, Stamped Background, Fussy Cutting| 1| 328

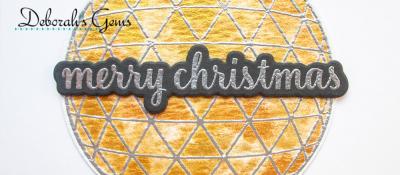
Merry Christmas
07/10/2020| Posted in Die Cutting, Card Making| 432
Merry Kissmas!
12/10/2020| Posted in Die Cutting, Card Making| 355

Iconic Christmas and More!
14/10/2020| Posted in Copic Colouring, Die Cutting, Card Making, Stamped Background, Heat Embossing, turnabouts| 323

Cozy Friends
19/10/2020| Posted in Die Cutting, Card Making| 479
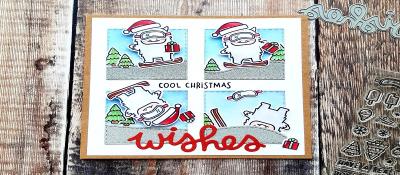
Cool Christmas Wishes
20/10/2020| Posted in Colouring Stamped Images, Copic Colouring, Die Cutting, Ink Blending, Card Making| 263

BIG Snow Flurry
22/10/2020| Posted in Die Cutting, Ink Blending, Card Making, Stamped Background, turnabouts, Masking| 286
Blossoms and Berries
02/11/2020| Posted in Stamping Techniques, Card Making| 2| 545

Quick One-Layer Cards
04/11/2020| Posted in Stamping Techniques, Card Making| 1| 332
O' Christmas Tree
05/11/2020| Posted in Card Making, Stamped Background| 235


'Tis the Season
10/11/2020| Posted in Colouring Stamped Images, Pencil Colouring| 3| 291

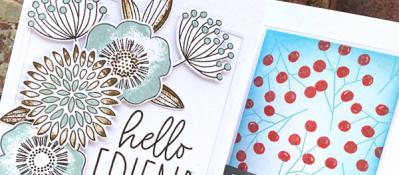
Friends and Christmas
18/11/2020| Posted in Stamping Techniques, Card Making, Stamp Layering, Stamped Background, Masking| 1| 379

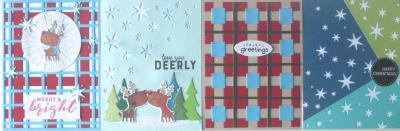
Reindeer, plaid and stars
15/11/2020| Posted in Copic Colouring, Die Cutting| 2| 281

Even the Mice Were Stirring
22/11/2020| Posted in Copic Colouring| 2| 481
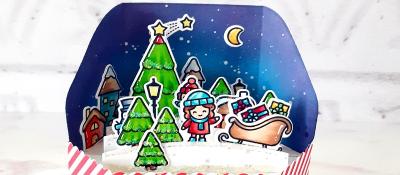
A Winter Scene
23/11/2020| Posted in Colouring Stamped Images, Copic Colouring, Card Making, Interactive Cards, Shaped Cards| 2| 383
Christmas Trees Galore!!
25/11/2020| Posted in Die Cutting, Card Making, Stamp Layering, Special Effects, Shaped Cards, Heat Embossing| 1| 562
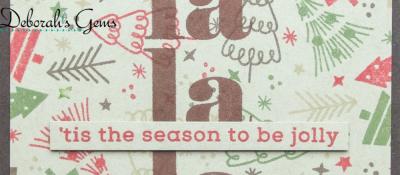
'Tis the Season to Be Jolly
27/11/2020| Posted in Copic Colouring, Card Making| 3| 456

Jingle All the Way
04/12/2020| Posted in Copic Colouring, Card Making| 2| 446

A modern twist on the Christmas Tree
01/12/2020| Posted in Stamping Techniques, Card Making| 2| 366
Trimming the Christmas Tree!
03/12/2020| Posted in Die Cutting, Card Making| 1| 319


Festive Decorations
06/12/2020| Posted in Die Cutting, Off The Page Projects, Stamped Background, Heat Embossing| 1| 365

Choosing a Tree!
07/12/2020| Posted in Colouring Stamped Images, Partial Die Cutting, Fussy Cutting, Shaped Cards| 2| 302
Tartan Christmas Wishes
08/12/2020| Posted in Stamping Techniques, Card Making, Heat Embossing, Repeat Pattern Building| 2| 233
The Classic Christmas Half Tree
11/12/2020| Posted in Die Cutting| 1| 350

Festive Gift Tags
12/12/2020| Posted in Colouring Stamped Images, Die Cutting, Stamping Techniques, Card Making, Heat Embossing| 3| 504
5 Minute Christmas make
15/12/2020| Posted in Heat Embossing| 3| 480

Oh Penguin Tree
18/12/2020| Posted in Copic Colouring, Card Making| 1| 784
Merry Christmas
19/12/2020| Posted in Colouring Stamped Images, Pencil Colouring, Water Colouring, Die Cutting, Card Making| 1| 450
Last Minute Die Cuts
20/12/2020| Posted in Die Cutting| 3| 619
A Topping Christmas
23/12/2020| Posted in Copic Colouring, Card Making, Stamped Background, Fussy Cutting, turnabouts| 440
Happy New Year!
03/01/2021| Posted in Pencil Colouring, Water Colouring| 2| 650

Here Comes Santa Jaws
05/03/2021| Posted in Copic Colouring, Card Making| 2| 441
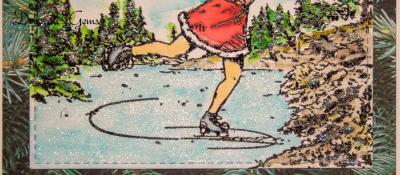
Lovely Christmas Legs
07/04/2021| Posted in Water Colouring, Card Making| 1| 308

Christmas Cards in the Sun
04/06/2021| Posted in Die Cutting| 213

Christmas in July - 2
14/07/2021| Posted in Copic Colouring, Die Cutting, Card Making, Stamped Background, Heat Embossing, Stamping| 257


Christmas in July 4
28/07/2021| Posted in Copic Colouring, Die Cutting, Ink Blending, Card Making, Heat Embossing, Stamping| 275
Wonderful Christmas
31/07/2021| Posted in Die Cutting, Stamping| 252

Here Comes Santa Jaws
21/08/2021| Posted in Copic Colouring, Fussy Cutting| 412
A Wreath for All Seasons
01/09/2021| Posted in Copic Colouring, Die Cutting, Card Making, Stamped Background, Fussy Cutting, Heat Embossing, turnabouts, Stamping| 460

Gone But Not Forgotten
08/09/2021| Posted in Copic Colouring, Die Cutting, Card Making, Stamped Background, Repeat Pattern Building, Stamping| 500
Festive One Layer
09/09/2021| Posted in Colouring Stamped Images, Copic Colouring, Stamping Techniques, Card Making, Masking, Stamping| 250

Nordic Inspired Poinsettias
25/09/2021| Posted in Die Cutting, Ink Blending| 229
Playing With Paste
26/09/2021| Posted in Die Cutting, Stencilling with embossing paste| 327
Christmas Time
28/09/2021| Posted in Copic Colouring, Water Colouring, Die Cutting, Ink Blending, Card Making, Stamped Background, Stamping| 378
Clean & Simple Christmas
09/10/2021| Posted in Copic Colouring| 283
Classic Christmas Scene
10/10/2021| Posted in Pencil Colouring, Masking| 295

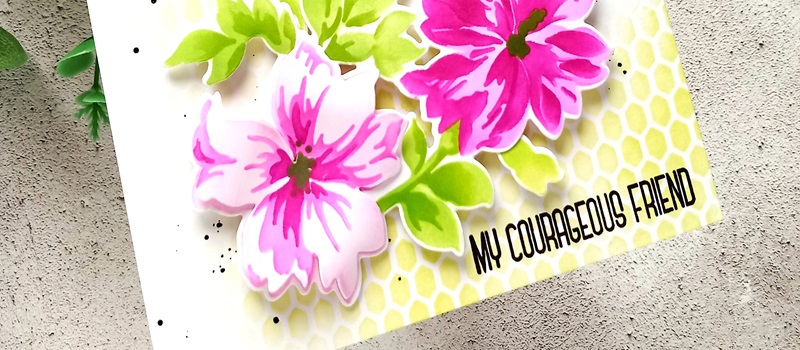
Bright Florals
25/10/2021| Posted in Card Making, Stamped Background| 234

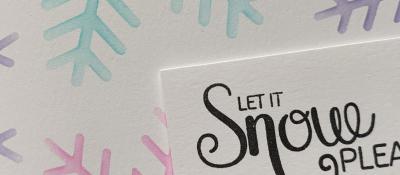
Let It Snow
30/10/2021| Posted in Die Cutting, Die Embossing| 285


Santa Duo
06/11/2021| Posted in Copic Colouring, Card Making, Fussy Cutting, Patterned Papers, Stamping, Clean & Simple| 548
What's in a snowflake?
07/11/2021| Posted in Pencil Colouring, Die Cutting| 772
Vintage Christmas
09/11/2021| Posted in Stamp Layering| 249

From All Of Us
13/11/2021| Posted in Copic Colouring| 335


Snowy Friends
19/11/2021| Posted in Pencil Colouring, No Line Colouring| 370
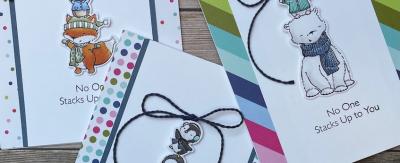
All Stacked Up
27/11/2021| Posted in Copic Colouring, Card Making, Interactive Cards, Fussy Cutting, Patterned Papers, Stamping, Clean & Simple| 338

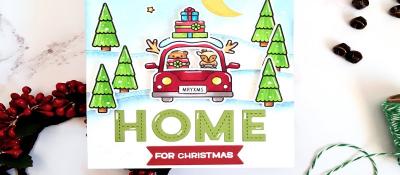
Destination North Pole
28/11/2021| Posted in Die Cutting, Stamping Techniques| 1| 278

Tree-mendous Christmas!
03/12/2021| Posted in Copic Colouring, No Line Colouring| 342


December Calendar
01/12/2021| Posted in Stamped Background, Layering Stencils| 296

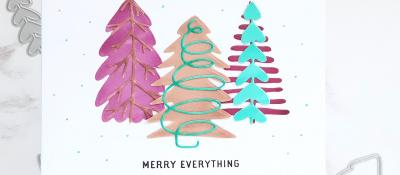
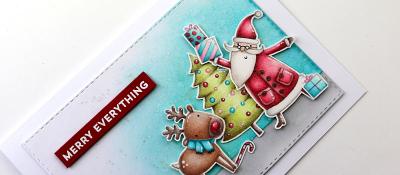
Merry Everything
07/12/2021| Posted in Die Cutting, Card Making| 254
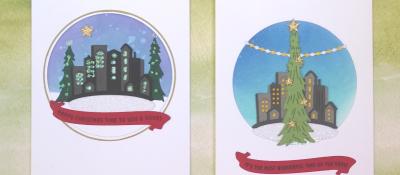
City Christmas
10/12/2021| Posted in Die Cutting| 1| 238
Rustic Christmas
11/12/2021| Posted in Stencilling, Layering Stencils| 289
Winter Wreath
13/12/2021| Posted in Pencil Colouring, Card Making| 369
Tangled With You
12/12/2021| Posted in Pencil Colouring, Masking| 373

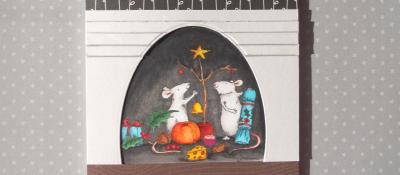
Mice on Ice
14/12/2021| Posted in Colouring Stamped Images, Die Cutting, Ink Blending, Card Making, Stencilling| 401

Fall Foliage All Year Round - Part 2
16/12/2021| Posted in Stamping Techniques, Card Making, Fussy Cutting, Stamping, Clean & Simple| 1| 279

Beastly Christmas
17/12/2021| Posted in Pencil Colouring, No Line Colouring| 3| 575

Twinkle Twinkle
18/12/2021| Posted in Copic Colouring, Off The Page Projects| 1| 936

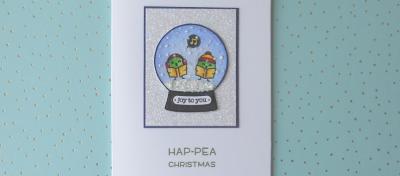
Let there be Peas on Earth
21/12/2021| Posted in Colouring Stamped Images, Die Cutting| 638

Under The Mistletoe
23/12/2021| Posted in Colouring Stamped Images, Copic Colouring, Card Making, Stamping, Clean & Simple| 368
Christmas in May
18/05/2022| Posted in Die Cutting, Stamping Techniques, Card Making, Stamped Background, turnabouts| 367

Last Years Christmas Stocking
16/07/2022| Posted in Copic Colouring, Card Making, Fussy Cutting, Patterned Papers, Stamping, Clean & Simple, Clean and Simple (CAS)| 293

Christmas in July
22/07/2022| Posted in Stamped Background| 400

More Christmas in July
24/07/2022| Posted in No Line Colouring| 294

Striped Sentiments
27/07/2022| Posted in Ink Blending, sentiment Focal Points| 341

Not Exactly Sweater Weather
10/08/2022| Posted in Pencil Colouring, Water Colouring, Die Cutting, Stencilling, Stencilled backgrounds| 244
Controversial Santas
28/08/2022| Posted in Copic Colouring, Pencil Colouring, Die Cutting, Stencilling, Heat Embossing| 5262
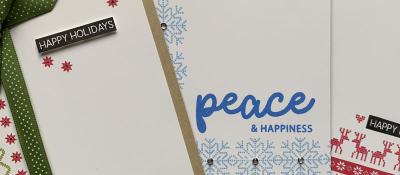
Holiday Greetings
29/08/2022| Posted in Colouring Stamped Images, Die Cutting, Ink Blending, Card Making, Interactive Cards, Heat Embossing| 342
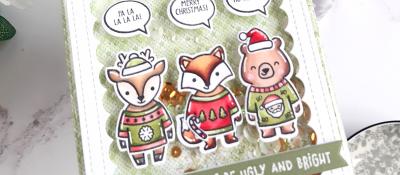
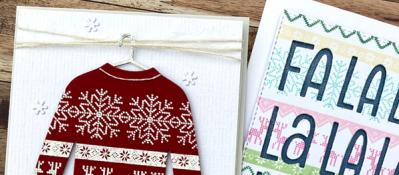
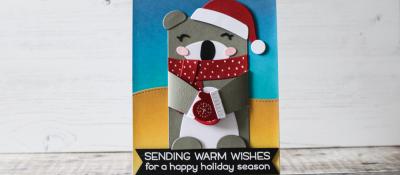
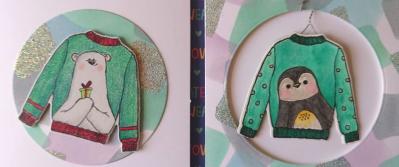
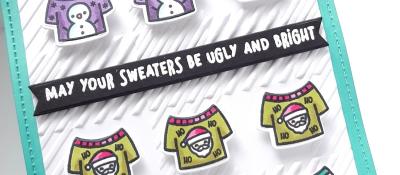
Ugly Sweaters
06/09/2022| Posted in Colouring Stamped Images, Copic Colouring, Die Cutting, Card Making, Interactive Cards, Heat Embossing| 226
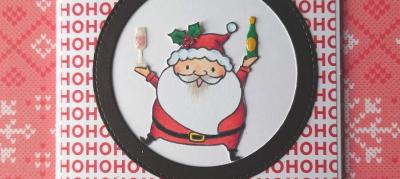
Tipsy Santa
07/09/2022| Posted in Copic Colouring, Die Cutting| 193


All Is Bright
01/10/2022| Posted in Copic Colouring, Card Making, Off The Page Projects, Stamped Background, Patterned Papers, Stamping, Clean & Simple, Clean and Simple (CAS)| 280


Bright Christmas
07/10/2022| Posted in Die Cutting, Card Making| 258
Cool Christmas
14/10/2022| Posted in Die Cutting, Card Making| 427
Bloom in Winter
08/10/2022| Posted in Copic Colouring| 203
Aurora Penguin
09/10/2022| Posted in Water Colouring| 343
Curio Attic Ornaments
12/10/2022| Posted in Die Cutting| 344
O' Christmas Tree
24/10/2022| Posted in Die Cutting, Stencilling with embossing paste| 451
Coffee Lovers Blog Hop Fall 22
11/11/2022| Posted in Stamp Layering| 19| 385
Snowy Day Fun
25/10/2022| Posted in Colouring Stamped Images, Die Cutting, Ink Blending, Card Making, Interactive Cards| 189
Santa Chimney Pop Up
26/10/2022| Posted in Die Cutting, Interactive Cards| 324


Krafty Noel
06/11/2022| Posted in Die Cutting| 2| 391
Meowy Christmas
12/11/2022| Posted in Copic Colouring| 254
Christmas Garnish
14/11/2022| Posted in Die Cutting, Clean & Simple| 380

Christmas Snowflake
18/11/2022| Posted in Card Making, Stamping| 1| 318

Polar Opposites
19/11/2022| Posted in Water Colouring, Card Making, Heat Embossing, Stamping, Clean & Simple, Clean and Simple (CAS)| 342

Bella's Tangled Kitty
23/11/2022| Posted in Copic Colouring| 230

Star Gazing
26/11/2022| Posted in Copic Colouring, Fussy Cutting| 262
Winter Pine
05/12/2022| Posted in Colouring Stamped Images, Stamping| 270
Month By Month - Part 1
01/12/2022| Posted in Colouring Stamped Images, Copic Colouring, Die Cutting, Stencilling, Stamped Background, Gift Making| 278


Christmas with Friends
10/12/2022| Posted in Copic Colouring, Die Cutting, Stamping Techniques, Partial Die Cutting, Fussy Cutting| 234
Polar Pals
17/12/2022| Posted in Copic Colouring, Die Embossing| 338

A whole lot of baubles going on......
19/12/2022| Posted in Die Cutting| 468

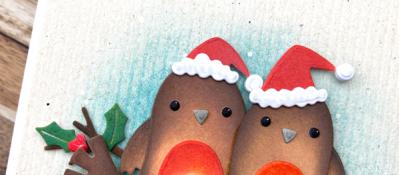
Last minute Robins
21/12/2022| Posted in Pencil Colouring| 363

Peaceful Olive Two Ways
26/04/2023| Posted in Die Cutting, Card Making, Stamp Layering, Stamped Background, Stamping, Layering Stencils, Clean & Simple, Stencilled backgrounds, Inlaid Die Cutting, Clean and Simple (CAS)| 255
Tips and Tricks for Easy Paper Piecing with Large Dies
09/07/2023| Posted in Die Cutting, Paper Piecing| 242
Holly Jolly Sparkly Christmas!
27/07/2023| Posted in Die Cutting, Stencilling| 276
Santa Tagging
04/08/2023| Posted in Die Cutting| 177
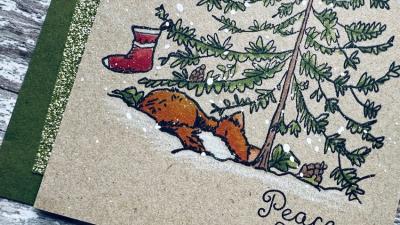
Peaceful Fox
12/08/2023| Posted in Copic Colouring, Card Making, Stamping, Clean & Simple, Clean and Simple (CAS)| 293
'Tis the Season...
30/08/2023| Posted in Die Cutting, Card Making| 287
Folk Art Reindeer
10/09/2023| Posted in Die Cutting| 213
Very Merry
16/09/2023| Posted in Die Cutting, Inky Backsides| 1| 206
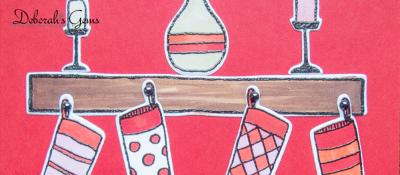
Hang a Stocking
20/09/2023| Posted in Die Cutting, Card Making, Stitching/Embroidery, Layering Stencils, Stencilled backgrounds| 240
Let's Be Merry
21/09/2023| Posted in Die Cutting, Stamping Techniques, Card Making, Heat Embossing, Shaker Cards| 183

'Tis the Season
28/09/2023| Posted in Die Cutting, Card Making| 262

Light Up Your Christmas
01/10/2023| Posted in Die Cutting, Homeware/Decorations| 1| 284
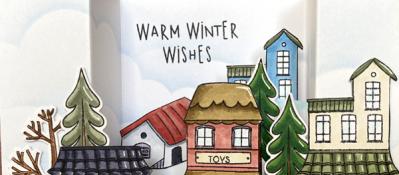
Tiny Houses
04/10/2023| Posted in Die Cutting, Card Making| 269

Gift Exchange
14/10/2023| Posted in Copic Colouring| 160
All aboard the Cheer Mobile!
18/10/2023| Posted in Die Cutting, Card Making, Stencilling, Stamping, Layering Stencils, Stencilled backgrounds| 214

Introducing Flashback Friday Bargains
20/10/2023| Posted in Copic Colouring| 1| 1003
Christmas Cloche
25/10/2023| Posted in Die Cutting, Card Making| 208
Big Beautiful Bow
01/11/2023| Posted in Die Cutting, Card Making| 495

Pretty CAS Gift
02/11/2023| Posted in Die Cutting, Ink Blending, Card Making, Clean & Simple, Clean and Simple (CAS)| 268
Figgy Pudding
08/11/2023| Posted in Die Cutting, Card Making, Stencilling, Layering Stencils, Stencilled backgrounds| 216
Hot Cocoa Anyone?
06/11/2023| Posted in Copic Colouring, Die Cutting, Card Making, Stamping, Clean & Simple, Clean and Simple (CAS), sales and giveaways, Flashback Friday Bargains| 210
Ta-Da! Seasons Tweetings.
07/11/2023| Posted in Colouring Stamped Images, Copic Colouring, Die Cutting, Card Making, Interactive Cards| 176
Joyful Christmas Sampler
15/11/2023| Posted in Card Making, Stencilling, Stencilling with embossing paste, Stencilled backgrounds| 207
Mini Christmas Gift Notebook & Co-Ordinating Card
13/11/2023| Posted in Die Cutting, Card Making, Gift Making, Stamping, Flashback Friday Bargains| 2| 211

Over the Rooftops
22/11/2023| Posted in Die Cutting, Card Making| 2| 258

Lil' Tags A Plenty and Store News
19/11/2023| Posted in Water Colouring| 247


Dashing Through the Snow
25/11/2023| Posted in Copic Colouring, Stencilling, Stencilling with embossing paste, Fussy Cutting| 183
Glitter & Snowflakes
30/11/2023| Posted in Die Cutting, Card Making, Stencilling, Stencilling with embossing paste, Clean and Simple (CAS)| 146

Flashback Friday Bargains - Concord and 9th
01/12/2023| Posted in Flashback Friday Bargains| 441
Simple 'Poinsettia' Card
04/12/2023| Posted in Copic Colouring, Pencil Colouring, Die Cutting, Stamping Techniques, Card Making, Stencilling with embossing paste| 122
Bulk Making Christmas Cards
03/12/2023| Posted in Die Cutting, Heat Embossing| 1| 251


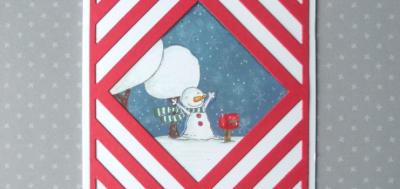
Snow Much Love
05/12/2023| Posted in Die Cutting, Stamping Techniques, Card Making, Heat Embossing, Clean & Simple| 132
12 Days of Anita Jerams Christmas Part 3
09/12/2023| Posted in Copic Colouring| 165
Banner & Bough
13/12/2023| Posted in Die Cutting, Ink Blending, Card Making, Stamp Layering, Stamping, Stencilled backgrounds| 165
Last Minute Christmas Cards
11/12/2023| Posted in Die Cutting, Card Making| 141
All Is Calm
20/12/2023| Posted in Die Cutting, Card Making, Fancy Folds, Clean & Simple, Clean and Simple (CAS)| 221
12 Days of Anita Jerams Christmas Part 4
16/12/2023| Posted in Copic Colouring, Fussy Cutting| 258
Elegant Christmas Gift Tags
18/12/2023| Posted in Die Cutting, Card Making| 199
2024 Part Three
21/12/2023| Posted in Ink Blending, Stamping Techniques, Stamp Layering, Stencilling, turnabouts, Gift Making, Masking, mixed media, Wreath Building| 206

Sweater Season
17/01/2024| Posted in Die Cutting, Card Making| 122
Related Products


Controversial Santas
28/08/2022

Birthday Forecast
14/02/2022

Encouraging Leaves
15/03/2021

Framed Snowdrops
22/02/2021

Birthday Blossoms
25/04/2024
Paper Bouquet Take 2
24/04/2024
How to add dimension to your projects!
23/04/2024
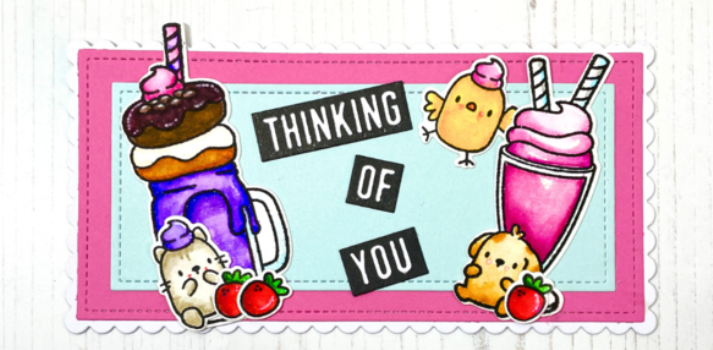
Cute Milkshake Card
22/04/2024