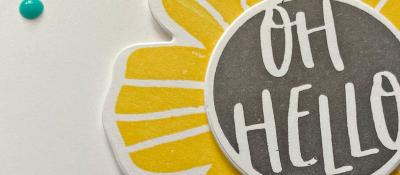
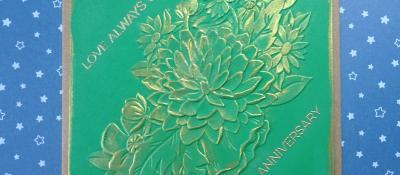
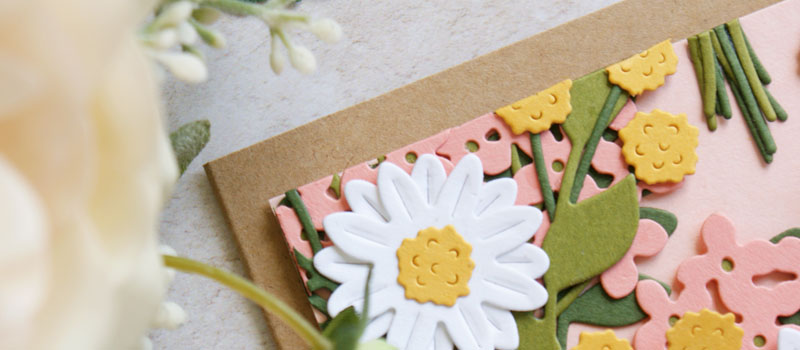
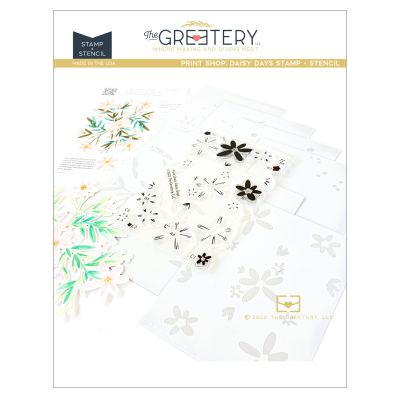
Daisy Days Two Ways

As many people will know, I am a huge fan of the Print Shop series from The Greetery.
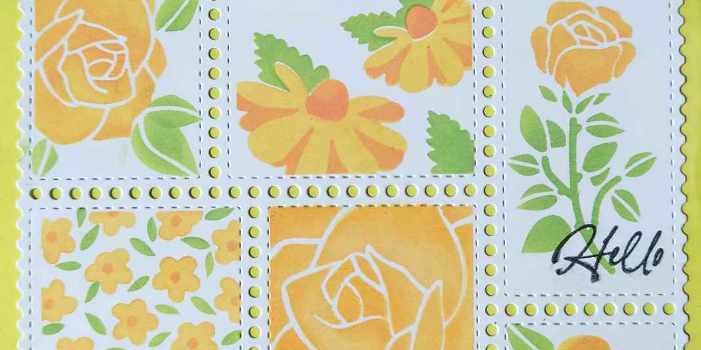
The whole premise of these products is that stamp and stencil combos are used to create pretty background patterns, and matching dies can be used for extra pop.
I love how quickly cards come together with the Print Shop series - they are all so cleverly thought out, enabling you to get lots of colour on your project and lots of detail while keeping the steps simple.
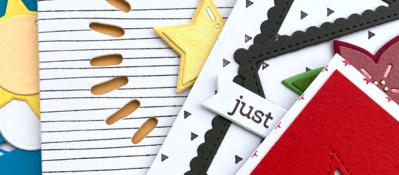
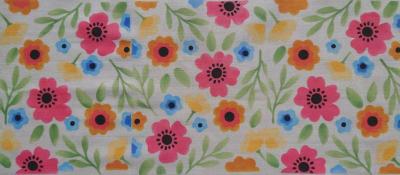
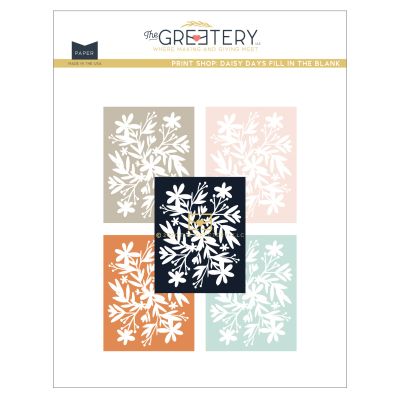
The Daisy Days product suite reminds me of the lovely botanical and floral prints you see from high-end stationers like Rifle Paper Co. Especially when combined with the coordinating Daisy Days "fill-in-the-blank" A2 paper pack (although I'd class the "paper" as cardstock, as it is a nice heavy weight and takes ink beautifully).
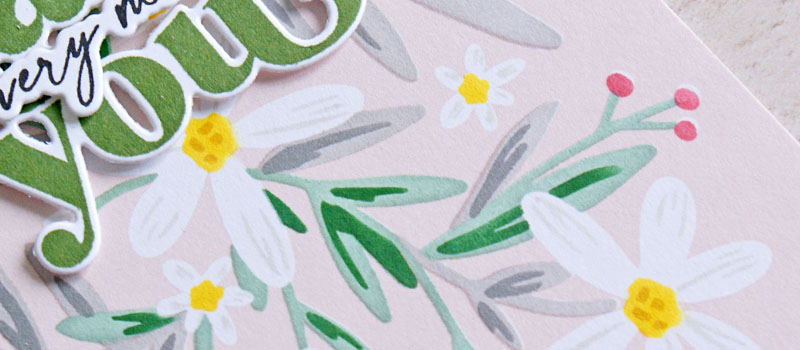
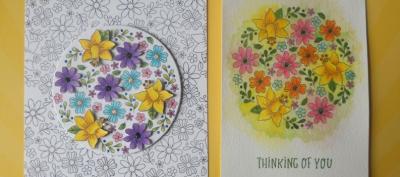
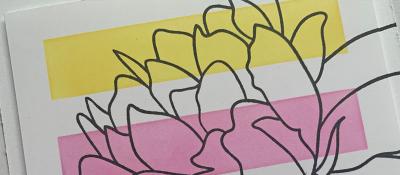
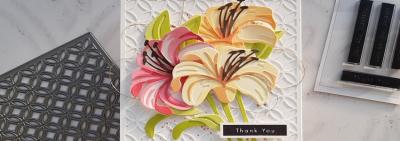
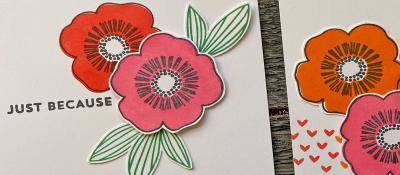
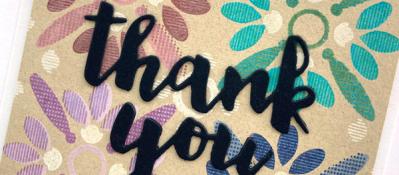
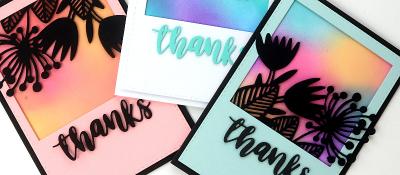
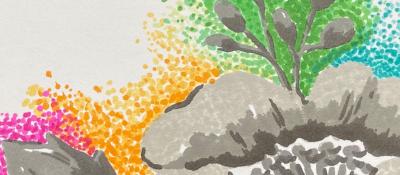
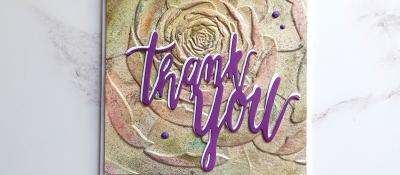
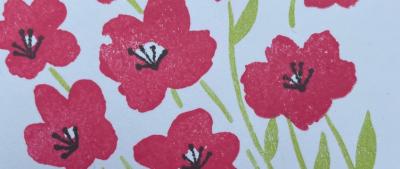
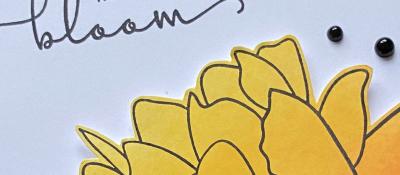
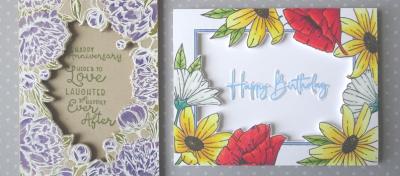
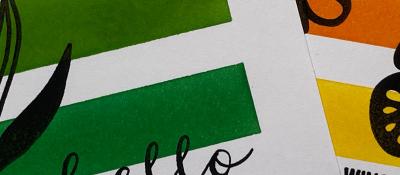
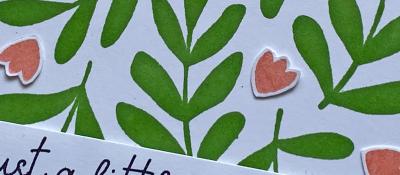
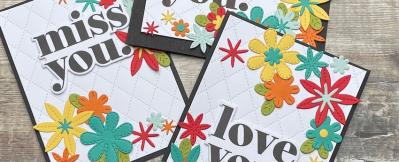
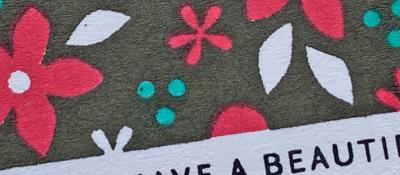
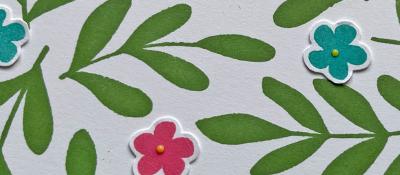
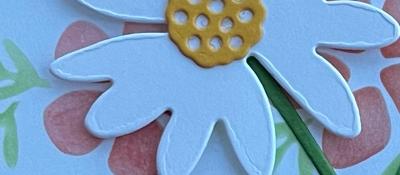
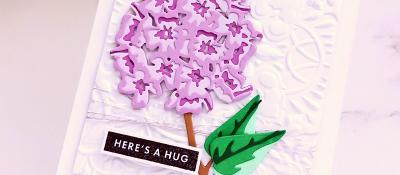
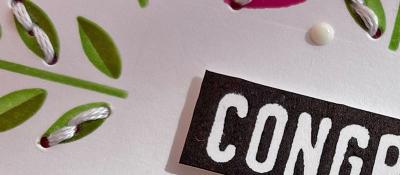
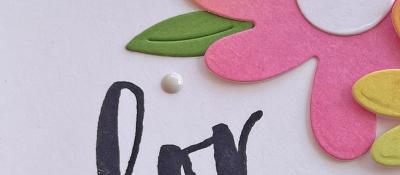
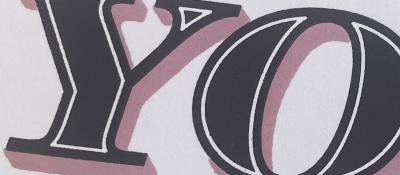
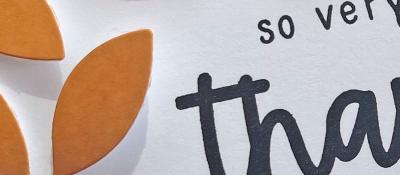
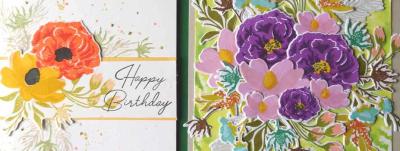
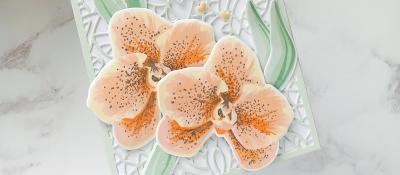
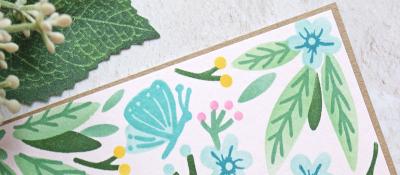
For my first card, I used one of the A2 papers in pink and applied every step of the stencilling except the one that colours in the actual daisies, as I wanted to leave them white.
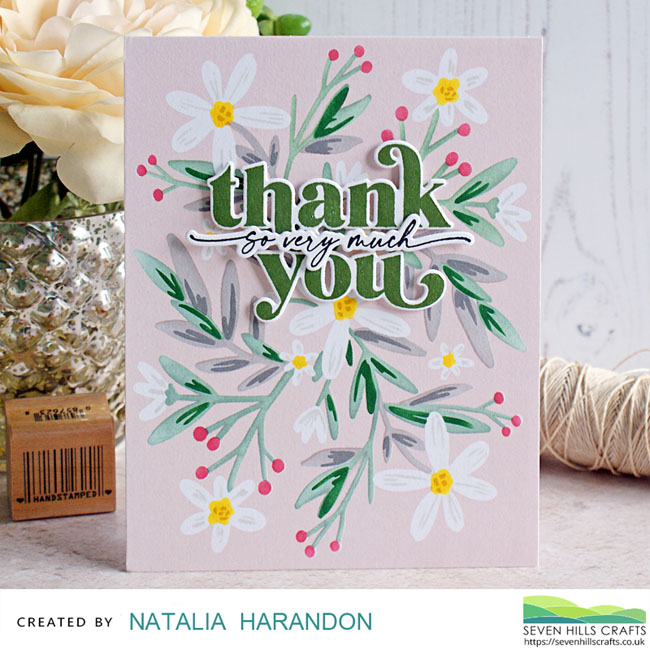
Once the stencilling is done, you just use the large stamp to add all the petal details in one go (I used light grey ink for this on the white daisies) and the little stamps for the flower centre details.
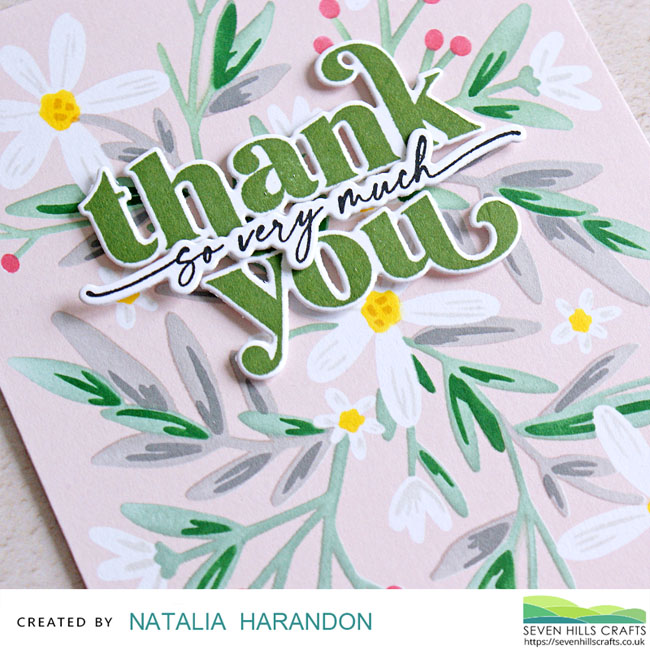
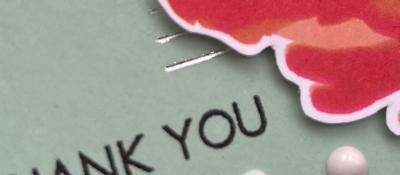
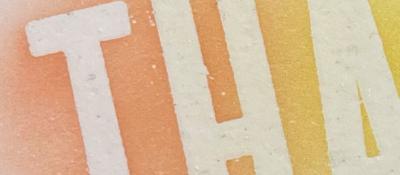
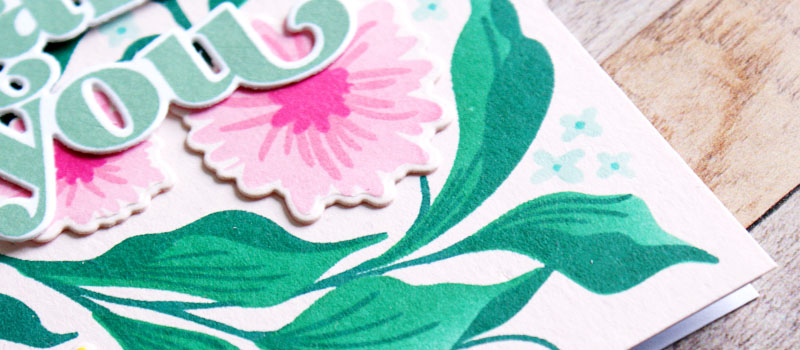
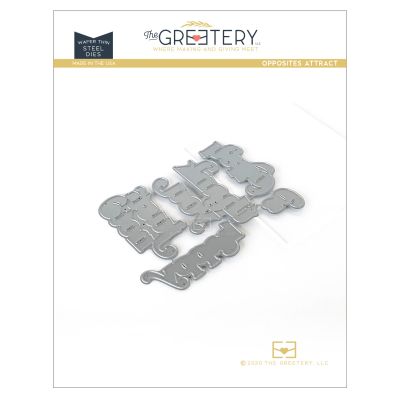
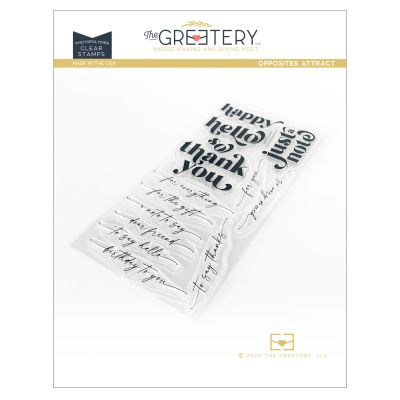
Inspired by the colour palette, I stamped the "Thank You" from Opposites Attract in an earthy green tone and used black ink for the scripty part of the sentiment.
~~~~
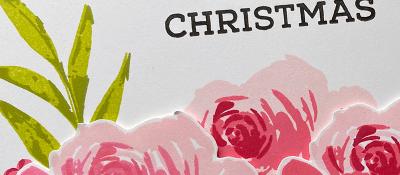
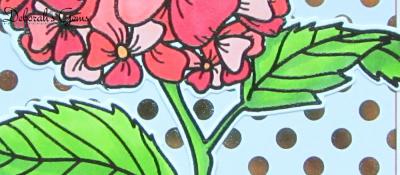
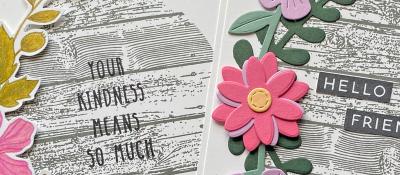
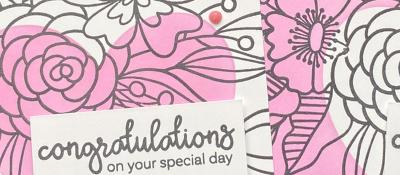
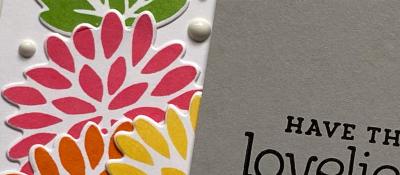
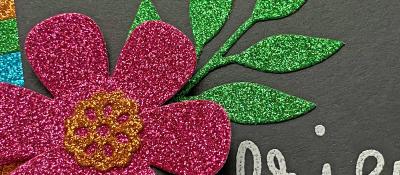
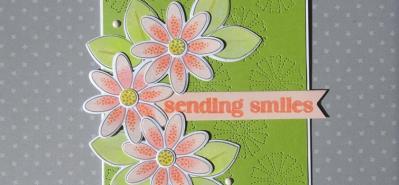
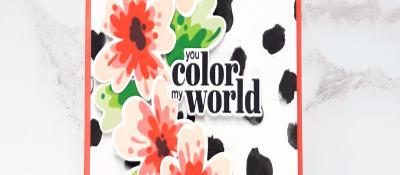
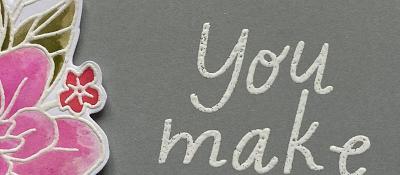
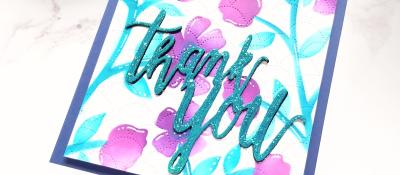
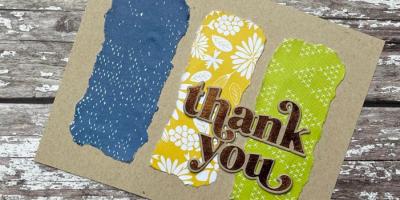
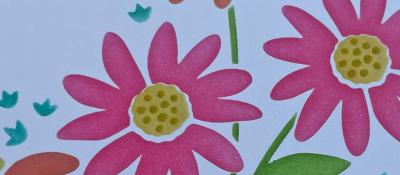
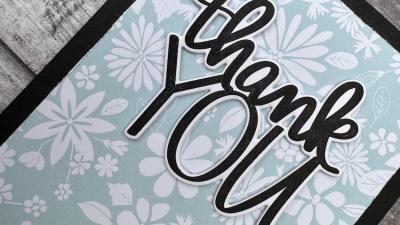
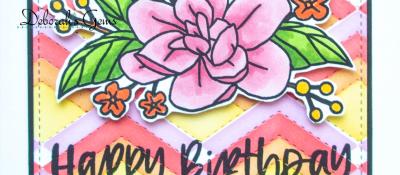
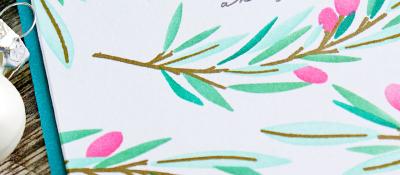
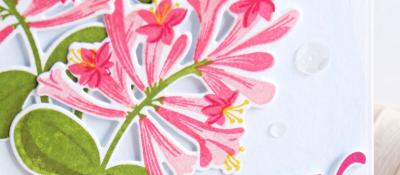
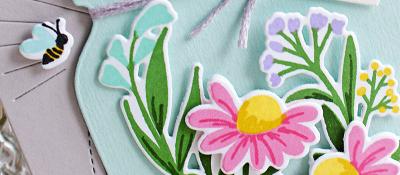
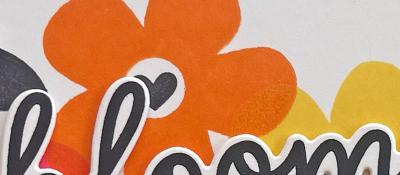
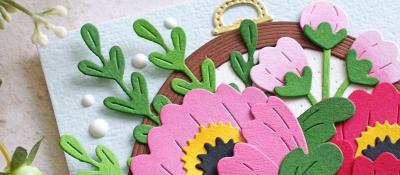
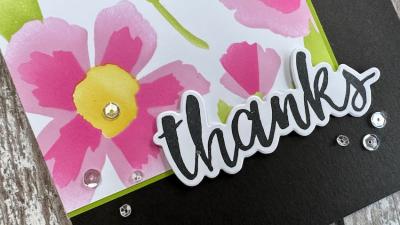
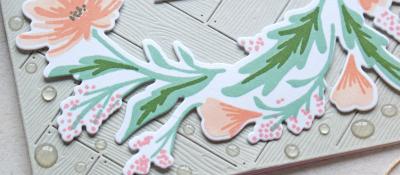
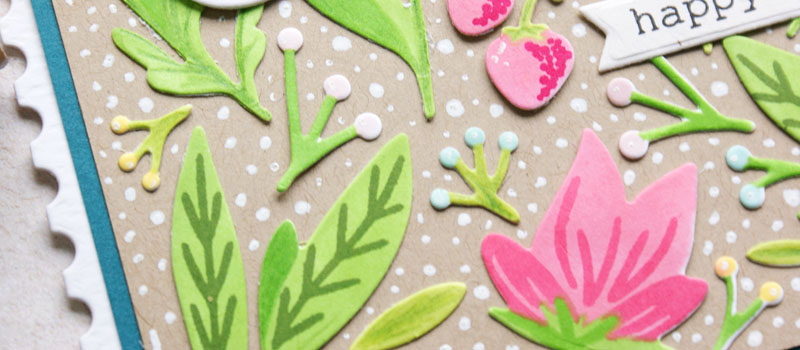
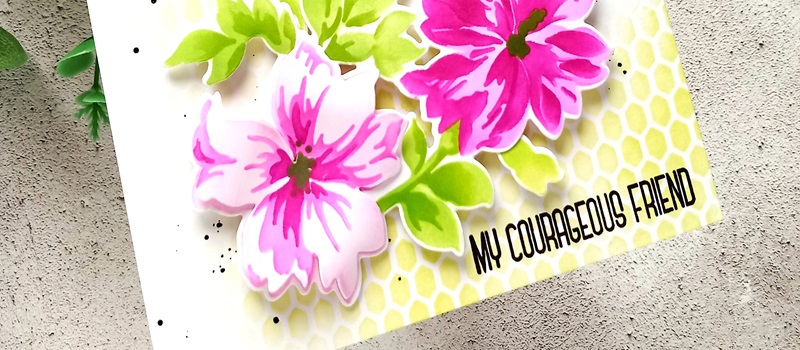
I was definitely in the mood for vibrant colours for my next card.
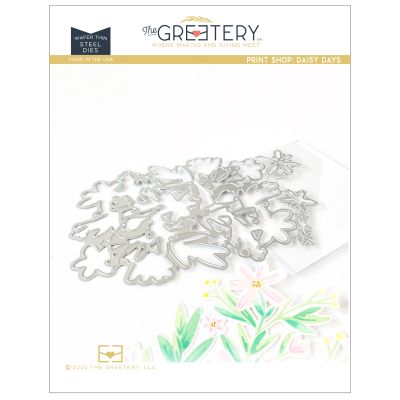
After stencilling and stamping the main background on white cardstock, I cut out the floral spray with the matching Daisy Days die.
I wanted some extra pop for this card, so stamped the daisies in two shades of pink and cut them out with the matching dies to layer over the stencilled daisies.
Top tip: If you only want to add a little dimension, glue layered up scraps of cardstock to the back of your die cuts before attaching them to your project. You can then save your foam tape/squares for when you need more dimension.
For even more colour contrast, I went with a cobalt blue card base so those flowers would really pop.

This time for the Opposites Attract sentiments I stamped the main sentiment in black and the scripty sentiment in cobalt blue ink.
As a final finishing touch, I added clear Nuvo drops around the floral spray.
So as you can see, you can create vastly different looks with the three products in the Daisy Days suite, from the subtle and simple to the bold and dimensional. So many possibilities!
Until next time, happy crafting!
10/05/2023
|
View: 272
|
Categories: Die Cutting, Card Making, Stamp Layering, Stamping, sentiment Focal Points, Layering Stencils, Clean & Simple, Stencilled backgrounds, Clean and Simple (CAS)
|
Tags: The Greetery
Related Posts
Jug of Flowers
01/03/2020| Posted in Water Colouring, Die Cutting| 1| 390


Hello Lovely
30/04/2020| Posted in Pencil Colouring, Card Making| 1| 356
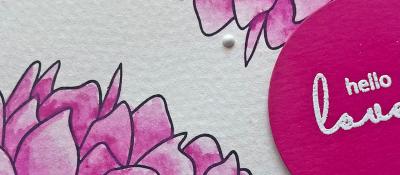
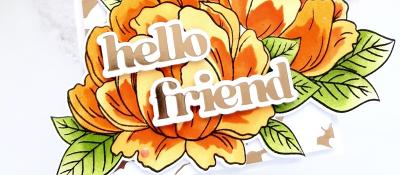
Hello Friend
07/05/2020| Posted in Card Making, Fussy Cutting| 249
Birthday Blooms
14/05/2020| Posted in Card Making, Stamped Background| 2| 247

Spotlight Sentiments
31/05/2020| Posted in Stamping Techniques, Stamped Background| 458
Say it with a handmade card
16/06/2020| Posted in Die Cutting| 396
Bowl of Blooms
18/06/2020| Posted in Colouring Stamped Images, Card Making| 345
Distress Speckled Egg and Repeating Pattern Stamping
21/06/2020| Posted in Stamping Techniques, Repeat Pattern Building| 545
Floral Splendour
28/06/2020| Posted in Pencil Colouring| 366
Aloha Sunshine
23/07/2020| Posted in Card Making| 295
Paper Hugs
05/08/2020| Posted in Copic Colouring, Die Cutting, Ink Blending, Card Making, Stamped Background, Interactive Cards, Heat Embossing| 421
For the love of pretty papers....
16/08/2020| Posted in Patterned Papers| 3| 499
Birthday Shakers
26/08/2020| Posted in Die Cutting, Stamping Techniques, Card Making, Stamped Background, Fussy Cutting, Heat Embossing, turnabouts, Repeat Pattern Building, Stamping on non paper surfaces| 421
Thank you, you are the best
29/09/2020| Posted in Die Cutting, Card Making| 284
Colorado Craft Company Week!
25/10/2020| Posted in Water Colouring| 2| 460
Delight in the Little Things
29/10/2020| Posted in Ink Blending, Card Making| 2| 255

Friends and Christmas
18/11/2020| Posted in Stamping Techniques, Card Making, Stamp Layering, Stamped Background, Masking| 1| 379
Floral Birthdays
09/12/2020| Posted in Colouring Stamped Images, Die Cutting, Stamping Techniques, Card Making, Stamped Background, Heat Embossing| 1| 237

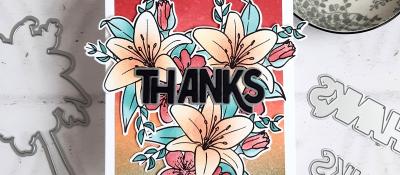
All the THANKS
10/12/2020| Posted in Die Cutting, Card Making| 2| 427
Tiled Thank you
21/12/2020| Posted in Repeat Pattern Building| 1| 339

Botanical Notecards
04/01/2021| Posted in Stamping Techniques, turnabouts| 1| 367
Birthday Roses
07/01/2021| Posted in Colouring Stamped Images, Copic Colouring, Card Making, Stencilling, Stamped Background| 1| 272
Magical Day
27/01/2021| Posted in Copic Colouring, Die Cutting, Card Making, Fussy Cutting, Heat Embossing| 1| 225
More Hearts!
10/02/2021| Posted in Die Cutting, Stamping Techniques, Card Making, Stamped Background, Heat Embossing, turnabouts| 1| 217
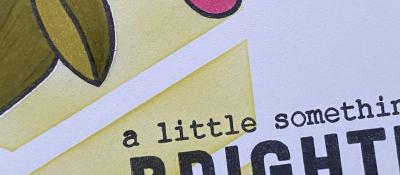
A Little Something...
18/02/2021| Posted in Colouring Stamped Images, Copic Colouring, Stamping Techniques, Card Making, Stencilling, Masking| 1| 264

Thanks a Bunch
23/02/2021| Posted in Die Cutting, Ink Blending| 1| 257
Birthday Blooms
04/03/2021| Posted in Die Cutting, Card Making| 1| 277
Thanks and Good Bye!
27/03/2021| Posted in Die Cutting, Ink Blending| 4| 355
A Little Note
01/04/2021| Posted in Colouring Stamped Images, Pencil Colouring, Card Making, Special Effects, Fussy Cutting| 1| 388
Hello Sunflowers
08/04/2021| Posted in Colouring Stamped Images, Pencil Colouring, Card Making, Fussy Cutting| 1| 327
Fun Fabric Guest
09/04/2021| Posted in Stamped Background, Repeat Pattern Building, Stamping on non paper surfaces, fabric, mixed media| 1| 327

Floral Fancies
25/04/2021| Posted in Off The Page Projects, Stamp Layering, Partial Die Cutting, Gift Making, Stamping on non paper surfaces| 2| 406
Eclectic Florals
29/04/2021| Posted in Colouring Stamped Images, Pencil Colouring, Die Cutting, Card Making, No Line Colouring, Fussy Cutting| 1| 366

Aloha
06/05/2021| Posted in Colouring Stamped Images, Copic Colouring, Card Making, Fussy Cutting, Stamping| 1| 280

Botanical Branches
13/05/2021| Posted in Water Colouring, Die Cutting, Stamping Techniques, Card Making, Stamped Background| 1| 313


Tie Dye Thanks
18/05/2021| Posted in Card Making| 1| 196
Going Dotty!
20/05/2021| Posted in Colouring Stamped Images, Copic Colouring, Stamping Techniques, Card Making, Stamp Layering, Stamping, sentiment Focal Points| 2| 329

My Favourite Human
22/05/2021| Posted in Copic Colouring, Fussy Cutting| 2| 325

You Are Flamazing
05/06/2021| Posted in Copic Colouring, Fussy Cutting| 314
Quick impact with embossing folders
08/06/2021| Posted in Card Making, Embossing Folders| 297
Cup of Friendship
10/06/2021| Posted in Colouring Stamped Images, Pencil Colouring, Stamping Techniques, Card Making, Heat Embossing, Stamping| 304
Literally The Best
13/08/2021| Posted in Pencil Colouring, Die Cutting| 337

A Wreath for All Seasons
01/09/2021| Posted in Copic Colouring, Die Cutting, Card Making, Stamped Background, Fussy Cutting, Heat Embossing, turnabouts, Stamping| 460
The Season In-Between!
02/09/2021| Posted in Ink Blending, Card Making| 249
Festive One Layer
09/09/2021| Posted in Colouring Stamped Images, Copic Colouring, Stamping Techniques, Card Making, Masking, Stamping| 250


One Layer Wonders!
17/02/2022| Posted in Ink Blending, Card Making, Stencilling, Stamping, Clean & Simple, Stencilled backgrounds| 322

Getting the most from foil plates
27/02/2022| Posted in Hot Foil, Letterpress| 1| 359

Hello Dear Friend
10/03/2022| Posted in Stamping Techniques, Card Making, Stamped Background, Fussy Cutting, Stamping, Clean & Simple| 233
Ink Blending on Solid Stamps
13/03/2022| Posted in Die Cutting, Ink Blending Direct on Stamps| 686
Smooshed Blooms
17/03/2022| Posted in Colouring Stamped Images, Water Colouring, Die Cutting, Stamping Techniques, Card Making, Special Effects, Stamping, Clean & Simple| 290
Tiny Flowers
18/03/2022| Posted in Die Cutting| 296

Friendship & Smiles
07/04/2022| Posted in Card Making, Stamped Background, Stamping, sentiment Focal Points, Clean & Simple| 298
Cut, Colour, Stick.. it's as easy as 1,2,3
26/04/2022| Posted in Die Cutting, Card Making| 159
3 ways with Castle Garden Stamp Set
03/05/2022| Posted in Colouring Stamped Images, Water Colouring, Die Cutting, Card Making, Stencilling, Heat Embossing, Stamping, Embossing Folders| 359
Wildflowers and Weeds
13/05/2022| Posted in Water Colouring| 1| 362
Thanks So Much
31/05/2022| Posted in Die Cutting| 295
Magnolia Smiles
07/06/2022| Posted in Water Colouring, Stamping Techniques, Card Making, Fussy Cutting, Heat Embossing| 324

Get Well Peonies
23/06/2022| Posted in Stamping Techniques, Card Making, Stamp Layering, Repeat Pattern Building, Masking| 294
Happy Hollyhocks
06/07/2022| Posted in Water Colouring, Die Cutting| 831
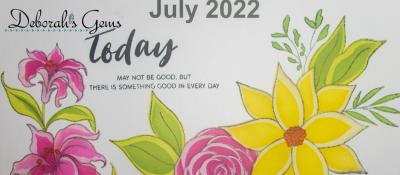
Floral Calendar Page
15/07/2022| Posted in Stamp Layering, Homeware/Decorations| 386
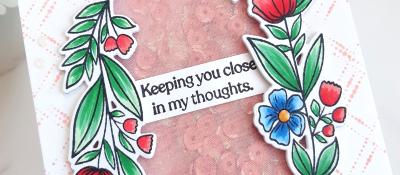
Stitched Florals
23/07/2022| Posted in Die Cutting, Card Making, Off The Page Projects, Stitching/Embroidery, Stamping, sentiment Focal Points, Clean & Simple| 449
One for the Guys & One for the Girls.
28/07/2022| Posted in Die Cutting, Card Making, Stamped Background, Stamping, Inlaid Die Cutting| 451
A Mixed Media Crafternoon
07/08/2022| Posted in Die Cutting, Stencilling with embossing paste, Heat Embossing, mixed media, Hot Foil, Die Cut Felt and Fabric| 386
Pick A Pattern
25/08/2022| Posted in Stamping Techniques, Card Making, Stamping, Clean & Simple, Clean and Simple (CAS)| 299
Grateful pumpkins
04/09/2022| Posted in Pencil Colouring| 246
Simply Celebrate Fall
30/09/2022| Posted in Copic Colouring, Die Cutting, Ink Blending, Card Making, Fussy Cutting, Patterned Papers, Stamping| 250
Autumnal Warm Wishes
10/11/2022| Posted in Stamping Techniques, Card Making, turnabouts, Clean & Simple, Clean and Simple (CAS)| 334
Faux Rub-On Technique
27/11/2022| Posted in Embossing Folders| 299
Month By Month - Part 2
08/12/2022| Posted in Ink Blending, turnabouts| 224
Fantasy Jungle
13/12/2022| Posted in Ink Blending, Card Making, Stencilling, Embossing Folders, Layering Stencils| 199
Month By Month - Part 4
22/12/2022| Posted in Die Cutting, Ink Blending, Stencilling, turnabouts, Gift Making, Layering Stencils| 356

One Background - Four Ways
20/01/2023| Posted in Copic Colouring, Die Cutting, Card Making, Stamped Background, Heat Embossing, Stamping| 242

Glorious Gouache
01/02/2023| Posted in gouache painting| 277
Simple Hot Foil Background
02/02/2023| Posted in Die Cutting, Stamping Techniques, Card Making, Stamp Layering, Clean & Simple, Hot Foil| 241
Encouraging Notecards
06/02/2023| Posted in Die Cutting, Card Making| 1| 223
Organic Cherry Blossom
08/02/2023| Posted in Die Cutting, Ink Blending| 203
Thank You
18/02/2023| Posted in Die Cutting, Patterned Papers| 231
Fabric that's a sweet as can bee
19/02/2023| Posted in Stencilling, fabric| 220
A Trio of Cards
24/02/2023| Posted in Copic Colouring, Card Making, Stencilling, Fussy Cutting, Stamping, Stencilled backgrounds| 327

All The Thanks
23/03/2023| Posted in Stamping Techniques, Card Making| 248
Garden Goodness Birthday Blooms
12/04/2023| Posted in Die Cutting, Card Making, Stamp Layering, Stencilling, Layering Stencils, Stencilled backgrounds| 332
Tiny Ninjas
29/04/2023| Posted in Stamping Techniques, Stamping| 181
Hold on Tight
27/05/2023| Posted in Copic Colouring, Die Cutting| 219
Threads Of Kindness
20/04/2023| Posted in Die Cutting, Card Making, Stencilling, mixed media, Layering Stencils, Clean & Simple| 294
Peaceful Olive Two Ways
26/04/2023| Posted in Die Cutting, Card Making, Stamp Layering, Stamped Background, Stamping, Layering Stencils, Clean & Simple, Stencilled backgrounds, Inlaid Die Cutting, Clean and Simple (CAS)| 255
Thank You Blossom
27/04/2023| Posted in Stamping Techniques, Card Making, Stamped Background, Clean and Simple (CAS)| 1| 225


Ornate Florals
02/06/2023| Posted in Die Cutting, Faux Embossing| 178
Takes the Cake!
12/06/2023| Posted in Die Cutting, Card Making, Stamped Background, Stamping, Layering Stencils| 190
Whaley Big Thank You
24/06/2023| Posted in Copic Colouring| 140

Super Thanks
26/06/2023| Posted in Colouring Stamped Images, Die Cutting, sentiment Focal Points, Clean & Simple, Stencilled backgrounds| 154

Hey Beautiful
29/06/2023| Posted in Colouring Stamped Images, Copic Colouring, Stamping Techniques, Card Making, Heat Embossing, Clean & Simple| 173
Letterpress without a Betterpress? No problem!
07/07/2023| Posted in Letterpress| 1| 420
Billowing Peonies
18/07/2023| Posted in Ink Blending, Card Making, Stencilling, Layering Stencils, Hot Foil, Stamp Wheel| 196


Bloomin' Wonderful!
03/08/2023| Posted in Die Cutting, Stamping Techniques, Card Making, Stamped Background, Clean & Simple| 183
Just for You
16/08/2023| Posted in Die Cutting, Card Making, Stamp Layering, Stamped Background, Stamping, sentiment Focal Points| 206
Picked Posies - Just for You
23/08/2023| Posted in Die Cutting, Card Making| 201
Thanks Sampler
21/08/2023| Posted in Die Cutting, Clean & Simple| 201
Friday Feel Good Floral
25/08/2023| Posted in Ink Blending, Stencilling, Clean & Simple, Stencilled backgrounds, Stamp Wheel| 220
Floral Thanks
09/09/2023| Posted in Die Cutting, Ink Blending| 217
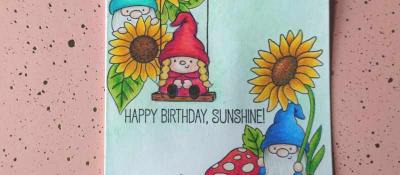
Gnomes in the sunflower patch
29/09/2023| Posted in Pencil Colouring| 198
Stitched Leaves
07/10/2023| Posted in Ink Blending, Inky Backsides| 173
Thanks & Goodbye
09/10/2023| Posted in Colouring Stamped Images, Copic Colouring, Card Making, Clean & Simple| 4| 239
Pumpkin Treat Boxes
13/10/2023| Posted in Die Cutting, Gift Making| 185
Make a Wish Mini Slimline Card
30/10/2023| Posted in Pencil Colouring, Die Cutting, Card Making, Mini Slimline Card, Flashback Friday Bargains| 214

Flashback Friday Bargains - Concord and 9th
01/12/2023| Posted in Flashback Friday Bargains| 441
2024 Part One
07/12/2023| Posted in Die Cutting, Ink Blending, Stencilling, Gift Making, Stamping, Stencilled backgrounds| 146
2024 Part Two
14/12/2023| Posted in Ink Blending, Stencilling, Stamped Background, turnabouts, Gift Making, Stamping, Layering Stencils, Stencilled backgrounds, Stamp Wheel| 193
2024 Part Three
21/12/2023| Posted in Ink Blending, Stamping Techniques, Stamp Layering, Stencilling, turnabouts, Gift Making, Masking, mixed media, Wreath Building| 206
Out with the old, in with the new!
03/01/2024| Posted in Card Making, sentiment Focal Points| 166
Hello 2024
04/01/2024| Posted in Card Making, Stencilling, Layering Stencils, Clean & Simple, Clean and Simple (CAS)| 154
Wintery Thanks
06/01/2024| Posted in Copic Colouring, Die Cutting| 96
More than Merry Sprigs
10/01/2024| Posted in Stamping Techniques, Card Making, Stamp Layering, Stamped Background, Stamping| 154

Metallic Magic: Crafting a Dramatic Black Floral Card
29/01/2024| Posted in Water Colouring, Die Cutting, Stamping Techniques, Card Making, Flashback Friday Bargains| 182
Endless Creativity: A Repeatable Card Design Gem!
05/02/2024| Posted in Copic Colouring, Card Making, Stencilling, Fussy Cutting, Stamping, Embossing Folders, Flashback Friday Bargains| 174
Garden Goodness
07/02/2024| Posted in Card Making, Stamp Layering, Stencilling, Layering Stencils, Clean & Simple, Stencilled backgrounds, Clean and Simple (CAS)| 172
Mother's Day Whirl
03/03/2024| Posted in Copic Colouring, Interactive Cards| 473
I Hope You Know...
07/03/2024| Posted in Stamping Techniques, Card Making| 563
A Sweet Duo
14/03/2024| Posted in Colouring Stamped Images, Die Cutting, Stamping Techniques, Card Making, Stencilling, colouring die cuts| 192
One panel two ways
17/03/2024| Posted in Die Cutting| 203

Primrose Garden Greetings
20/03/2024| Posted in Die Cutting, Card Making| 224
Sweet Hello
21/03/2024| Posted in Die Cutting, Card Making, Partial Die Cutting, Stencilling, Stencilled backgrounds| 138
A Basket Full of Care
24/03/2024| Posted in Die Cutting| 193
Letterpressing Hotfoils
31/03/2024| Posted in Letterpress| 154

Flashback Friday Bargains - Leaves and Flowers
05/04/2024| Posted in Flashback Friday Bargains| 502
Sending Hugs & Snuggles
09/04/2024| Posted in Die Cutting, Ink Blending, Card Making, Stencilling, Stamping, Embossing Folders| 142
Bouquet Wishes
10/04/2024| Posted in Die Cutting, Card Making| 146

Birthdays and Backgrounds
14/04/2024| Posted in Die Cutting| 177

Paper Bouquet
17/04/2024| Posted in Die Cutting, Card Making| 107
Paper Bouquet Take 2
24/04/2024| Posted in Die Cutting, Card Making| 82
How to add dimension to your projects!
23/04/2024| Posted in Die Cutting, Ink Blending, Card Making, Stencilling, Stamping, Layering Stencils| 64
Related Products

Controversial Santas
28/08/2022

Birthday Forecast
14/02/2022

Encouraging Leaves
15/03/2021

Framed Snowdrops
22/02/2021

Birthday Blossoms
25/04/2024
Paper Bouquet Take 2
24/04/2024
How to add dimension to your projects!
23/04/2024
Cute Milkshake Card
22/04/2024