Distress Speckled Egg and Repeating Pattern Stamping

Hi all, hope you're all enjoying Father's Day and that lockdown isn't preventing you seeing them. I think my Dad would have gone crazy being stuck indoors this long and not able to sit on a riverbank to fish so although I'd love the chance to spend today with him it's perhaps for the best that he's not here to suffer lockdown.
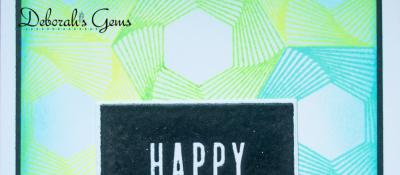
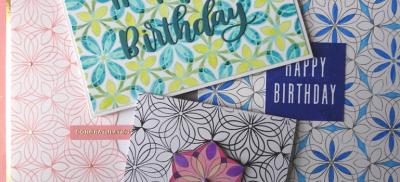
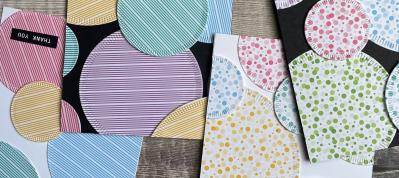
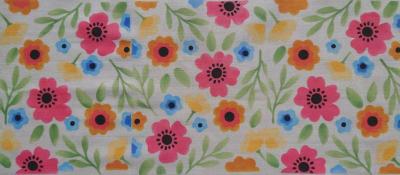
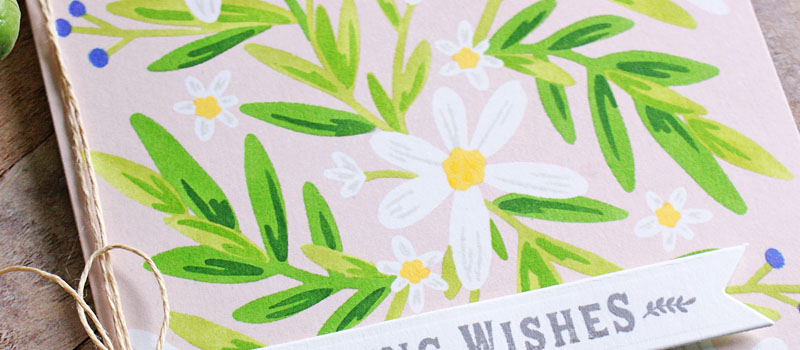
Today I'm focusing on two things - showing off the new colour in the distress range from Tim Holtz and Ranger and how to create your own perfect repeating pattern using stamps. The technique I'm using here is one I picked up from Dawn, the designer behind the Wplus9 brand, and rather than me video myself doing it (not brave enough for that yet!) here's a link to her original video.
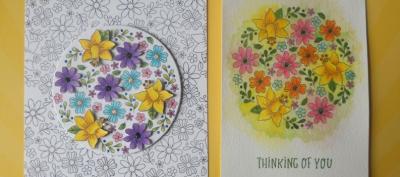
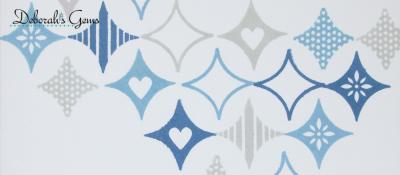
Basically the essence is you create yourself a jig/template from a 6" square piece of copy paper and lay out your pattern in one quadrant. Then using a stamping platform or stamp jig if you don't have a platform (you can make your own jig from lego if you don't have one of those either - it just means you can align your stamps in the same place every time) you simply repeat stamp the pattern in all 4 quandrants to build up your pattern.
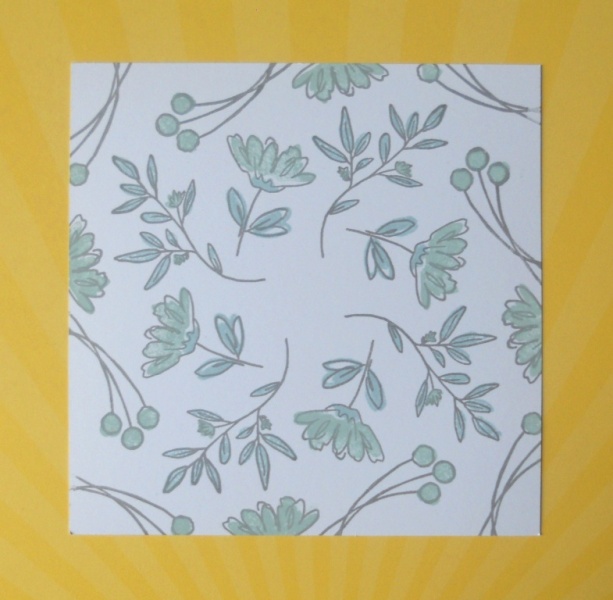
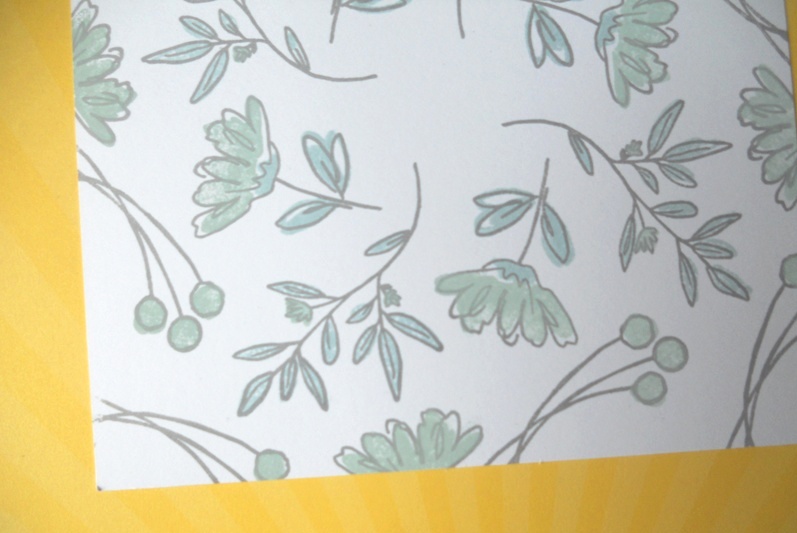
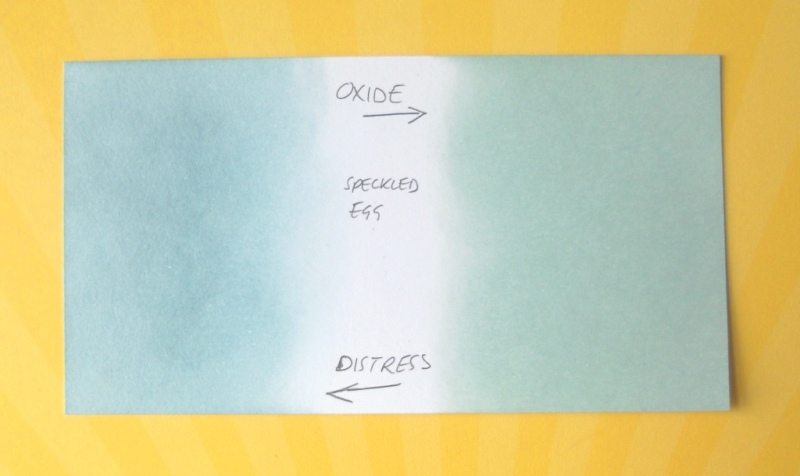
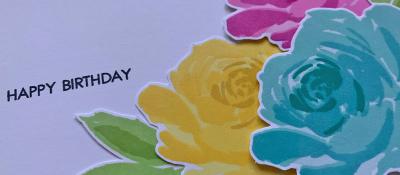
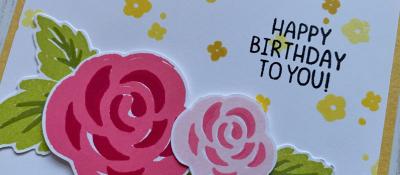
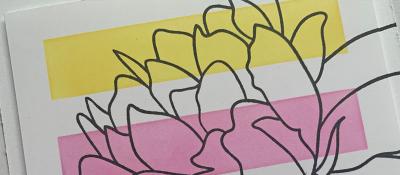
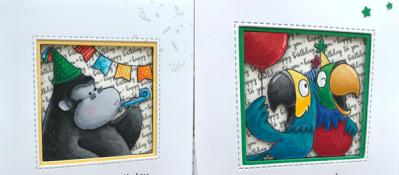
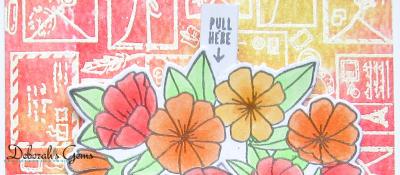
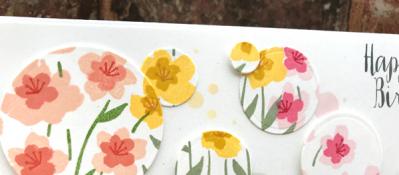
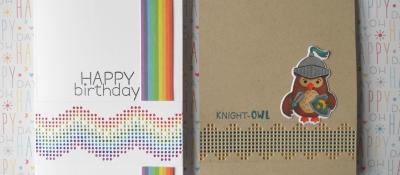
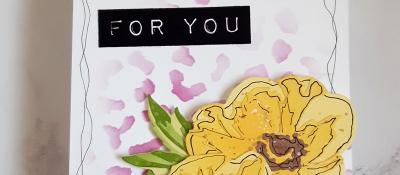
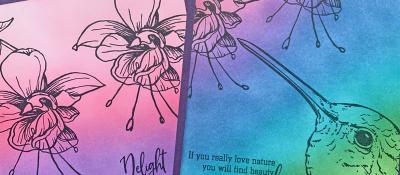
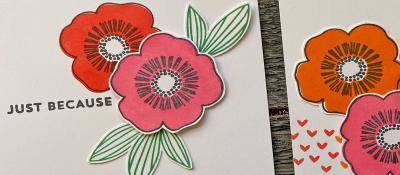
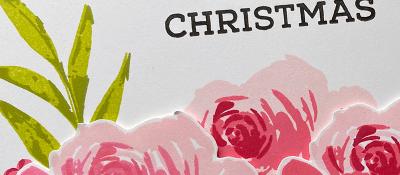
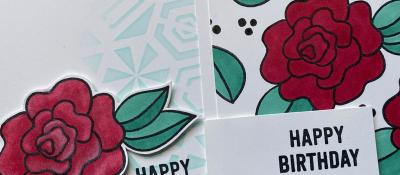
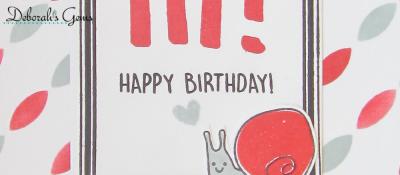
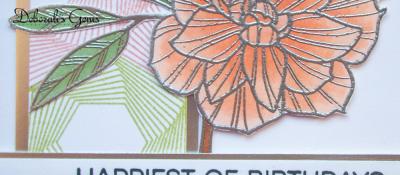
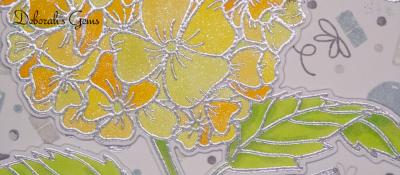
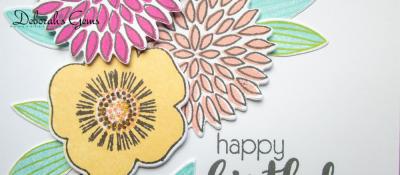
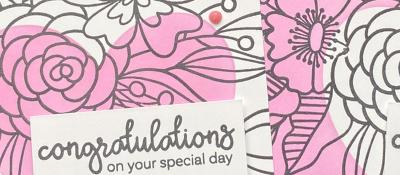
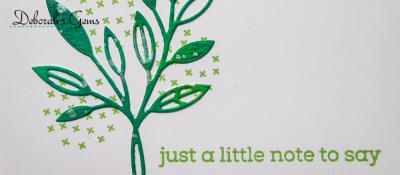
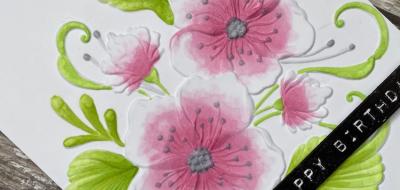
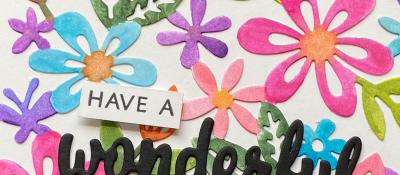
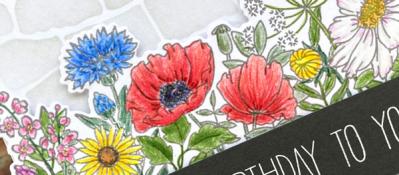
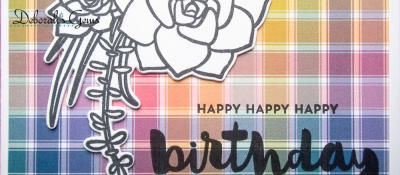
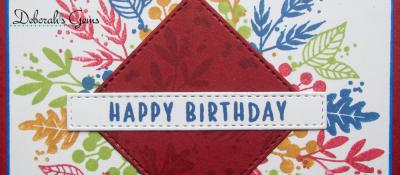
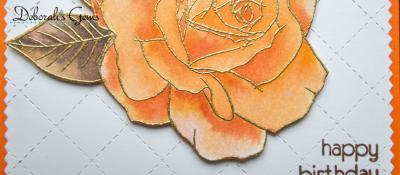
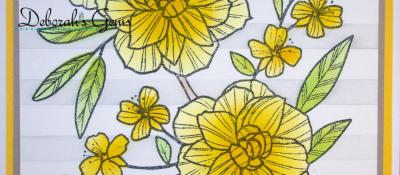
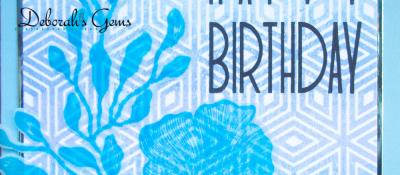
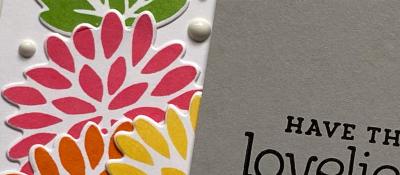
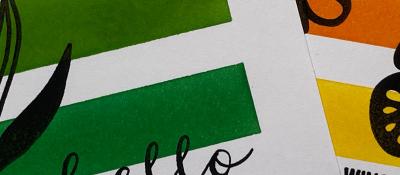
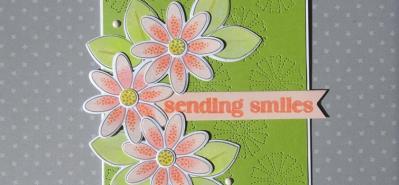
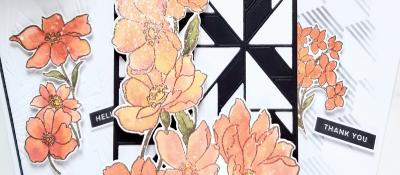
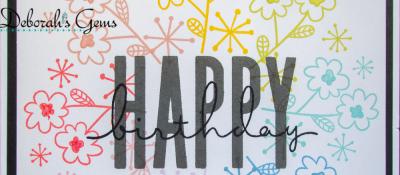
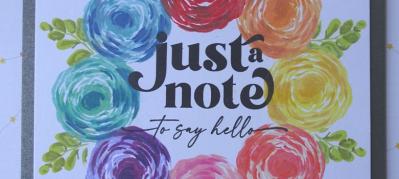
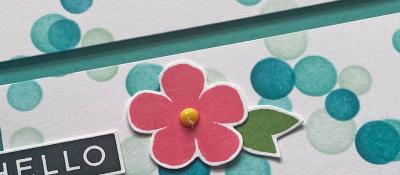
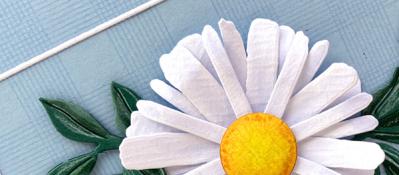
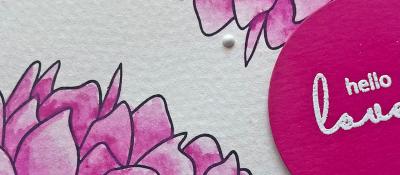
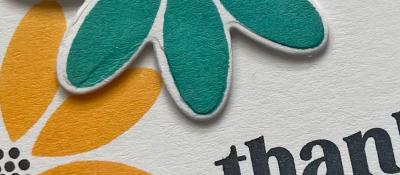
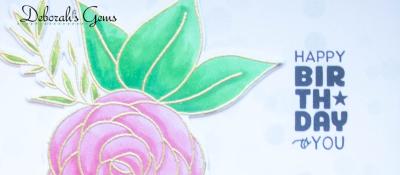
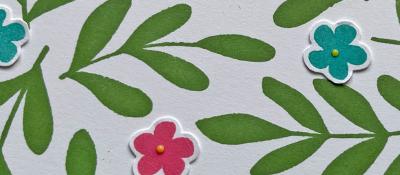
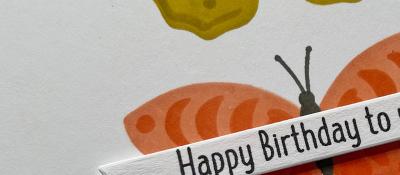
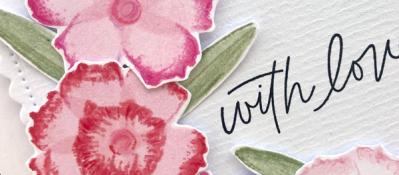
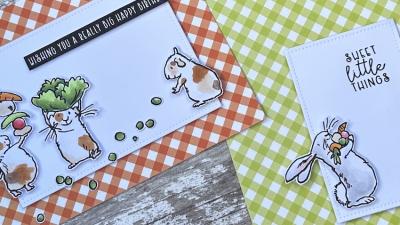
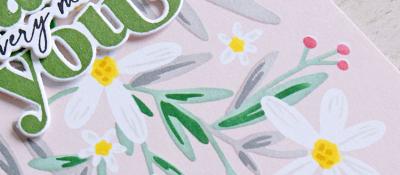
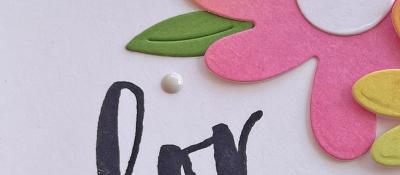
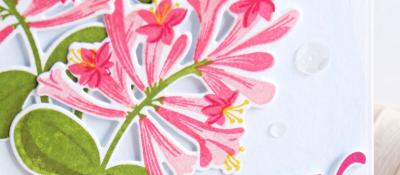
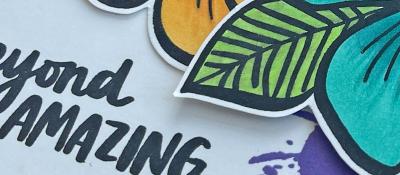
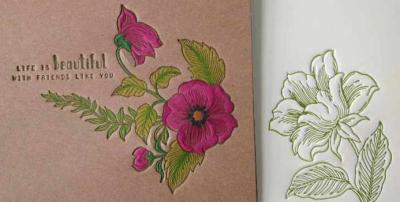
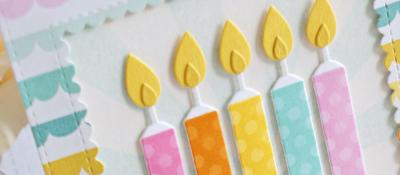
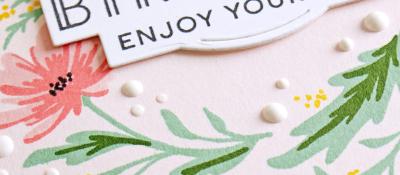
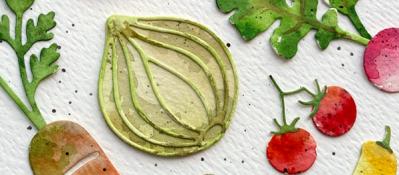
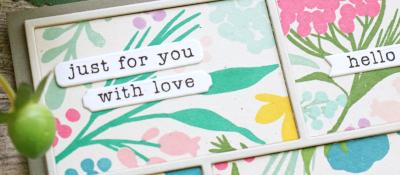
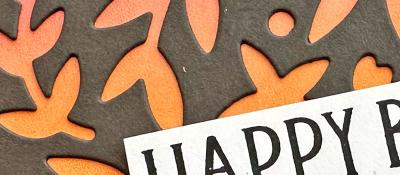
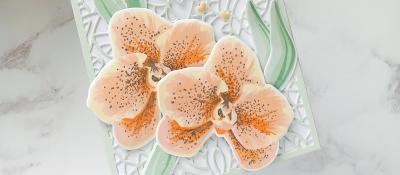
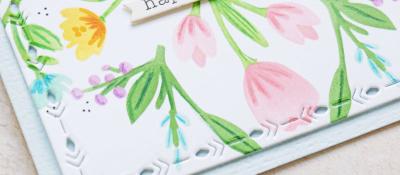
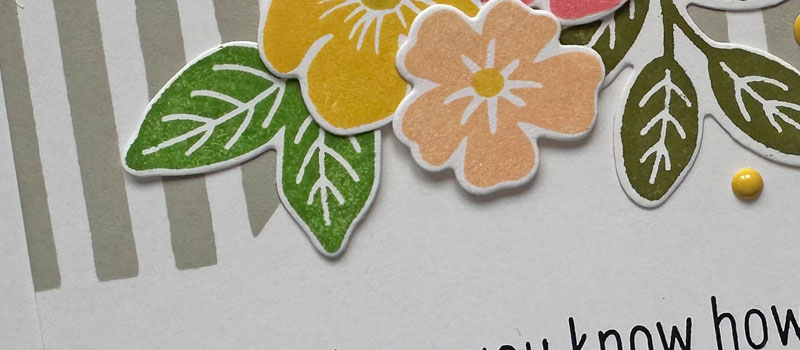
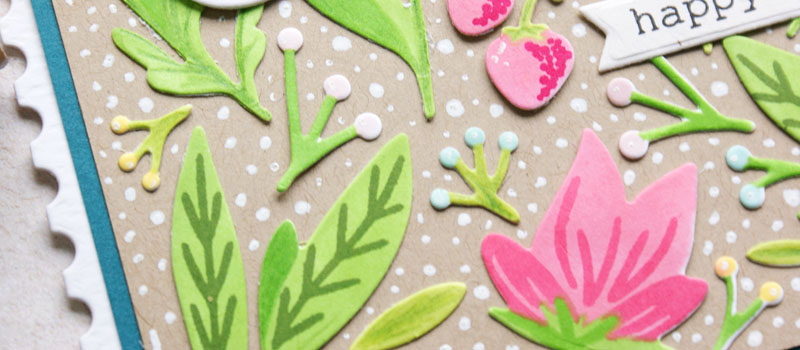
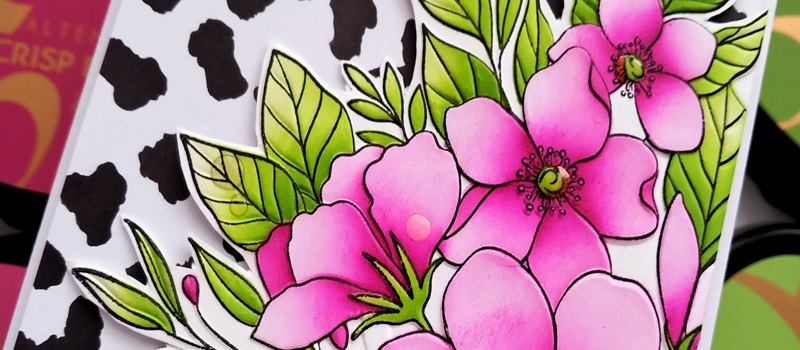
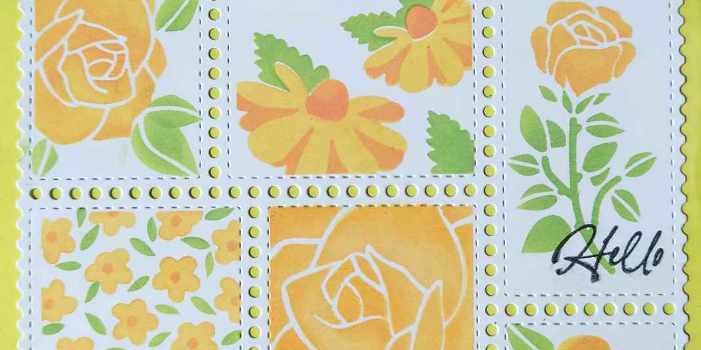
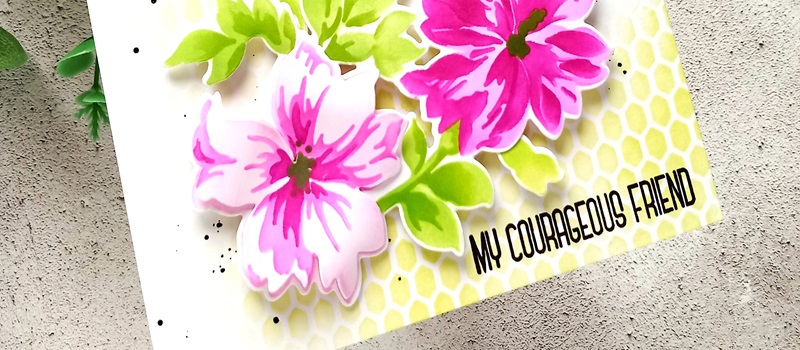
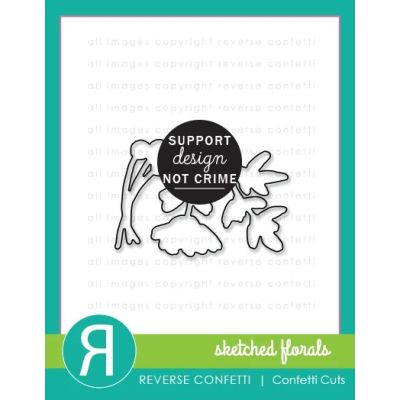
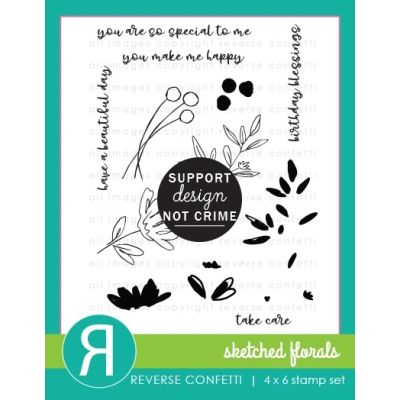
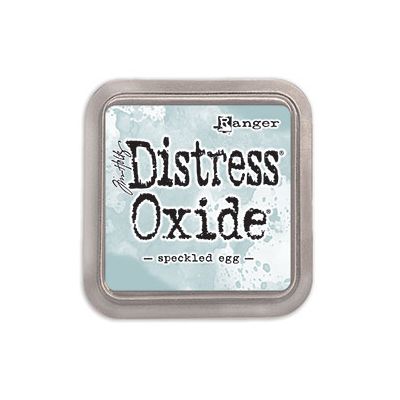
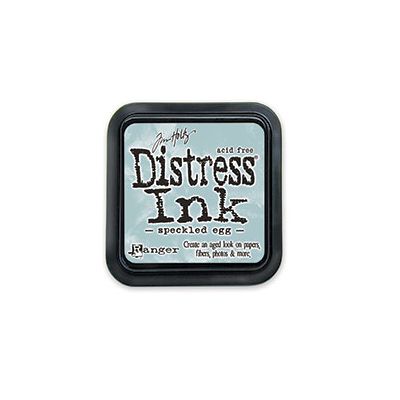
I used one of the fabulous new stamps from the Reverse Confetti birthday release - sketched florals which is just so delicate and pretty. I also wanted to play with the new colour in the distress range so kept the colours simple. All the outlines were stamped in Hickory Smoke Distress Oxide. The solids were done in Speckled Egg but in two different versions - the leaves are in the standard distress and the flowers in oxide. Although they are both speckeld egg there is a subtle difference to the two inks.
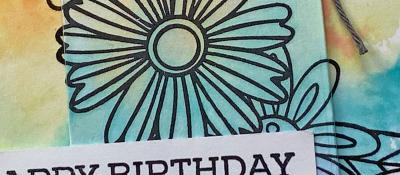
We had some questions in our VIPs group on Facebook about what the differnce is between Distress and Oxides. The first distinct difference is one of formula. Distress Inks fall into the family of dye inks. Dye inks are transparent in nature and, due to their "thin" quality, dry quickly. Distress Oxides, on the other hand, are primarily constructed of pigment ink, a type of ink that is opaque and, due to its natural thickness, dries more slowly. It is important to note, however, that Distress Oxides are technically a hybrid - containing mostly pigment ink, but also some dye ink too.
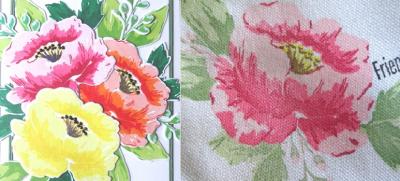
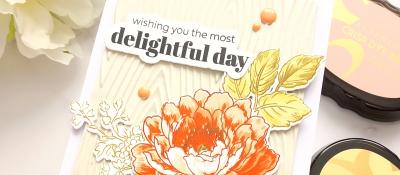
Distress Oxides begin to oxidize immediately, giving them a chalky finished look, even though they contain absolutely no chalk. Because of this milky oxidizing effect and the fact that they are pigment inks, which makes them more opaque, they tend to "cover up" their background (i.e. the white cardstock). This makes the Distress Inks appear brighter and more vibrant in color when used on a white piece of cardstock (hence why the leaves on my pattern seem brighter and bluer) but had I stamped the pattern on coloured card (like kraft) then the standard distress wouldn't show up as much as the oxide.
Although the original distress were loved by many crafters for ink blending, I personally could never get a good result with them. If I do any blended background now it is ALWAYS with oxides - for me them blend seemlessly and I am never disappointed. I did a quick blend of both new pads here and had to work much harder on the standard distress to get a smooth finish but I am sure those who are better with ink than me get great results - it's as with most things, personal preference.
There are many more properties for both inks - if you want to get to knwo them better than I suggest getting it direct from the guy who developed them for Ranger. Here's a video where Tim explains the difference when oxides were first released.
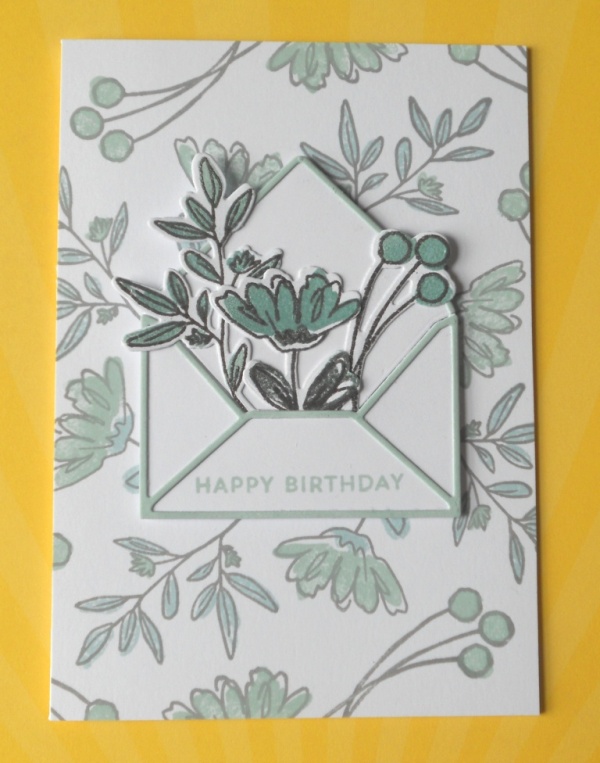
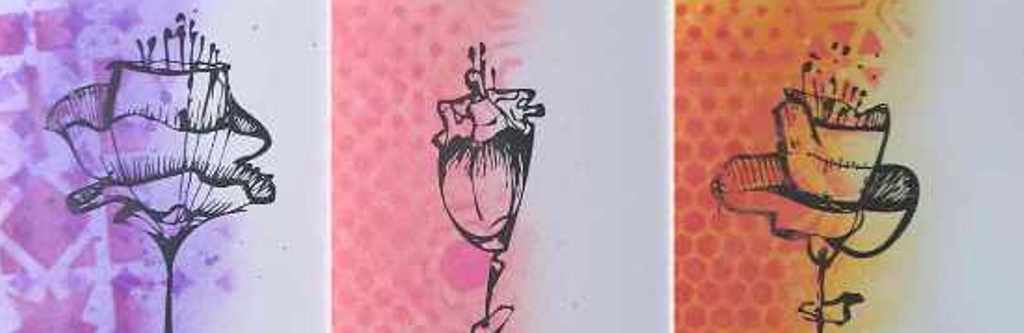
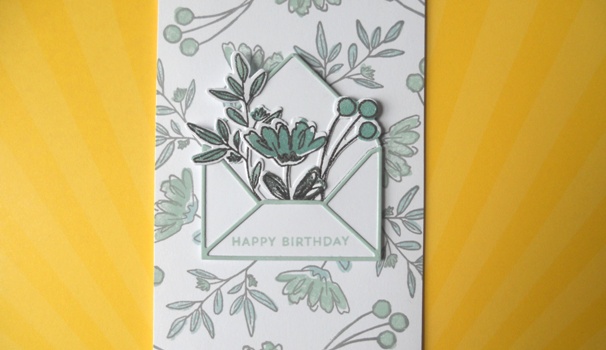
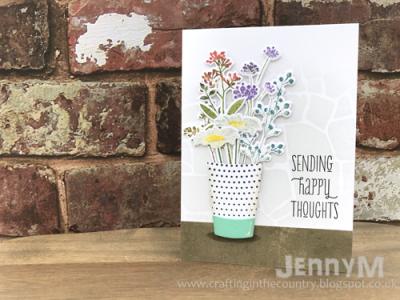
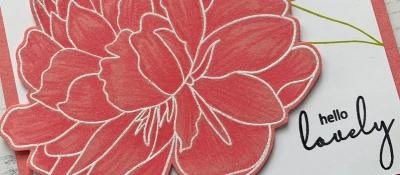
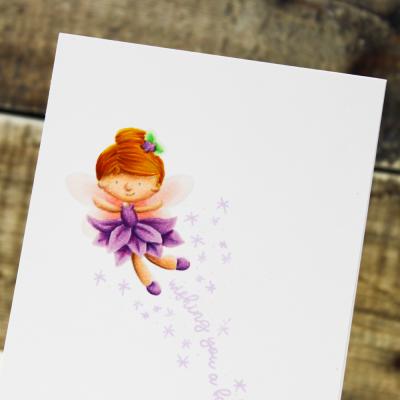
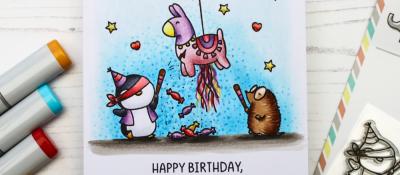
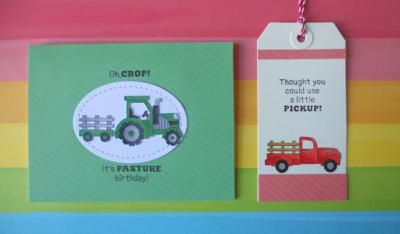
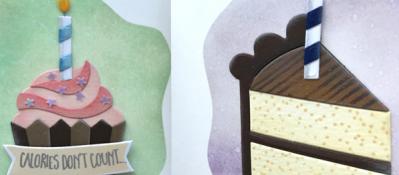
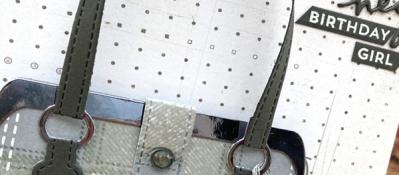
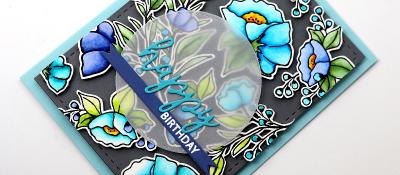
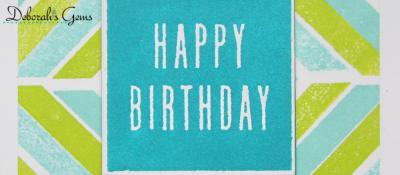
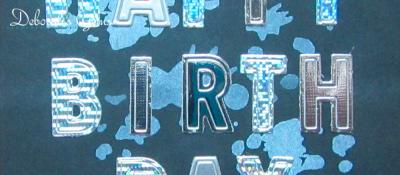
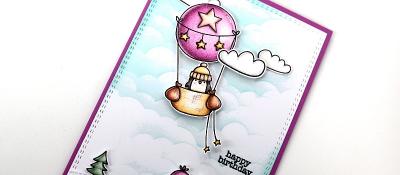
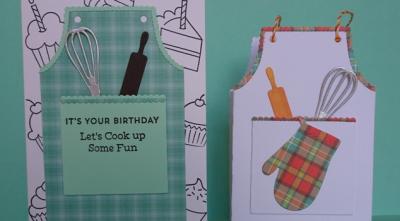
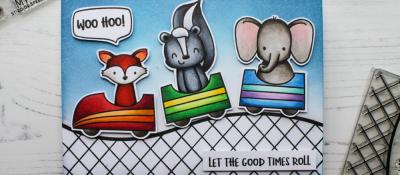
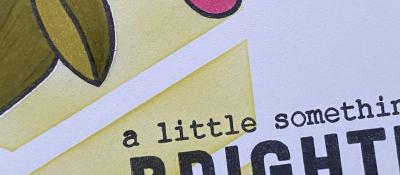
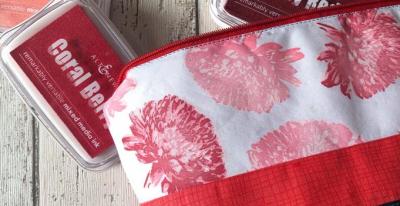
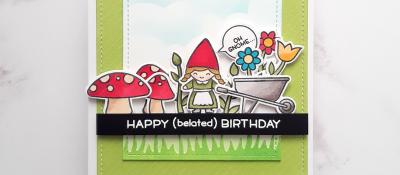
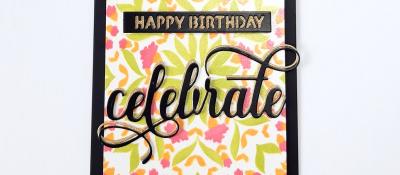
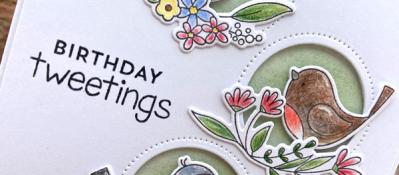
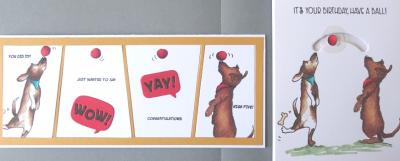
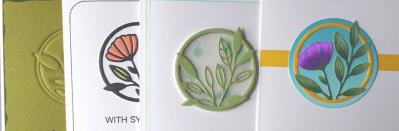
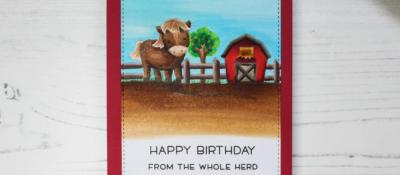
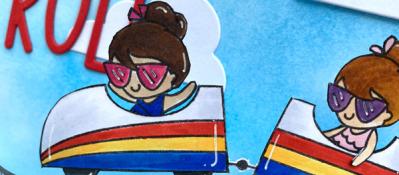
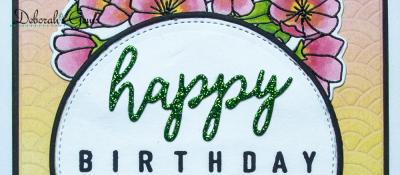
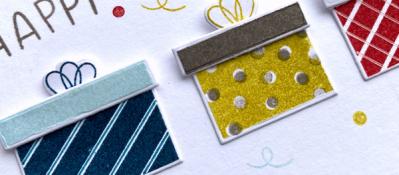
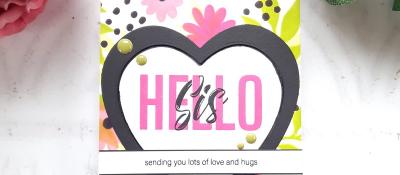
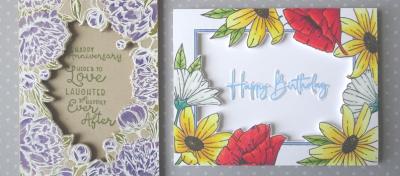
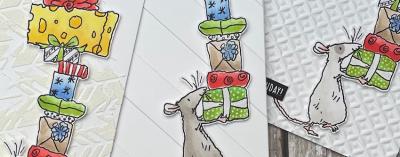
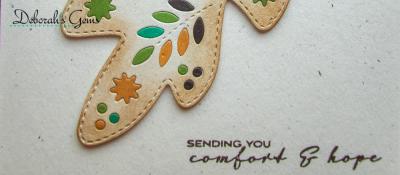
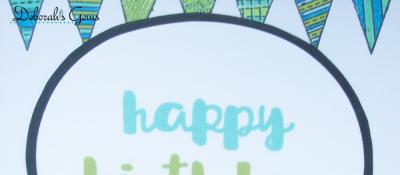
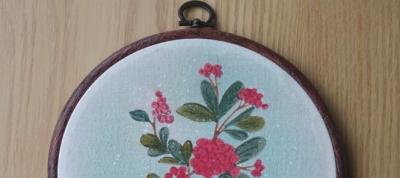
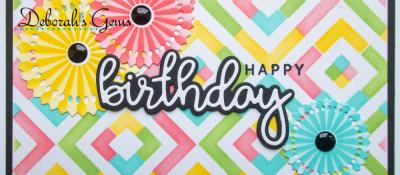
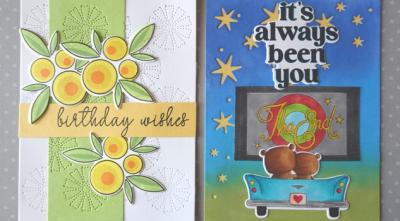
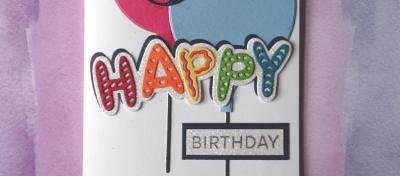
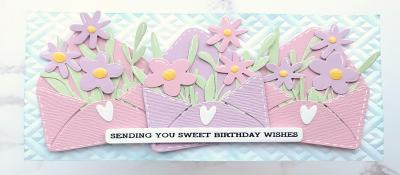
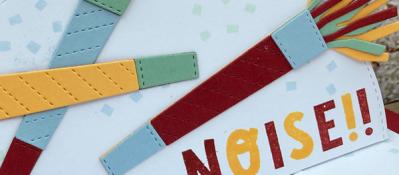
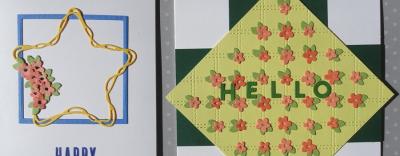
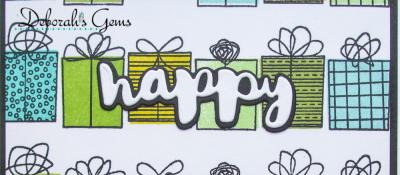
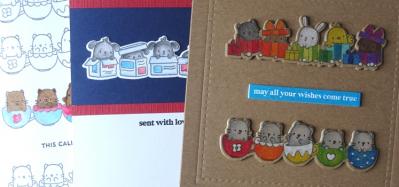
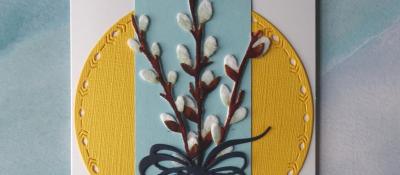
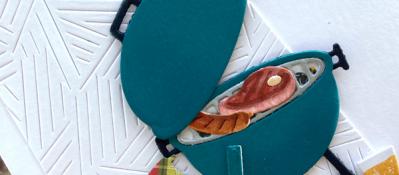
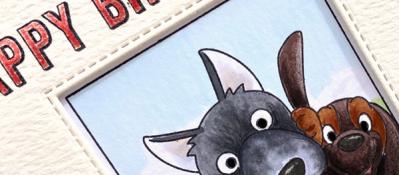
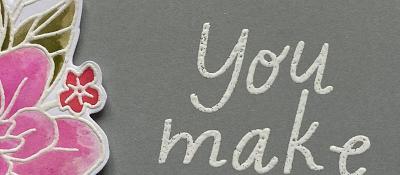
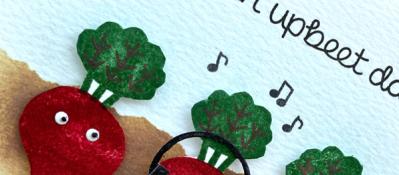
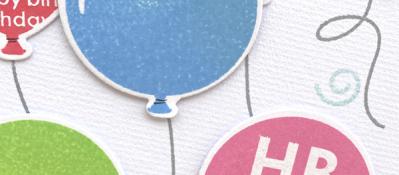
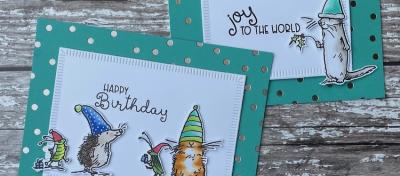
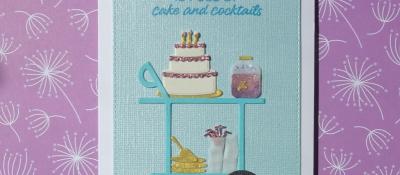
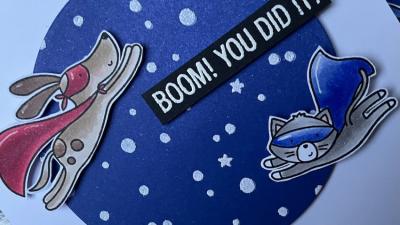
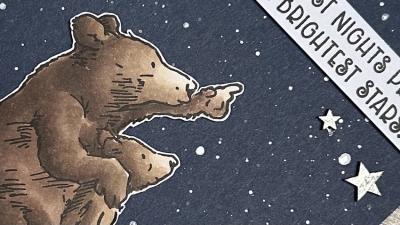
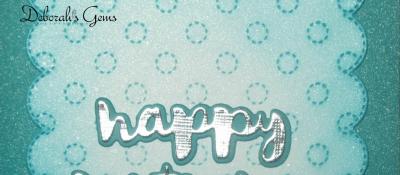
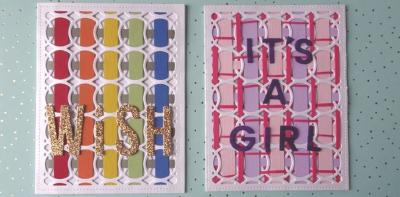
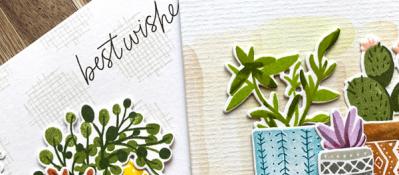
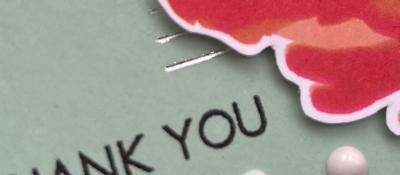
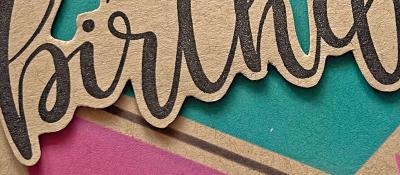
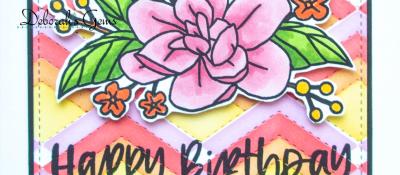
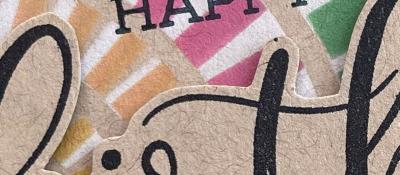
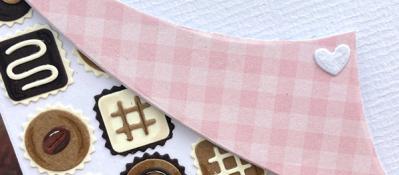
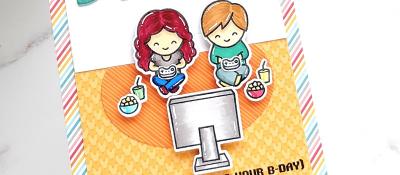
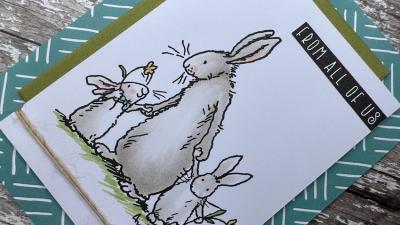
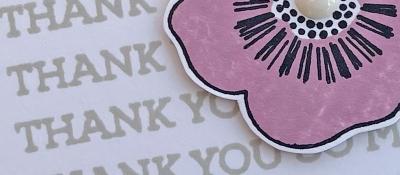
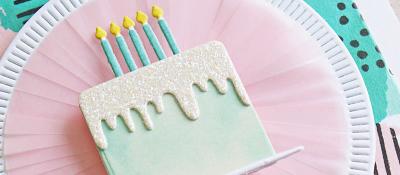
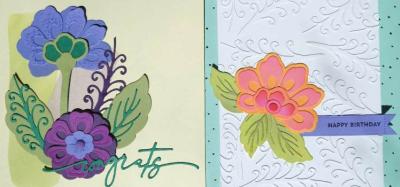
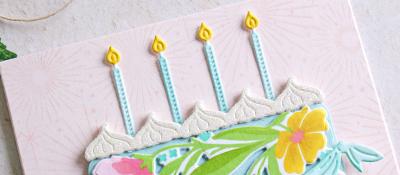
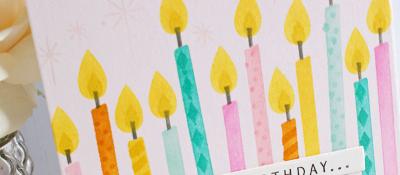
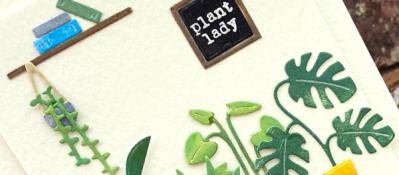
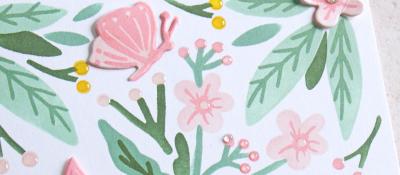
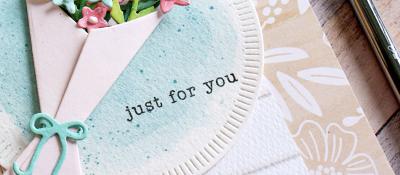
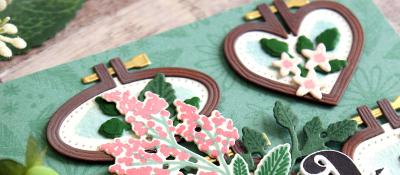
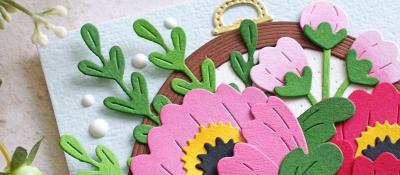
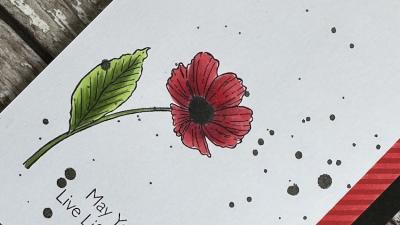
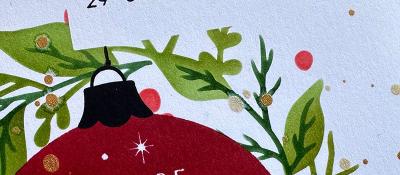
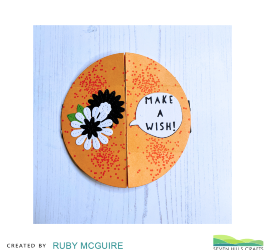
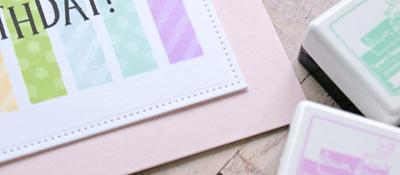
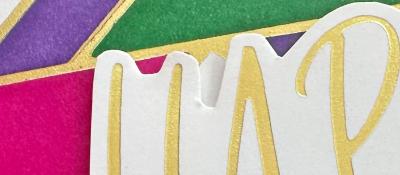
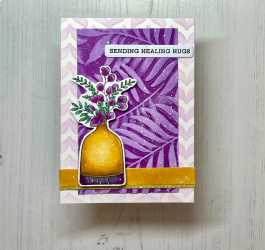
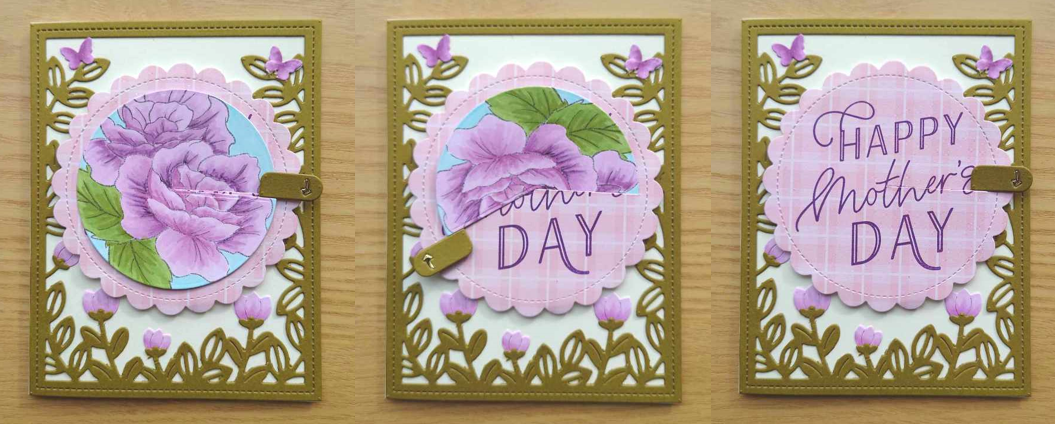
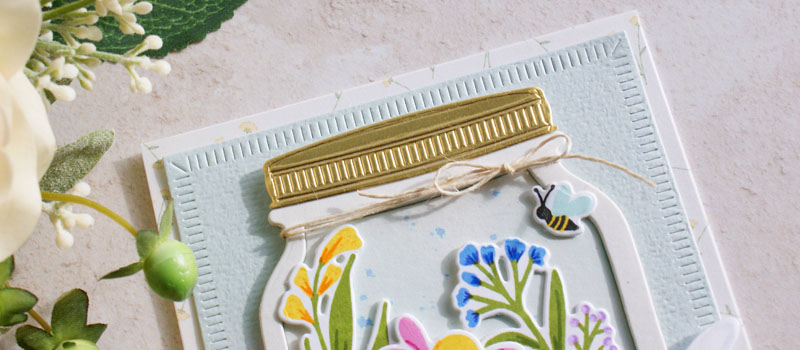
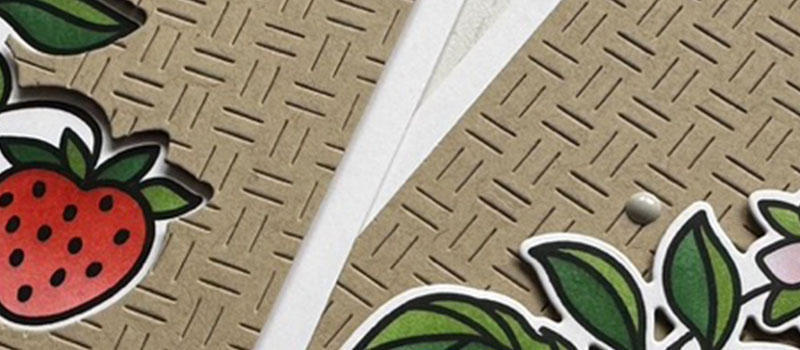
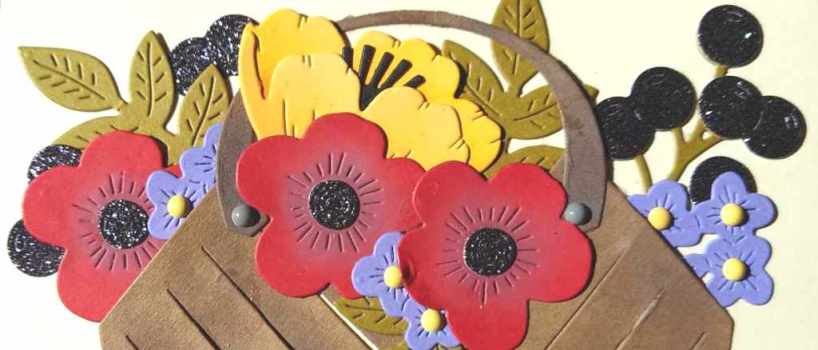
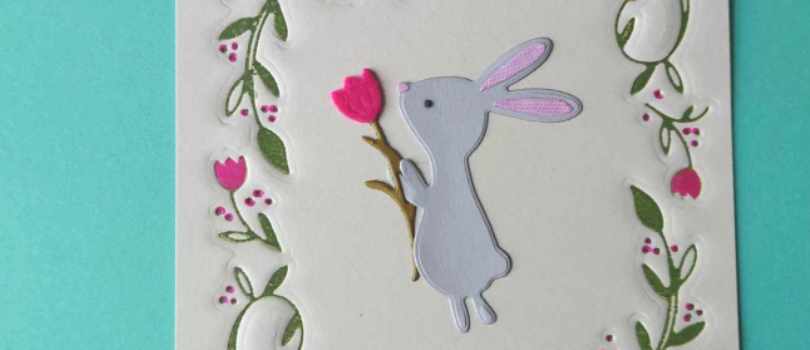
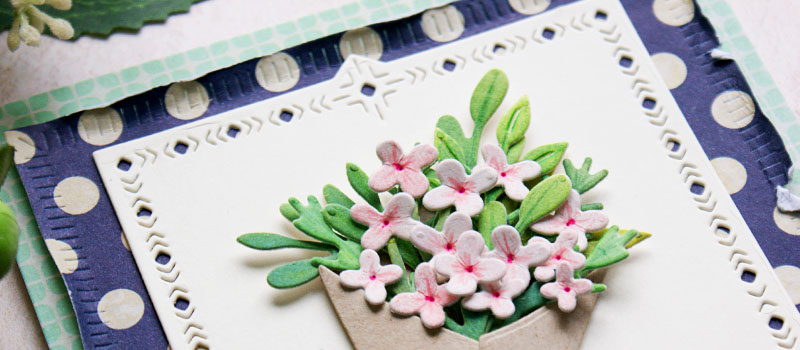
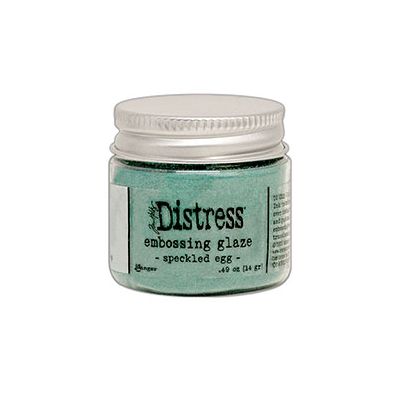
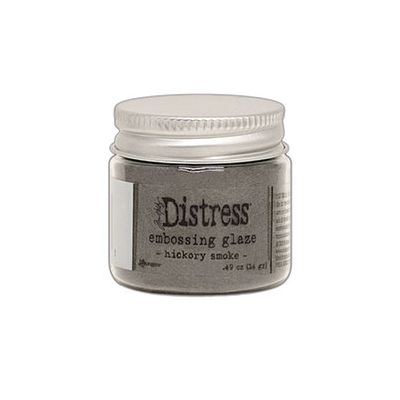
Back to my pattern piece - I trimmed it down to create a card with it. Adding a central element again sticking to the same two colours but this time I added the new Glazes from Ranger over the top of the stamped oxides to make the elements pop a little more. I have to say the glazes are brand new to me and I love them. They are SUPER FINE translucent powders which melt really quickly and add a gorgeous finish. I can't wait to experiment more. Here I added them into an envelope using Mama Elephant's Botanic Envelope die but adding the stamped florals. I ink blended speckled egg on the envelope die cut layers and stamped the sentiment from MFT's Bitty Birthday Wishes using the same ink (in hindsight I should have glazed that too) I popped the envelope up on foam pads to finish the card.
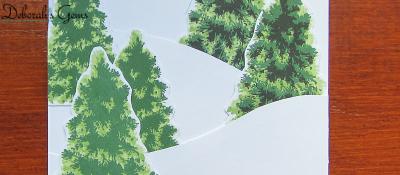
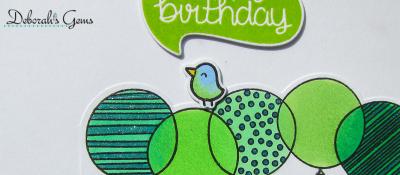
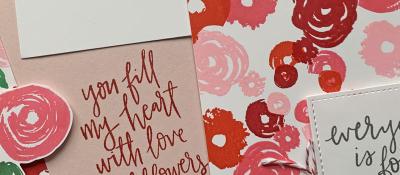
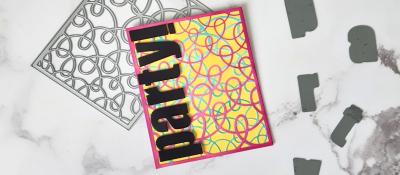
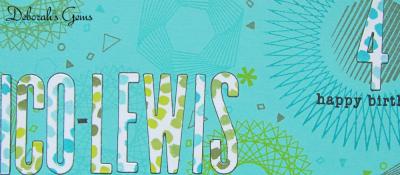
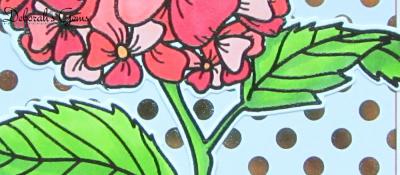
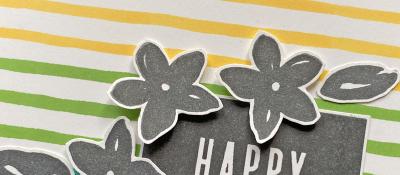
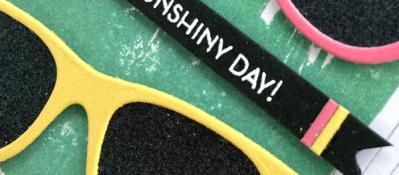
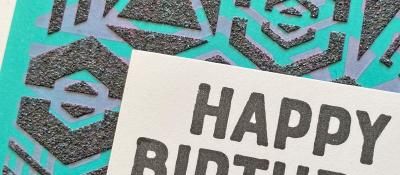
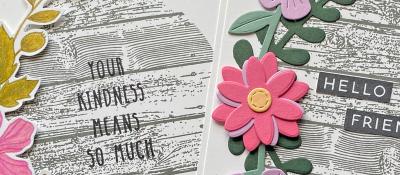
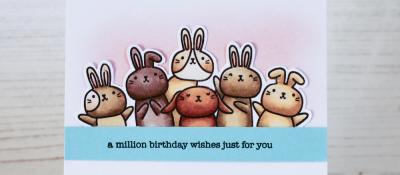
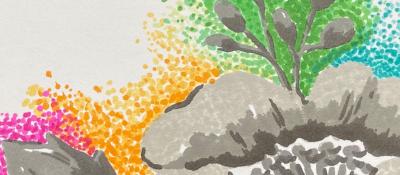
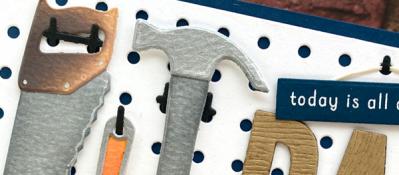
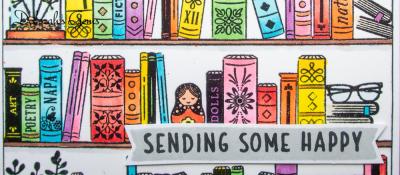
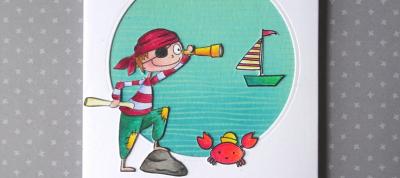
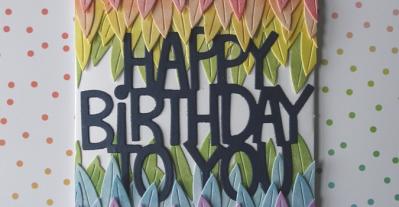
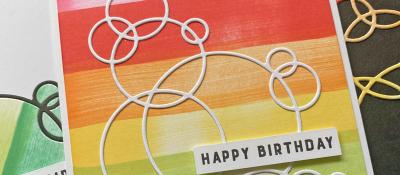
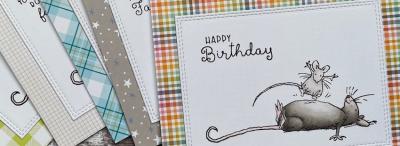
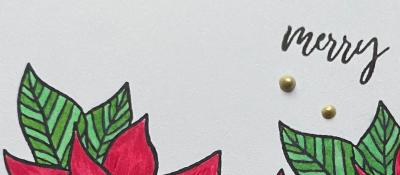
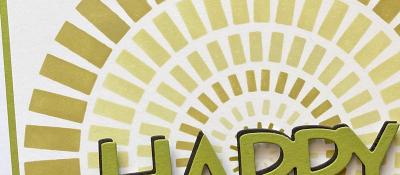
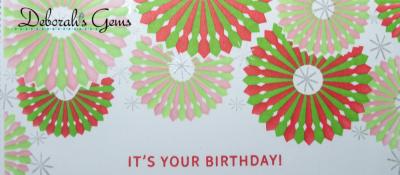
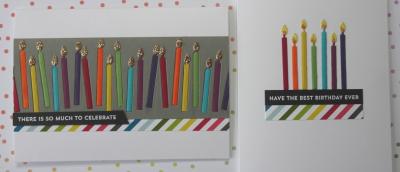
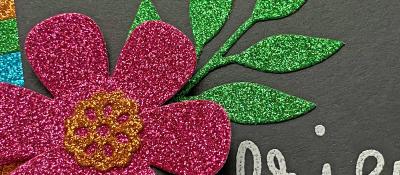
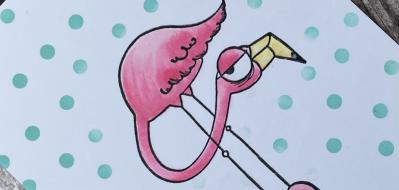
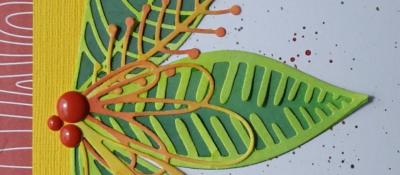
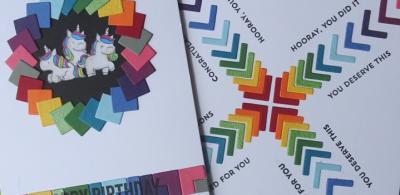
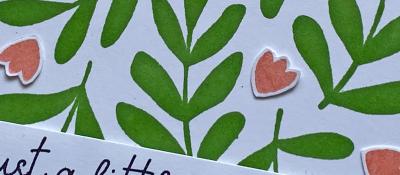
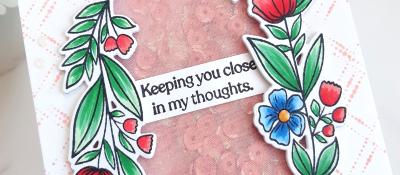
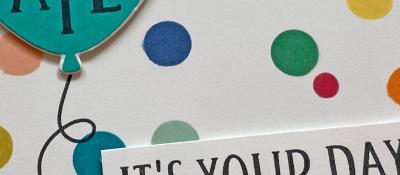
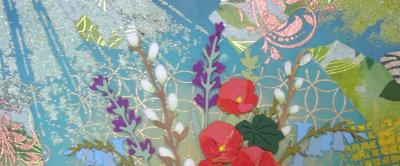
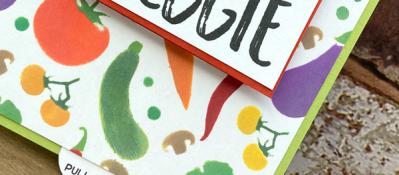
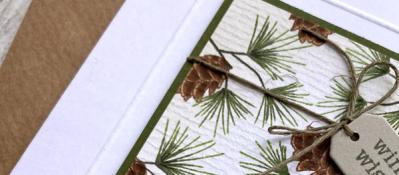
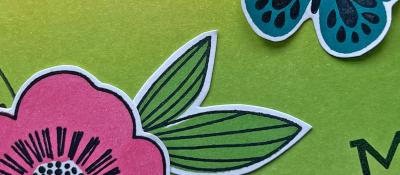
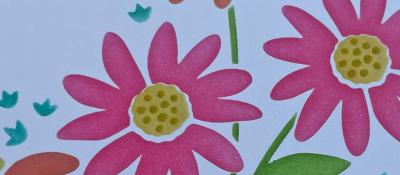
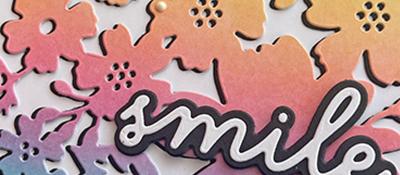
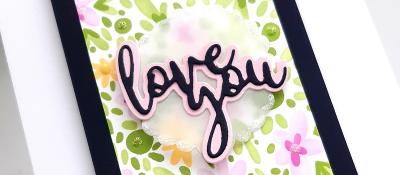
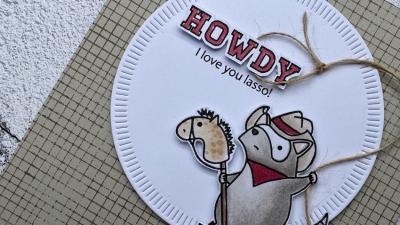
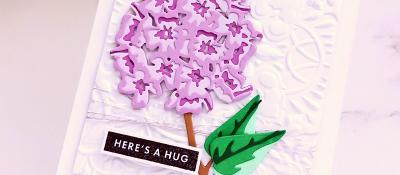
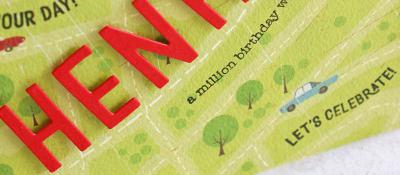
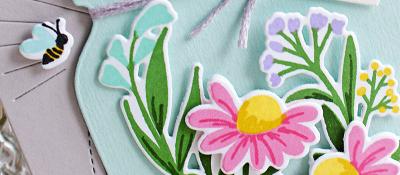
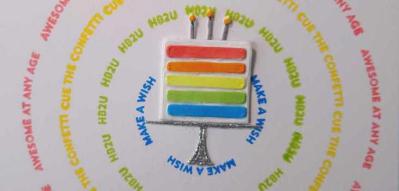
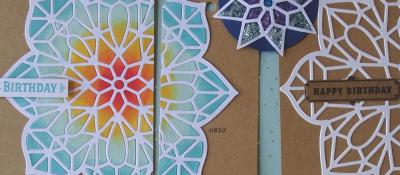
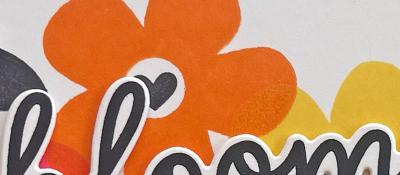
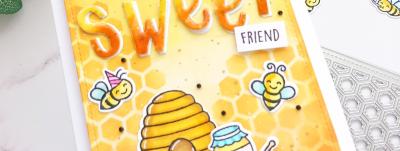
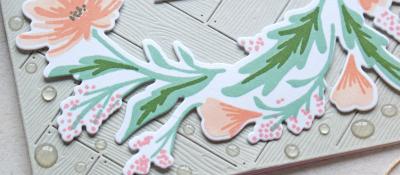
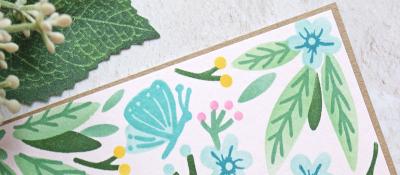
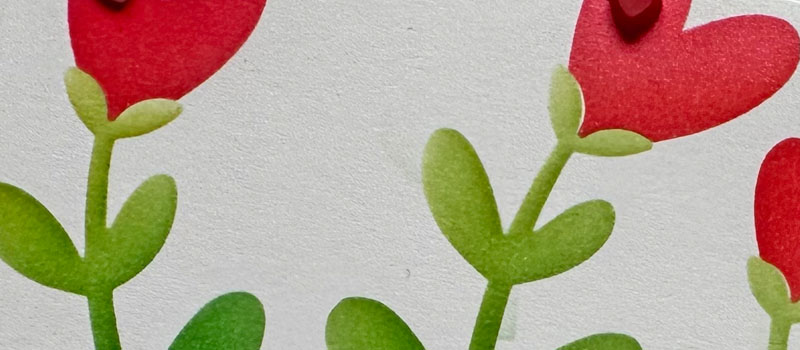
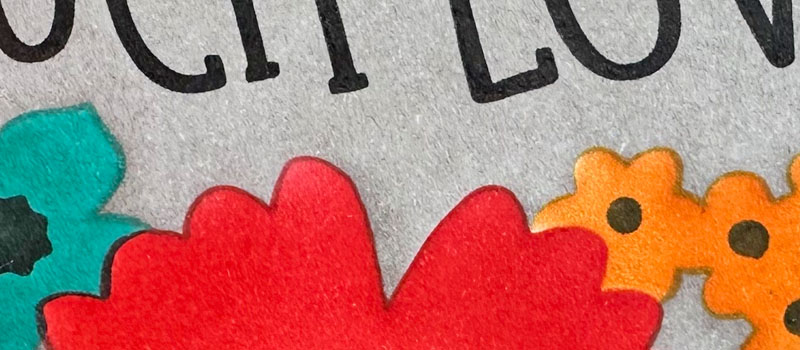
I wanted to have another play with the pattern building - this time I skipped a step and didn't stamp out the jig I just layed them out - and therefore didn't see that they overlap in the middle before I stamped onto my cardstock! Whoops! In the end I decided to live with it, and I kind of like the central circle it makes. Depending on what I do with it, I can always cover it up too!

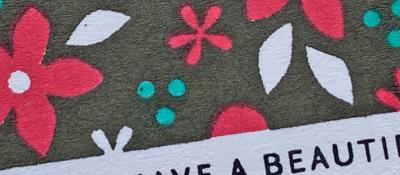
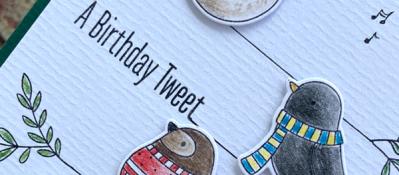
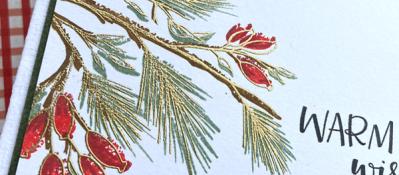
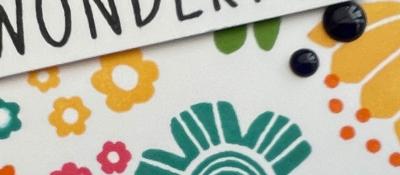
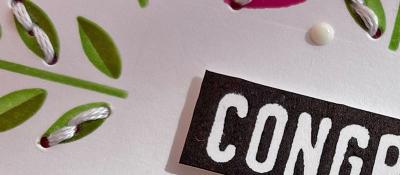
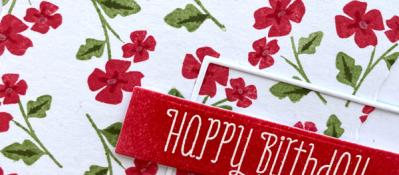
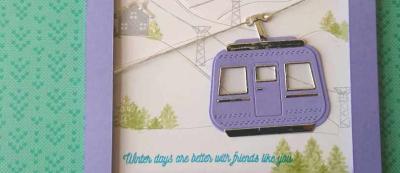
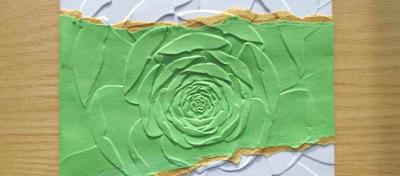
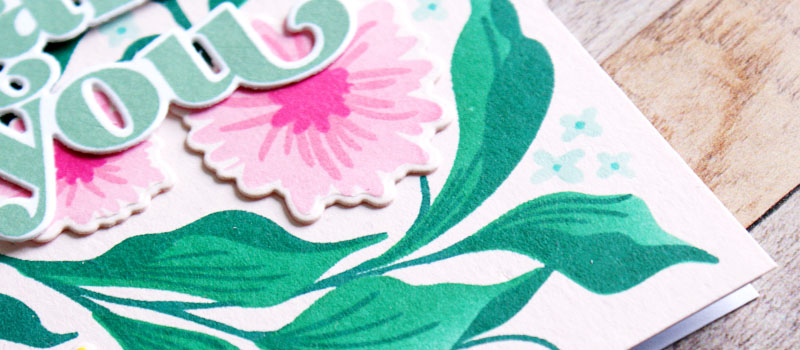
For this one, I did what Dawn does in the video and added some smaller stamps to fill in the "white space" between the repeat pattern. I did this by eye, but you could put the tiny stamps in the platform if you want perfect repeats. For the fill ins I used a couple of tiny stamps from Altenew's Poinsettia Pieces.
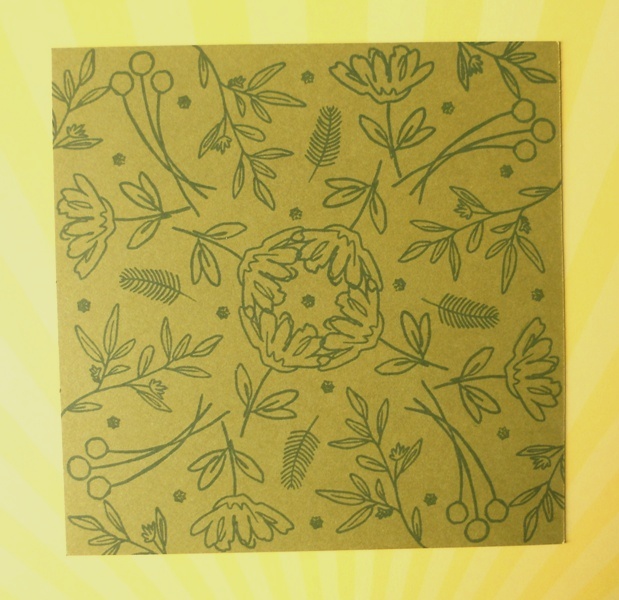
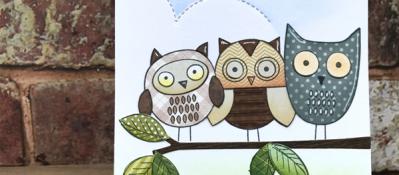
All just stamped with Shady Lane Versafine onto a tonal green cardstock.
Hope this gives you a new take on patterned background stamping - it would work for lots of different small images not just florals - so I'd love to see what you can make with it. Share your makes with us in the VIPS group.
NEWS FROM THE STORE
We've had some technical issues this week so I am behind on our normal order packing schedule - we normally aim to ship all orders within 48 working hours (excludes weekends and bank holidays) but we're running more at 72 at the moment but I will do my very best to catch up. Our printer died on Friday morning so we have a new one coming tomorrow - hopefully it turns up early and we can get orders printed, but bear with us whilst we get over this issue (I bought a little back up printer too to make sure we're never in this position of not being able to print orders again)
In terms of arrivals this week here's the news:
-
Lawn Fawn release is Thursday and it WILL be in store by 7am that morning.
-
Stamping Bella release is in transit and will be in store as soon as I get time to add it after it gets here (see above - it may take a while to catch up on orders so other than adding Lawn Fawn other releases may not be added this week)
-
Hero Arts have finally shipped their monthly releases and new summer release to us (sorry no restocks this time) and we expect that to arrive this week too - it includes montly releases from March onwards.
-
Newton's Nook's latest release is on order but they haven't got the dies for the new release yet so we're holding on until it can all ship together.
That's all the news this week - if what you want isn't listed - it's not coming YET but watch this space for more news next week. It's an ongoing battle to keep on top of things so we may be behind but we will catch up eventually!!!
Thanks
Tara
21/06/2020
|
View: 546
|
Categories: Stamping Techniques, Repeat Pattern Building
|
Tags: Mama Elephant, My Favorite Things, Ranger, Reverse Confetti
Related Posts
The blog is back!
16/02/2020| Posted in Colouring Stamped Images, Copic Colouring, Pencil Colouring, Die Cutting| 6| 1099
Pottery Crazy
17/02/2020| Posted in Die Cutting, Stencilling, Stencilling with embossing paste, Special Effects| 1| 1216

It's a RAWR-y Dino-mite Birthday!
06/03/2020| Posted in Copic Colouring, Ink Blending| 460

Butterfly Wreath
25/02/2020| Posted in Water Colouring, Card Making| 1| 452
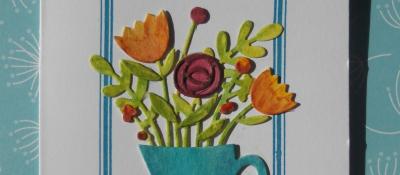
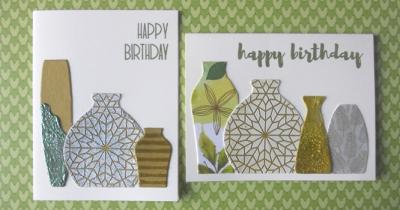
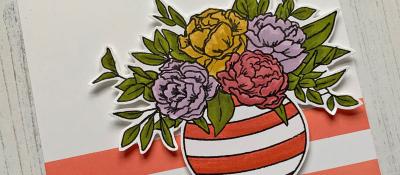
Jug of Flowers
01/03/2020| Posted in Water Colouring, Die Cutting| 1| 391
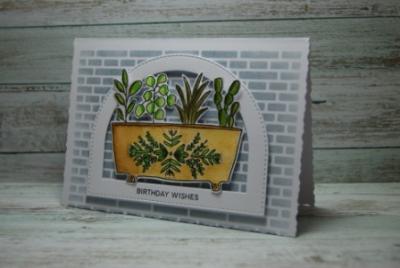
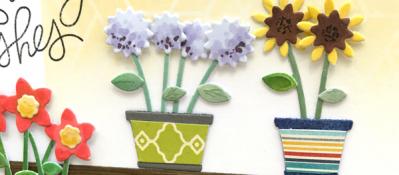
Spice Pot Birthday Wishes
03/03/2020| Posted in Water Colouring, Stencilling| 1| 288
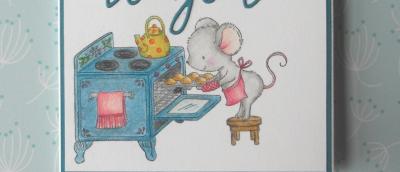
Birthday Baking
04/03/2020| Posted in Pencil Colouring, Die Cutting| 2| 245

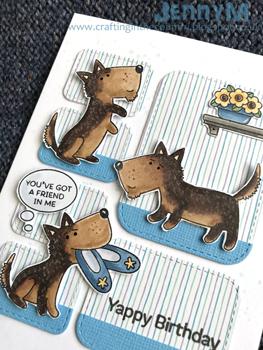
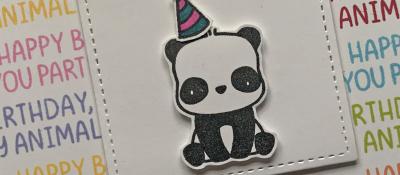
Party Animals
07/03/2020| Posted in Colouring Stamped Images, Pencil Colouring| 430
Flower Truck
09/03/2020| Posted in Pencil Colouring, Stamped Background| 356
A touch of pattern
13/03/2020| Posted in Die Cutting| 1| 280

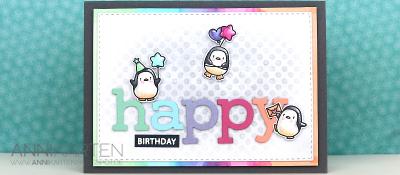
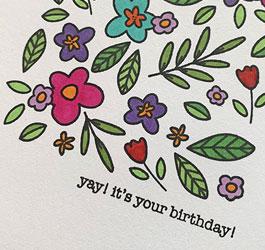
Rainbow Birthday
14/03/2020| Posted in Copic Colouring, Die Cutting| 1| 433
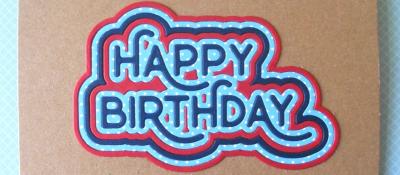
Big Happy Birthday
21/03/2020| Posted in Colouring Stamped Images, Copic Colouring| 1| 249
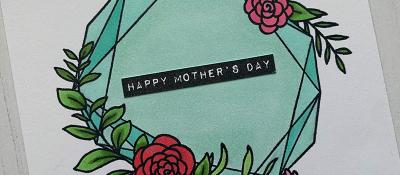
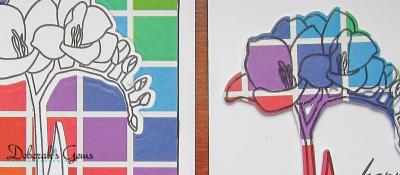
Cool Geometrics
26/03/2020| Posted in Card Making| 2| 224
Cute cactus birthday card
31/03/2020| Posted in Colouring Stamped Images, Die Cutting, Ink Blending, Stamping Techniques| 1| 695
Sending Rainbows
03/04/2020| Posted in Card Making| 391
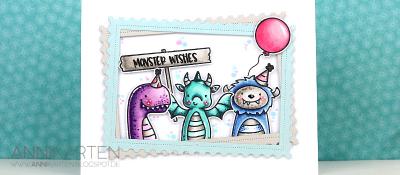
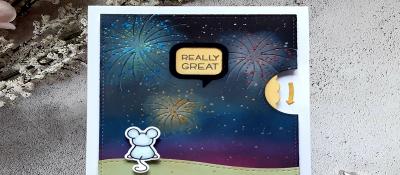
Monster Wishes
04/04/2020| Posted in Colouring Stamped Images, Copic Colouring| 430
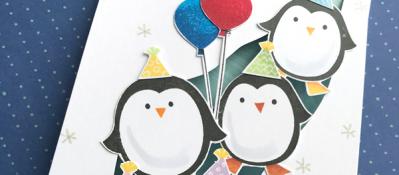
Penguin Party
06/04/2020| Posted in Card Making, Shaped Cards| 347
Mistletoe.. but not as you know it!
13/04/2020| Posted in Die Cutting, Card Making| 1| 508
Happy Bee-Day
17/04/2020| Posted in Die Cutting, Card Making| 596
Bring on the Cake
20/04/2020| Posted in Card Making, Interactive Cards| 467
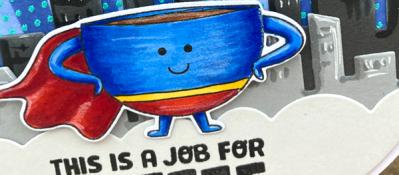
Spiderman
24/04/2020| Posted in Die Cutting, Stamping Techniques| 1| 523


Hello Lovely
30/04/2020| Posted in Pencil Colouring, Card Making| 1| 356
Hello Friend
07/05/2020| Posted in Card Making, Fussy Cutting| 249
Birthday Blooms
14/05/2020| Posted in Card Making, Stamped Background| 2| 248

Tropical Birthday
27/05/2020| Posted in Copic Colouring, Die Cutting, Card Making, Stamp Layering, Heat Embossing| 281
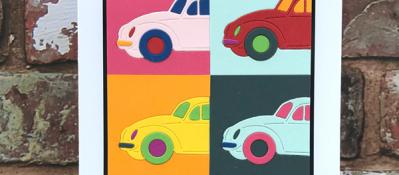
Colourful Beetles
25/05/2020| Posted in Die Cutting, Card Making| 659

Spotlight Sentiments
31/05/2020| Posted in Stamping Techniques, Stamped Background| 458
Masculine Playful Patterns
04/06/2020| Posted in Die Cutting, Card Making| 365

Trigonometry Birthday
10/06/2020| Posted in Stamping Techniques, Card Making| 313
Bowl of Blooms
18/06/2020| Posted in Colouring Stamped Images, Card Making| 345
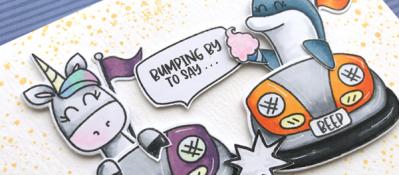
Bumping by to say..
22/06/2020| Posted in Colouring Stamped Images, Card Making| 680
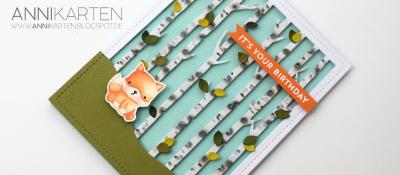
Fox in a Forest
27/06/2020| Posted in Colouring Stamped Images, Water Colouring, Die Cutting, No Line Colouring| 374
It's a Pinata Party!
24/06/2020| Posted in Copic Colouring, Card Making| 724
Wish Big!
26/06/2020| Posted in Die Cutting| 257
Floral Splendour
28/06/2020| Posted in Pencil Colouring| 366
Berry Sweet
29/06/2020| Posted in Water Colouring, Stencilling| 404
Rainbows & Party Animals
02/07/2020| Posted in Card Making, Stamped Background| 241
Farming Fun
10/07/2020| Posted in Colouring Stamped Images, Copic Colouring, Pencil Colouring, Fussy Cutting| 275
Slim is In!
19/07/2020| Posted in Die Cutting| 563
Aloha Sunshine
23/07/2020| Posted in Card Making| 295
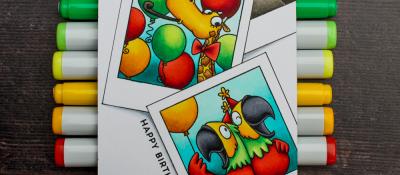
Birthday Balloons
29/07/2020| Posted in Colouring Stamped Images, Copic Colouring, Die Cutting, Card Making, Heat Embossing| 403
Peekaboo birthday
28/07/2020| Posted in Colouring Stamped Images, Die Cutting| 391
Paper Hugs
05/08/2020| Posted in Copic Colouring, Die Cutting, Ink Blending, Card Making, Stamped Background, Interactive Cards, Heat Embossing| 421
It's Your Day!
03/08/2020| Posted in Die Cutting, Stencilling| 272
Monkey Sea Monkey Do!
07/08/2020| Posted in Copic Colouring, Card Making| 275


For the love of pretty papers....
16/08/2020| Posted in Patterned Papers| 3| 500
An Alternative Gift Bag
24/08/2020| Posted in Die Cutting, Card Making, Stamped Background, Interactive Cards, Heat Embossing, Repeat Pattern Building, Gift Making| 609
Slimline Florals
18/08/2020| Posted in Ink Blending, Stencilling| 244
Hippo Pool Party
22/08/2020| Posted in Colouring Stamped Images, Pencil Colouring| 343
No Stitch Stitching Dies
23/08/2020| Posted in Stitching/Embroidery| 1| 586
Birthday Shakers
26/08/2020| Posted in Die Cutting, Stamping Techniques, Card Making, Stamped Background, Fussy Cutting, Heat Embossing, turnabouts, Repeat Pattern Building, Stamping on non paper surfaces| 421

Birthday Fishes To You
29/08/2020| Posted in Colouring Stamped Images, Copic Colouring| 317
Peek-a-Boo Jungle
04/09/2020| Posted in Copic Colouring, Card Making| 359
Have a thrilling birthday
08/09/2020| Posted in Colouring Stamped Images, Die Cutting, Card Making, Stencilling, Interactive Cards| 314

Gnome Girl on the Blog
12/09/2020| Posted in Colouring Stamped Images, Pencil Colouring| 404
Birthday Queen
23/09/2020| Posted in Card Making, Stamped Background| 379
Selfie Party Pics
18/09/2020| Posted in Copic Colouring, Card Making| 1080
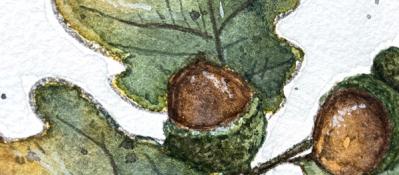
Autumn Acorns
28/09/2020| Posted in Water Colouring, Card Making| 302
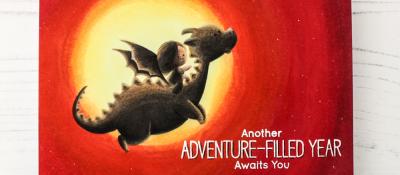
Sunset Dragon Scene Card
02/10/2020| Posted in Copic Colouring| 1| 373
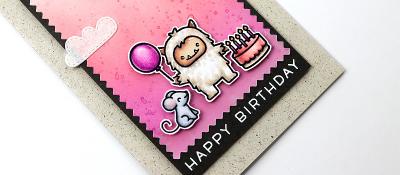
Yeti or Not: Happy Birthday
03/10/2020| Posted in Copic Colouring, Ink Blending| 1| 295
One Stencil, Three Cards!
08/10/2020| Posted in Stencilling| 229
Cozy Friends
19/10/2020| Posted in Die Cutting, Card Making| 479
Colorado Craft Company Week!
25/10/2020| Posted in Water Colouring| 2| 460
Delight in the Little Things
29/10/2020| Posted in Ink Blending, Card Making| 2| 255
Lets Party!
03/11/2020| Posted in Die Cutting| 1| 253
Birthday Fishes
07/11/2020| Posted in Colouring Stamped Images, Water Colouring| 1| 187
Present Time!
09/11/2020| Posted in Stamping Techniques, Card Making, Fussy Cutting, Repeat Pattern Building, Masking| 313

Friends and Christmas
18/11/2020| Posted in Stamping Techniques, Card Making, Stamp Layering, Stamped Background, Masking| 1| 380
Snowball Fun
30/11/2020| Posted in Colouring Stamped Images, Card Making| 2| 337
Floral Birthdays
09/12/2020| Posted in Colouring Stamped Images, Die Cutting, Stamping Techniques, Card Making, Stamped Background, Heat Embossing| 1| 237

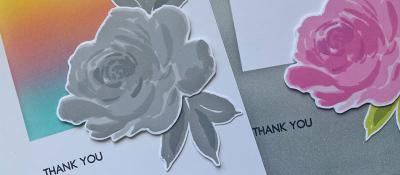
All the THANKS
10/12/2020| Posted in Die Cutting, Card Making| 2| 427
Happy New Year!
03/01/2021| Posted in Pencil Colouring, Water Colouring| 2| 651
Birthday Roses
07/01/2021| Posted in Colouring Stamped Images, Copic Colouring, Card Making, Stencilling, Stamped Background| 1| 272

Birthday Burst!
11/01/2021| Posted in Die Cutting, Card Making| 1| 290
Going Dotty!
20/01/2021| Posted in Copic Colouring, Die Cutting, Stamping Techniques, Card Making, Stamped Background| 1| 232
Birthday Cupcake
15/01/2021| Posted in Copic Colouring, Card Making| 1| 475
A Tale of Two Hearts
17/01/2021| Posted in Die Cutting| 1| 487
HAPPY HAPPY Birthday!
21/01/2021| Posted in Colouring Stamped Images, Copic Colouring, Stamping Techniques, Card Making, Fussy Cutting, Repeat Pattern Building| 1| 252
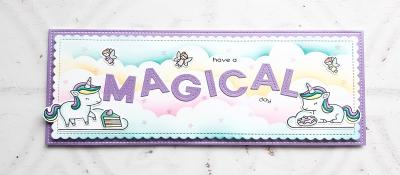
Magical Day
27/01/2021| Posted in Copic Colouring, Die Cutting, Card Making, Fussy Cutting, Heat Embossing| 1| 225


Slimline Birthday Card
30/01/2021| Posted in Colouring Stamped Images, Pencil Colouring, Water Colouring, Die Cutting| 1| 531
Let the Good Times Roll!
29/01/2021| Posted in Copic Colouring, Card Making| 1| 340

Thank you Mr Postman!
03/02/2021| Posted in Die Cutting, Stamping Techniques, Card Making, Stamp Layering, Stamped Background, turnabouts| 1| 409

Poppin' Popcorn
01/02/2021| Posted in Off The Page Projects, Stencilling with embossing paste, Heat Embossing| 1| 322

Bears on Adventure
13/02/2021| Posted in Colouring Stamped Images, Pencil Colouring, Water Colouring, Die Cutting, Ink Blending, Stencilling| 1| 488

A Little Something...
18/02/2021| Posted in Colouring Stamped Images, Copic Colouring, Stamping Techniques, Card Making, Stencilling, Masking| 1| 264
Underwater Birthday Wishes
19/02/2021| Posted in Copic Colouring, Card Making| 1| 613

Trig 102
24/02/2021| Posted in Copic Colouring, Die Cutting, Card Making, Fussy Cutting, Heat Embossing, Repeat Pattern Building| 1| 552
Birthday Blooms
04/03/2021| Posted in Die Cutting, Card Making| 1| 277
Birthday Buds
06/03/2021| Posted in Colouring Stamped Images, Pencil Colouring| 1| 387
A Little Note
01/04/2021| Posted in Colouring Stamped Images, Pencil Colouring, Card Making, Special Effects, Fussy Cutting| 1| 388
Hello Sunflowers
08/04/2021| Posted in Colouring Stamped Images, Pencil Colouring, Card Making, Fussy Cutting| 1| 327
Fun Fabric Guest
09/04/2021| Posted in Stamped Background, Repeat Pattern Building, Stamping on non paper surfaces, fabric, mixed media| 1| 327
Happy Birthdays
14/04/2021| Posted in Copic Colouring, Die Cutting, Card Making, Stamped Background, Shaped Cards| 1| 388
Dandy Lion
11/04/2021| Posted in Pencil Colouring, Water Colouring, Interactive Cards, Fussy Cutting, Embossing Folders| 2| 424
Hex Layers
15/04/2021| Posted in Ink Blending, Card Making, Stencilling, Stencilling with embossing paste| 1| 257

Floral Fancies
25/04/2021| Posted in Off The Page Projects, Stamp Layering, Partial Die Cutting, Gift Making, Stamping on non paper surfaces| 2| 406
Let's Party Birthday Cards
28/04/2021| Posted in Copic Colouring, Die Cutting, Stamping Techniques, Card Making, Stamped Background, Interactive Cards, Heat Embossing, turnabouts, Masking, Stamping| 1| 334
Eclectic Florals
29/04/2021| Posted in Colouring Stamped Images, Pencil Colouring, Die Cutting, Card Making, No Line Colouring, Fussy Cutting| 1| 366
Introducing Elliot & Marcel
02/05/2021| Posted in Pencil Colouring, Stamping| 376

Aloha
06/05/2021| Posted in Colouring Stamped Images, Copic Colouring, Card Making, Fussy Cutting, Stamping| 1| 280
We Herd It's Your Birthday!
07/05/2021| Posted in Copic Colouring| 1| 378

Botanical Branches
13/05/2021| Posted in Water Colouring, Die Cutting, Stamping Techniques, Card Making, Stamped Background| 1| 313
Floral Birthdays
19/05/2021| Posted in Die Cutting, Stamping Techniques, Card Making, Stamp Layering, turnabouts, Stamping| 1| 516
Going Dotty!
20/05/2021| Posted in Colouring Stamped Images, Copic Colouring, Stamping Techniques, Card Making, Stamp Layering, Stamping, sentiment Focal Points| 2| 329
Starry Birthday
26/05/2021| Posted in Copic Colouring, Ink Blending, Card Making, Fussy Cutting, Heat Embossing, turnabouts, Stamping| 1| 243
“The rules are… there ain’t no rules!”
02/06/2021| Posted in Colouring Stamped Images, Copic Colouring, Stamping Techniques, Card Making, Fussy Cutting, Stamping| 317
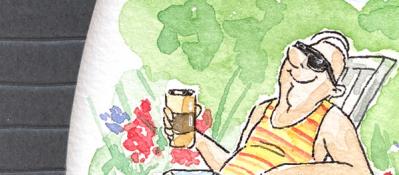
Kick Back and Chill
07/06/2021| Posted in Water Colouring, Card Making| 554
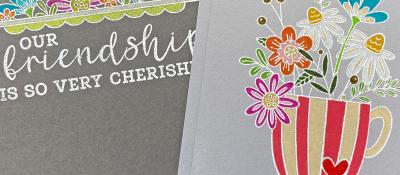
Cup of Friendship
10/06/2021| Posted in Colouring Stamped Images, Pencil Colouring, Stamping Techniques, Card Making, Heat Embossing, Stamping| 304
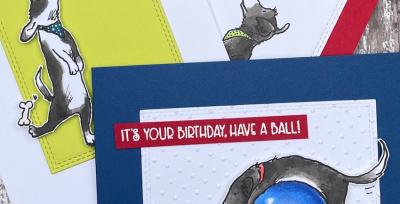
Time to Paw-ty!!!
12/06/2021| Posted in Sketches| 243
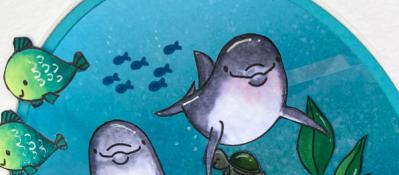

Rainbow Birthday
16/06/2021| Posted in Copic Colouring, Die Cutting, Ink Blending, Card Making, Stamped Background, Interactive Cards, Fussy Cutting, Heat Embossing| 496
Hay There Birthday
02/07/2021| Posted in Copic Colouring, No Line Colouring| 322

Sending Rainbows in the Rain
18/06/2021| Posted in Copic Colouring, No Line Colouring| 549
Birthday Gifts
16/07/2021| Posted in Pencil Colouring, No Line Colouring| 1| 330
Birthday 3D Floral
19/06/2021| Posted in Copic Colouring, Embossing Folders| 250
Coaster Fun
21/06/2021| Posted in Colouring Stamped Images, Ink Blending, Card Making, Fussy Cutting, Shaped Cards| 249
Leaves or Feathers?
24/06/2021| Posted in Die Cutting| 1| 309
Quick Masculine Makes
04/07/2021| Posted in Stamping Techniques| 276
Birthday fun
06/07/2021| Posted in Colouring Stamped Images| 321
Birthday Sprinkles
19/07/2021| Posted in Die Cutting, Stamping| 222
Floating On By
26/07/2021| Posted in Copic Colouring, Die Cutting, Ink Blending, Stencilling, sentiment Focal Points| 251
First Birthday Animals
02/08/2021| Posted in Colouring Stamped Images, Pencil Colouring, Stamped Background, Fussy Cutting| 427
A Cat Isn't Just for Christmas
30/07/2021| Posted in Pencil Colouring, Die Cutting| 259
Whale of a birthday
01/08/2021| Posted in Ink Blending, Stamp Layering| 227

Bright Birthday Geometrics
05/08/2021| Posted in Die Cutting, Card Making| 428
Succulent Bouquet Four Ways
18/08/2021| Posted in Copic Colouring, Water Colouring, Die Cutting, Card Making, Off The Page Projects, Heat Embossing, Patterned Papers, Stamping| 358

Oh Happy Day!
20/08/2021| Posted in Copic Colouring| 308
Sweater Weather!!
25/08/2021| Posted in Copic Colouring, Die Cutting, Stamping Techniques, Card Making, Stamped Background, Stamping, Embossing Folders| 414

Patterned Paper Play
27/08/2021| Posted in Die Cutting, Patterned Papers| 1| 351
A Wreath for All Seasons
01/09/2021| Posted in Copic Colouring, Die Cutting, Card Making, Stamped Background, Fussy Cutting, Heat Embossing, turnabouts, Stamping| 460
The Season In-Between!
02/09/2021| Posted in Ink Blending, Card Making| 249
The Little Things
03/09/2021| Posted in Pencil Colouring, No Line Colouring| 1| 243
Gone But Not Forgotten
08/09/2021| Posted in Copic Colouring, Die Cutting, Card Making, Stamped Background, Repeat Pattern Building, Stamping| 500

Festive One Layer
09/09/2021| Posted in Colouring Stamped Images, Copic Colouring, Stamping Techniques, Card Making, Masking, Stamping| 250
All The Three's
11/09/2021| Posted in Copic Colouring, Card Making, Stencilling with embossing paste, Fussy Cutting, Stamping, stamp surgery| 295
Picture Perfect!
17/09/2021| Posted in Copic Colouring| 303
Autumn Leaves
21/09/2021| Posted in Die Cutting, Card Making| 1| 326
Heroes On The Inside
02/10/2021| Posted in Ink Blending, Interactive Cards| 244
Butterfly Dies
14/10/2021| Posted in Die Cutting, Card Making, Special Effects, Fancy Folds, Stamping, Clean & Simple| 1| 240
Happy as a Seagull with a Chip
15/10/2021| Posted in Copic Colouring, No Line Colouring| 298

Masculine Birthday Card
03/11/2021| Posted in Copic Colouring, Die Cutting, Card Making, Stamping, sentiment Focal Points| 301
The Big 5-0
05/11/2021| Posted in Die Cutting, Heat Embossing| 400
Caffeine Inspiration
17/11/2021| Posted in Copic Colouring, Die Cutting, Stamped Background, turnabouts, Stamping, Mini Slimline Card, Clean & Simple| 340
Winter Wreath
13/12/2021| Posted in Pencil Colouring, Card Making| 369
Happy Birthday
22/12/2021| Posted in Die Cutting, Stamping Techniques, Card Making, Stamped Background, Layering Stencils| 359
Every Day Labels His and Hers
09/01/2022| Posted in Die Cutting, Stamping Techniques| 305


Masculine Birthday Cards
26/01/2022| Posted in Die Cutting, Stamping Techniques, Card Making, Stamped Background, Embossing Folders, Layering Stencils| 477
Lets Conga
15/01/2022| Posted in Copic Colouring, Card Making, Off The Page Projects, Stamping, Clean & Simple| 1| 1126

I Smell A Birthday
29/01/2022| Posted in Copic Colouring, Card Making, Fussy Cutting, Patterned Papers, Stamping, Sketches, Clean & Simple| 296
Big Birthday Balloons
04/02/2022| Posted in Die Cutting| 229
Flowers For Your Birthday
11/02/2022| Posted in Die Cutting| 340

One Layer Wonders!
17/02/2022| Posted in Ink Blending, Card Making, Stencilling, Stamping, Clean & Simple, Stencilled backgrounds| 322

Friends Fur-ever
25/02/2022| Posted in Copic Colouring, Card Making, Partial Die Cutting, Fussy Cutting, Stamping, Clean & Simple| 1| 302

Getting the most from foil plates
27/02/2022| Posted in Hot Foil, Letterpress| 1| 359

Hello Dear Friend
10/03/2022| Posted in Stamping Techniques, Card Making, Stamped Background, Fussy Cutting, Stamping, Clean & Simple| 233
Ink Blending on Solid Stamps
13/03/2022| Posted in Die Cutting, Ink Blending Direct on Stamps| 686
Smooshed Blooms
17/03/2022| Posted in Colouring Stamped Images, Water Colouring, Die Cutting, Stamping Techniques, Card Making, Special Effects, Stamping, Clean & Simple| 290
Tiny Flowers
18/03/2022| Posted in Die Cutting| 296
Fairy Magic
28/03/2022| Posted in Colouring Stamped Images, sentiment Focal Points| 219
Birthdays
06/04/2022| Posted in Copic Colouring, Die Cutting, Card Making, Stamped Background, Heat Embossing| 2| 357

Friendship & Smiles
07/04/2022| Posted in Card Making, Stamped Background, Stamping, sentiment Focal Points, Clean & Simple| 298
Birthday Bar
17/04/2022| Posted in Copic Colouring, Die Cutting| 305
Sending Birthday Flowers
18/04/2022| Posted in Card Making, Stamping| 215
Fake Cake
22/04/2022| Posted in Die Cutting| 381
Cut, Colour, Stick.. it's as easy as 1,2,3
26/04/2022| Posted in Die Cutting, Card Making| 159

Geometric Quilt
27/04/2022| Posted in Die Cutting, Card Making| 316
Happy Birthday
04/05/2022| Posted in Copic Colouring, Ink Blending, Card Making, Stencilling, Stencilled backgrounds| 324
Pussy Willow
29/04/2022| Posted in Die Cutting, Die Cut Felt and Fabric| 399
Birthday Magic
02/05/2022| Posted in Colouring Stamped Images, Copic Colouring, Card Making, sentiment Focal Points, Clean & Simple| 236
3 ways with Castle Garden Stamp Set
03/05/2022| Posted in Colouring Stamped Images, Water Colouring, Die Cutting, Card Making, Stencilling, Heat Embossing, Stamping, Embossing Folders| 359
Birthday Hugs and Kisses
08/05/2022| Posted in Die Cutting| 279
BBQ Time
09/05/2022| Posted in Die Cutting| 249

Wildflowers and Weeds
13/05/2022| Posted in Water Colouring| 1| 362
The Personal Touch
14/05/2022| Posted in Card Making, Partial Die Cutting| 296
Rainbow Spacers and a Busy Week in Store
15/05/2022| Posted in Die Cutting| 351
Monochrome Moustache
28/05/2022| Posted in Patterned Papers| 222
Magnolia Smiles
07/06/2022| Posted in Water Colouring, Stamping Techniques, Card Making, Fussy Cutting, Heat Embossing| 324

Pool Party
09/06/2022| Posted in Colouring Stamped Images, Die Cutting| 227
Making the Most of Mini Stamps - Part Two
12/06/2022| Posted in Stamped Background| 272
Circle Quad
11/06/2022| Posted in Patterned Papers| 286
Having a Hoot of A Time
19/06/2022| Posted in Pencil Colouring, Die Cutting| 266

Get Well Peonies
23/06/2022| Posted in Stamping Techniques, Card Making, Stamp Layering, Repeat Pattern Building, Masking| 294
Fishing You A Happy Birthday
25/06/2022| Posted in Stamping, mixed media, Clean & Simple, Inky Backsides, Clean and Simple (CAS)| 220
Birthday Rose
01/07/2022| Posted in Card Making, Stamp Layering, Stamped Background, Masking, Stencilled backgrounds| 311

Snappy Birthday Wishes
02/07/2022| Posted in Copic Colouring, Ink Blending, Card Making, Fussy Cutting, Inky Backsides| 341
Happy Hollyhocks
06/07/2022| Posted in Water Colouring, Die Cutting| 831
Floral Calendar Page
15/07/2022| Posted in Stamp Layering, Homeware/Decorations| 386
Picnic In The Sky
12/07/2022| Posted in Colouring Stamped Images, Copic Colouring, Die Cutting, Ink Blending, Card Making, Stencilling| 244
One for the Guys & One for the Girls.
28/07/2022| Posted in Die Cutting, Card Making, Stamped Background, Stamping, Inlaid Die Cutting| 451
Say it with Balloons
01/08/2022| Posted in Die Cutting, Stamping| 235
A Mixed Media Crafternoon
07/08/2022| Posted in Die Cutting, Stencilling with embossing paste, Heat Embossing, mixed media, Hot Foil, Die Cut Felt and Fabric| 386
Cocktail Cheers
08/08/2022| Posted in Die Cutting, colouring die cuts| 394

Is it on the trolley?
21/08/2022| Posted in Die Cutting| 341
Pick A Pattern
25/08/2022| Posted in Stamping Techniques, Card Making, Stamping, Clean & Simple, Clean and Simple (CAS)| 300
To The Rescue
17/09/2022| Posted in Copic Colouring, Ink Blending, Stencilling with embossing paste, Fussy Cutting, Inky Backsides| 169


Birthday Tweet
17/10/2022| Posted in Colouring Stamped Images| 2| 263

Cards for my Great Nephew
25/11/2022| Posted in Card Making, Stamped Background, turnabouts, Stamping, colouring die cuts| 240
Star Gazing
26/11/2022| Posted in Copic Colouring, Fussy Cutting| 263
Faux Rub-On Technique
27/11/2022| Posted in Embossing Folders| 300
Winter Pine
05/12/2022| Posted in Colouring Stamped Images, Stamping| 271
Birthday Flowers
09/12/2022| Posted in Copic Colouring, Die Cutting, Card Making, Stamping, Stencilled backgrounds| 318
Month By Month - Part 2
08/12/2022| Posted in Ink Blending, turnabouts| 225
Fantasy Jungle
13/12/2022| Posted in Ink Blending, Card Making, Stencilling, Embossing Folders, Layering Stencils| 200
Month By Month - Part 4
22/12/2022| Posted in Die Cutting, Ink Blending, Stencilling, turnabouts, Gift Making, Layering Stencils| 356
Stacks of Presents
07/01/2023| Posted in Copic Colouring, Patterned Papers| 157

Penguin Party
09/01/2023| Posted in Patterned Papers, Stamping| 147

One Background - Four Ways
20/01/2023| Posted in Copic Colouring, Die Cutting, Card Making, Stamped Background, Heat Embossing, Stamping| 242
White Diecutting and Yummy Cakes
18/01/2023| Posted in Die Cutting, water colour pencils| 296
Graphic Weaving
25/01/2023| Posted in Die Cutting, paper weaving| 190
Glorious Gouache
01/02/2023| Posted in gouache painting| 277
Simple Hot Foil Background
02/02/2023| Posted in Die Cutting, Stamping Techniques, Card Making, Stamp Layering, Clean & Simple, Hot Foil| 242
Organic Cherry Blossom
08/02/2023| Posted in Die Cutting, Ink Blending| 204
Fabric that's a sweet as can bee
19/02/2023| Posted in Stencilling, fabric| 220
A Trio of Cards
24/02/2023| Posted in Copic Colouring, Card Making, Stencilling, Fussy Cutting, Stamping, Stencilled backgrounds| 327
Ghost Bricks
22/02/2023| Posted in Ink Blending, Card Making, Stencilling, Layering Stencils, Clean & Simple| 293
Tiny Giant Birthday
05/03/2023| Posted in Die Cutting| 217
Soak & Relax
06/03/2023| Posted in Die Cutting, Homeware/Decorations| 270
it's Your Day
22/03/2023| Posted in Die Cutting| 252
Garden Goodness Birthday Blooms
12/04/2023| Posted in Die Cutting, Card Making, Stamp Layering, Stencilling, Layering Stencils, Stencilled backgrounds| 332
Boho Butterflies
30/03/2023| Posted in Die Cutting, Ink Blending, Card Making, Stencilling, Layering Stencils, Clean & Simple| 1| 262
Howdy Raccoon
15/04/2023| Posted in Colouring Stamped Images, Copic Colouring, Stamping Techniques, Stamped Background, Fussy Cutting, Stamping| 297

Threads Of Kindness
20/04/2023| Posted in Die Cutting, Card Making, Stencilling, mixed media, Layering Stencils, Clean & Simple| 294
Classy in Pink
21/04/2023| Posted in Die Cutting| 193

Thank You Blossom
27/04/2023| Posted in Stamping Techniques, Card Making, Stamped Background, Clean and Simple (CAS)| 1| 226

Daisy Days Two Ways
10/05/2023| Posted in Die Cutting, Card Making, Stamp Layering, Stamping, sentiment Focal Points, Layering Stencils, Clean & Simple, Stencilled backgrounds, Clean and Simple (CAS)| 272
Iced Mini Cake
07/05/2023| Posted in Die Cutting, Stencilling with embossing paste| 299
Simply Make a Wish
12/05/2023| Posted in Stamping Techniques| 208

Mod Turnabout
14/05/2023| Posted in Stamping Techniques, turnabouts| 310
Just for you on your birthday
17/05/2023| Posted in Die Cutting, Stamping Techniques, Card Making, Stamped Background, turnabouts, Stamping| 155
Sewn with love
23/05/2023| Posted in Copic Colouring, Card Making| 220
Ornate Florals
02/06/2023| Posted in Die Cutting, Faux Embossing| 179
First Steps in the Urban Jungle
09/06/2023| Posted in Die Cutting, Ink Blending| 227
Takes the Cake!
12/06/2023| Posted in Die Cutting, Card Making, Stamped Background, Stamping, Layering Stencils| 190
Partners In Adventure
17/06/2023| Posted in Copic Colouring, Die Cutting, Paper Piecing, Card Making, Fussy Cutting, Patterned Papers, Stamping, Clean & Simple, Clean and Simple (CAS)| 187

Pawsome Party In the Park
22/06/2023| Posted in Pencil Colouring, Die Cutting| 154
All Aglow
28/06/2023| Posted in Card Making, Stencilling, Stamped Background, Stamping, Layering Stencils| 229
Circular Sentiment Stamping with a Stamp Wheel Tool
25/06/2023| Posted in Stamping, Stamp Wheel| 179

Hey Beautiful
29/06/2023| Posted in Colouring Stamped Images, Copic Colouring, Stamping Techniques, Card Making, Heat Embossing, Clean & Simple| 173
Letterpress without a Betterpress? No problem!
07/07/2023| Posted in Letterpress| 1| 421
Tips and Tricks for Easy Paper Piecing with Large Dies
09/07/2023| Posted in Die Cutting, Paper Piecing| 242
A Chilled Day
10/07/2023| Posted in Colouring Stamped Images, Ink Blending, Card Making, sentiment Focal Points, colouring die cuts| 199
Make a Wish...
12/07/2023| Posted in Die Cutting, Card Making, Stamp Layering, Stamping, Clean & Simple, Clean and Simple (CAS)| 256


Donuts and Sprinkles
14/07/2023| Posted in Copic Colouring, Die Cutting| 200
Garden Goodness Birthday Wishes
19/07/2023| Posted in Die Cutting, Card Making, Stamping, sentiment Focal Points, Layering Stencils, Stencilled backgrounds| 241
Billowing Peonies
18/07/2023| Posted in Ink Blending, Card Making, Stencilling, Layering Stencils, Hot Foil, Stamp Wheel| 197
Floral Frame
26/07/2023| Posted in Card Making, Stamp Layering, Stamping, sentiment Focal Points, Stencilled backgrounds| 234

Ice Cream Helps
31/07/2023| Posted in Colouring Stamped Images, Copic Colouring, Pencil Colouring, Card Making, Heat Embossing, Clean & Simple| 239
Bloomin' Wonderful!
03/08/2023| Posted in Die Cutting, Stamping Techniques, Card Making, Stamped Background, Clean & Simple| 184
Just for You
16/08/2023| Posted in Die Cutting, Card Making, Stamp Layering, Stamped Background, Stamping, sentiment Focal Points| 207

Happy Bee-Day
15/08/2023| Posted in Copic Colouring, Die Cutting, Ink Blending, Card Making, Stamping, Stencilled backgrounds| 168
Picked Posies - Just for You
23/08/2023| Posted in Die Cutting, Card Making| 202
Hay Ride Drive By
24/08/2023| Posted in Pencil Colouring, Masking| 175
Friday Feel Good Floral
25/08/2023| Posted in Ink Blending, Stencilling, Clean & Simple, Stencilled backgrounds, Stamp Wheel| 220

Home Grown Notecard
04/09/2023| Posted in Clean & Simple, colouring die cuts| 181
Hope Your Day Is Filled With Fun
12/09/2023| Posted in Colouring Stamped Images, Die Cutting, Ink Blending, Card Making, Interactive Cards| 146
Gnomes in the sunflower patch
29/09/2023| Posted in Pencil Colouring| 199
Wish Upon a Star Fish
04/11/2023| Posted in Copic Colouring, Card Making, Stamped Background, Fussy Cutting, Stamping, Sketches, Clean & Simple, Clean and Simple (CAS)| 219

Introducing Flashback Friday Bargains
20/10/2023| Posted in Copic Colouring| 1| 1004

Flashback Friday Bargains - Concord and 9th
01/12/2023| Posted in Flashback Friday Bargains| 442
2024 Part One
07/12/2023| Posted in Die Cutting, Ink Blending, Stencilling, Gift Making, Stamping, Stencilled backgrounds| 147
2024 Part Two
14/12/2023| Posted in Ink Blending, Stencilling, Stamped Background, turnabouts, Gift Making, Stamping, Layering Stencils, Stencilled backgrounds, Stamp Wheel| 193
2024 Part Three
21/12/2023| Posted in Ink Blending, Stamping Techniques, Stamp Layering, Stencilling, turnabouts, Gift Making, Masking, mixed media, Wreath Building| 207
Out with the old, in with the new!
03/01/2024| Posted in Card Making, sentiment Focal Points| 167
Hello 2024
04/01/2024| Posted in Card Making, Stencilling, Layering Stencils, Clean & Simple, Clean and Simple (CAS)| 154
More than Merry Sprigs
10/01/2024| Posted in Stamping Techniques, Card Making, Stamp Layering, Stamped Background, Stamping| 155
Infinity Birthday Card
08/01/2024| Posted in Die Cutting, Interactive Cards| 162
Ski Season
19/01/2024| Posted in Die Cutting| 136
Layered Embossing Technique
21/01/2024| Posted in Embossing Folders| 197
Metallic Magic: Crafting a Dramatic Black Floral Card
29/01/2024| Posted in Water Colouring, Die Cutting, Stamping Techniques, Card Making, Flashback Friday Bargains| 182

Let's Party!
01/02/2024| Posted in Die Cutting, Ink Blending, Card Making, Stencilling, Clean & Simple, Stencilled backgrounds| 169
Endless Creativity: A Repeatable Card Design Gem!
05/02/2024| Posted in Copic Colouring, Card Making, Stencilling, Fussy Cutting, Stamping, Embossing Folders, Flashback Friday Bargains| 174

Legend-diary Birthday
04/02/2024| Posted in Copic Colouring, Die Cutting| 181
Garden Goodness
07/02/2024| Posted in Card Making, Stamp Layering, Stencilling, Layering Stencils, Clean & Simple, Stencilled backgrounds, Clean and Simple (CAS)| 172
Sew Cute Mini Notebook & Card
19/02/2024| Posted in Pencil Colouring, Die Cutting, Card Making, Stencilling, Gift Making, Layering Stencils, Stencilled backgrounds, Flashback Friday Bargains| 133
Grungy Flappy Birthday
20/02/2024| Posted in Colouring Stamped Images, Copic Colouring, Die Cutting, Ink Blending, Card Making| 149

Big Contempo Birthday Vibes
23/02/2024| Posted in Die Cutting, Stamping Techniques, Card Making, Stamped Background, turnabouts, sentiment Focal Points| 174
Mother's Day Whirl
03/03/2024| Posted in Copic Colouring, Interactive Cards| 474
I Hope You Know...
07/03/2024| Posted in Stamping Techniques, Card Making| 563
A Sweet Duo
14/03/2024| Posted in Colouring Stamped Images, Die Cutting, Stamping Techniques, Card Making, Stencilling, colouring die cuts| 192
One panel two ways
17/03/2024| Posted in Die Cutting| 205

Primrose Garden Greetings
20/03/2024| Posted in Die Cutting, Card Making| 224
Sweet Hello
21/03/2024| Posted in Die Cutting, Card Making, Partial Die Cutting, Stencilling, Stencilled backgrounds| 138
A Basket Full of Care
24/03/2024| Posted in Die Cutting| 193
Letterpressing Hotfoils
31/03/2024| Posted in Letterpress| 154

Flashback Friday Bargains - Leaves and Flowers
05/04/2024| Posted in Flashback Friday Bargains| 502
It's a Wrap Posy
08/04/2024| Posted in Die Cutting, Card Making, Stencilling, Patterned Papers, Clean & Simple, Clean and Simple (CAS)| 120
Sending Hugs & Snuggles
09/04/2024| Posted in Die Cutting, Ink Blending, Card Making, Stencilling, Stamping, Embossing Folders| 142
Bouquet Wishes
10/04/2024| Posted in Die Cutting, Card Making| 146

Birthdays and Backgrounds
14/04/2024| Posted in Die Cutting| 177

Paper Bouquet
17/04/2024| Posted in Die Cutting, Card Making| 107
Paper Bouquet Take 2
24/04/2024| Posted in Die Cutting, Card Making| 84
How to add dimension to your projects!
23/04/2024| Posted in Die Cutting, Ink Blending, Card Making, Stencilling, Stamping, Layering Stencils| 65
Related Products


Controversial Santas
28/08/2022

Birthday Forecast
14/02/2022

Encouraging Leaves
15/03/2021

Framed Snowdrops
22/02/2021

Birthday Blossoms
25/04/2024
Paper Bouquet Take 2
24/04/2024
How to add dimension to your projects!
23/04/2024
Cute Milkshake Card
22/04/2024