Marbled Magic: Vellum Floral Card with Artist Markers
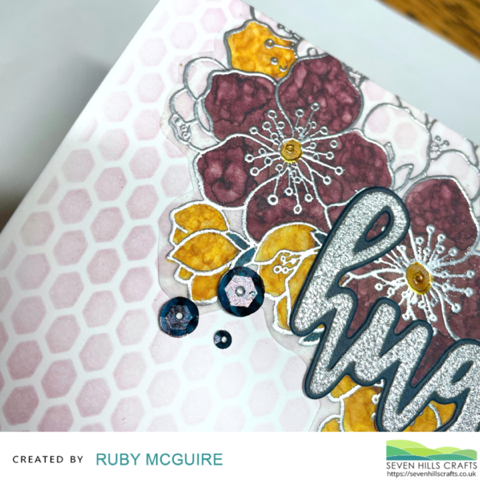
Hi there, it's Ruby
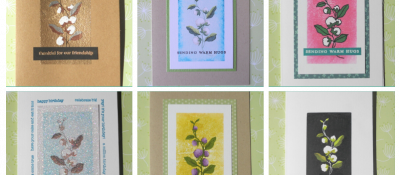
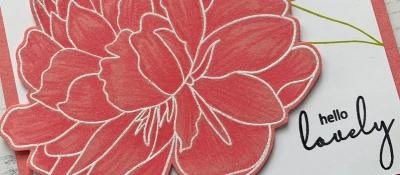
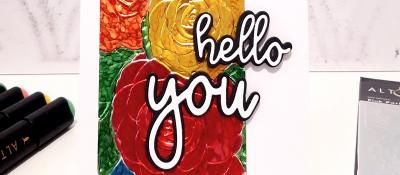
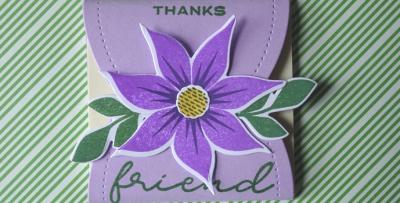
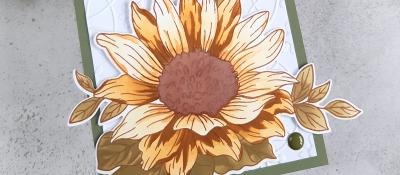
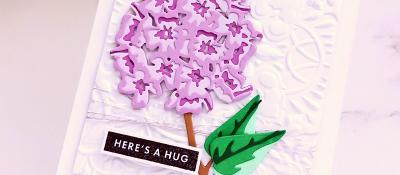
I thought I'd share a card with you that I taught in a card-making workshop last weekend as it was really well received. It's a fun technique to play with. I made a card with it over on my blog here if you want to check out a different design.
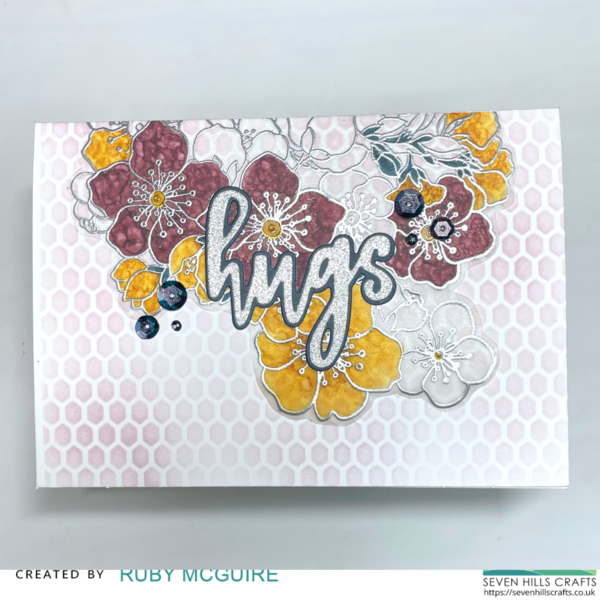
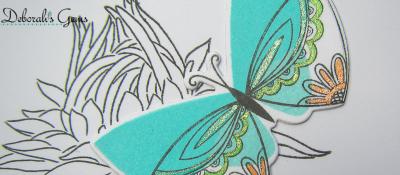
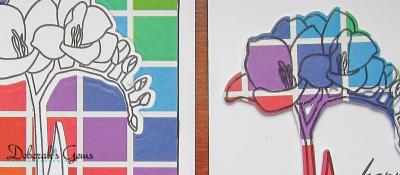
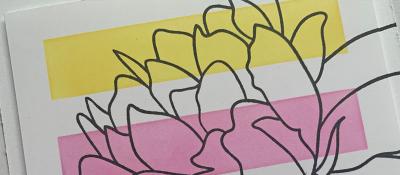
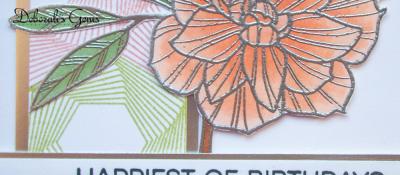
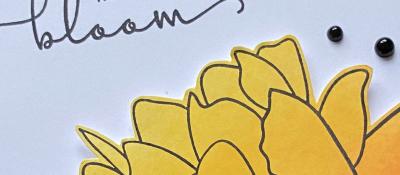
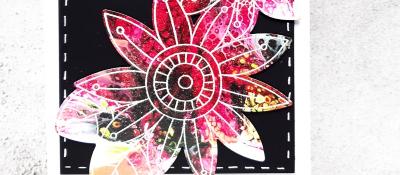
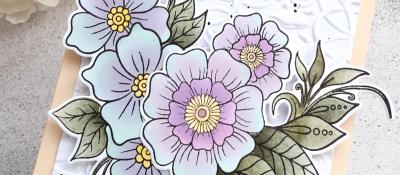
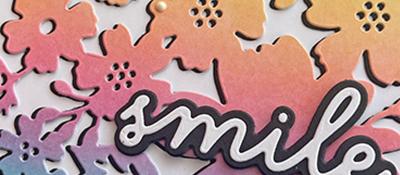
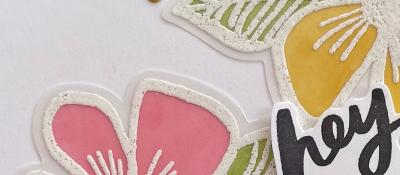
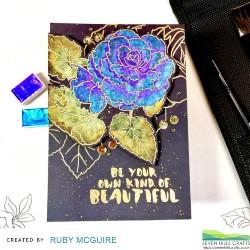
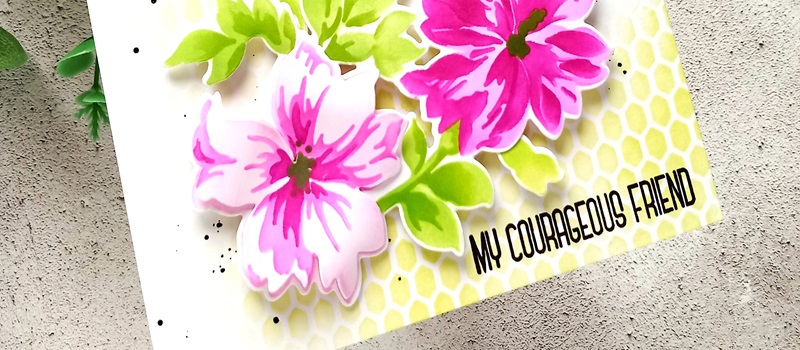
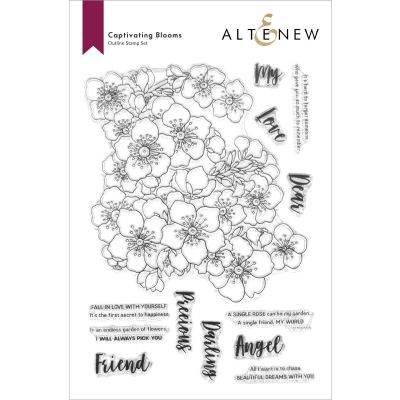
- Stamp Altenew's Captivating Blooms flower stamp onto vellum using Versamark ink
- Emboss the flowers using silver embossing powder
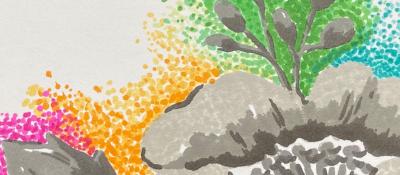
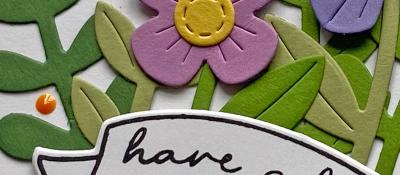
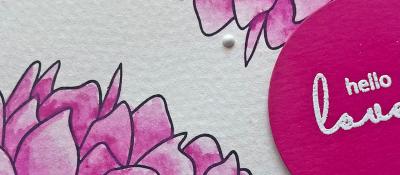
- Flip the embossed vellum panel over and lay down a base colour with Artist Markers. Note: Colouring on the reverse side creates a softer effect and reduces the risk of damage to your markers.
- Go back over the base colour with a lighter marker and stipple the petals to create a mottled effect.
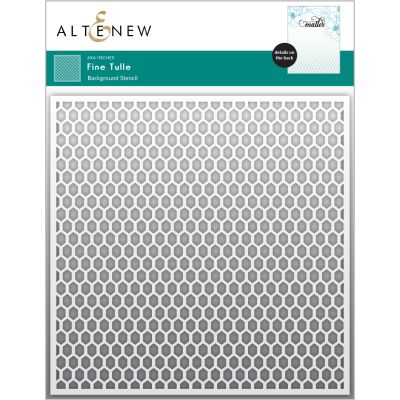
- Using Altenew's Fine Tulle Stencil and pale purple ink, stamp the card base
- Attach your coloured vellum panel to some double-sided adhesive sheets. This solves any issues with glue showing through
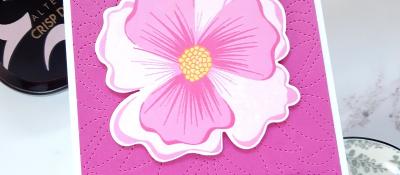
- Fussy cut your finished panel and attach it to the stencilled card base
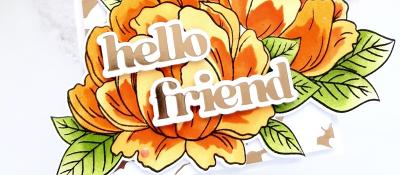
- Using Altenew's Hello and Hugs die set, die cut the sentiment out of silver and purple cardstock. Layer and attach to the card. Note: The closest die I could find to this was Altenew's Fancy Hugs Die. It's not a shadow die, but you could offset it to create a shadow effect.
- Add some silver watercolour splatter and some dark blue sequins to finish
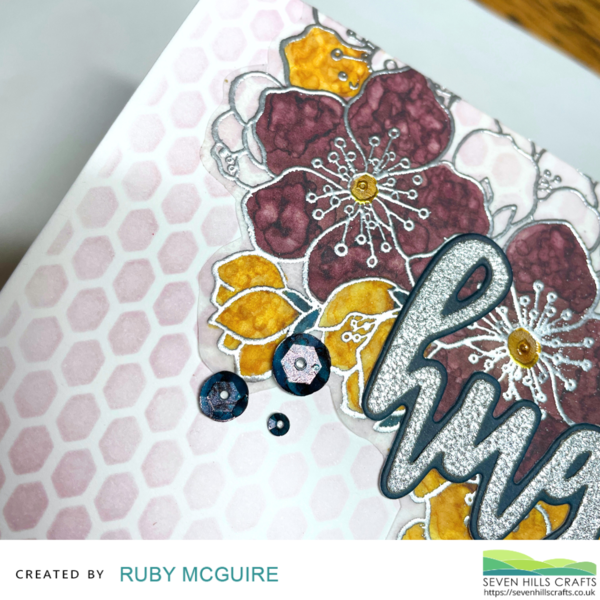
Top tip: This technique works better when your flowers have a nice open space, so the mottled event can show through.

That's it from me. I hope you enjoy playing with this technique. One of my lovely participants said she couldn't stop using it after doing the class!
Have a great week.
25/03/2024
|
View: 137
|
Categories: Copic Colouring, Card Making, Stencilling, Fussy Cutting, Stamping
|
Tags: Altenew, Seven Hills Crafts
Share this post
Related Posts
Handcrafted Happiness
10/03/2020| Posted in Card Making| 2| 303
Crafty Friends
18/03/2020| Posted in Copic Colouring, Die Cutting, Special Effects, Stamped Background, Interactive Cards| 331
Plant Kindness
22/03/2020| Posted in Copic Colouring| 333
You Are Beautiful
16/04/2020| Posted in Ink Blending, Fussy Cutting| 450
love from our home to yours
26/04/2020| Posted in Die Cutting, Stamping Techniques| 3| 583
Hello Lovely
30/04/2020| Posted in Pencil Colouring, Card Making| 1| 356
Every Hour is Happy Hour in Lockdown!
03/05/2020| Posted in Die Cutting, Stamping Techniques| 1| 671
Hello Friend
07/05/2020| Posted in Card Making, Fussy Cutting| 249
Quick and Easy Male Gift card
12/05/2020| Posted in Ink Blending, Card Making| 1| 258
2020 Spring/Summer Coffee Lovers Blog Hop
22/05/2020| Posted in Paper Piecing, Card Making| 40| 855
Sending Warm Hugs
30/05/2020| Posted in Colouring Stamped Images, Pencil Colouring, Water Colouring, Ink Blending| 537
Hello Friend
06/06/2020| Posted in Colouring Stamped Images, Die Cutting| 1| 383
Fluttering By
11/06/2020| Posted in Card Making, Stencilling| 266
Shine Like a Diamond
17/06/2020| Posted in Copic Colouring, Die Cutting, Card Making, Stamp Layering, Stamped Background, Heat Embossing| 337
Bowl of Blooms
18/06/2020| Posted in Colouring Stamped Images, Card Making| 345
Bumping by to say..
22/06/2020| Posted in Colouring Stamped Images, Card Making| 680
Berry Sweet
29/06/2020| Posted in Water Colouring, Stencilling| 404
Paper Hugs
05/08/2020| Posted in Copic Colouring, Die Cutting, Ink Blending, Card Making, Stamped Background, Interactive Cards, Heat Embossing| 421
The Cow Jumps over the moon
04/08/2020| Posted in Colouring Stamped Images, Die Cutting, Ink Blending, Card Making, Interactive Cards, Heat Embossing| 383
Camping Critters
21/08/2020| Posted in Copic Colouring| 359
Hey Friend!
27/08/2020| Posted in Die Cutting, Card Making| 309
Autumn Nuts
18/10/2020| Posted in Ink Blending, Inktense Pencils| 444
Cozy Friends
19/10/2020| Posted in Die Cutting, Card Making| 479
Aloha, 3 ways to colour your stamps.
27/10/2020| Posted in Colouring Stamped Images, Copic Colouring, Pencil Colouring, Water Colouring, Card Making| 3| 396
Delight in the Little Things
29/10/2020| Posted in Ink Blending, Card Making| 2| 255
Big and Bold Peacocks
30/10/2020| Posted in Copic Colouring, Card Making| 2| 415
Blossoms and Berries
02/11/2020| Posted in Stamping Techniques, Card Making| 2| 545
Friends and Christmas
18/11/2020| Posted in Stamping Techniques, Card Making, Stamp Layering, Stamped Background, Masking| 1| 379
A Winter Scene
23/11/2020| Posted in Colouring Stamped Images, Copic Colouring, Card Making, Interactive Cards, Shaped Cards| 2| 383
Hello on this Rainy day
24/11/2020| Posted in Copic Colouring, Die Cutting| 2| 294
Snowball Fun
30/11/2020| Posted in Colouring Stamped Images, Card Making| 2| 337
All the THANKS
10/12/2020| Posted in Die Cutting, Card Making| 2| 427
Going Dotty!
20/01/2021| Posted in Copic Colouring, Die Cutting, Stamping Techniques, Card Making, Stamped Background| 1| 232
More Hearts!
10/02/2021| Posted in Die Cutting, Stamping Techniques, Card Making, Stamped Background, Heat Embossing, turnabouts| 1| 217
A Little Something...
18/02/2021| Posted in Colouring Stamped Images, Copic Colouring, Stamping Techniques, Card Making, Stencilling, Masking| 1| 264
Trig 102
24/02/2021| Posted in Copic Colouring, Die Cutting, Card Making, Fussy Cutting, Heat Embossing, Repeat Pattern Building| 1| 552
Elephantastic
25/03/2021| Posted in Colouring Stamped Images, Pencil Colouring, Card Making, Stamped Background, Masking| 2| 345
Every Friendship has a story
06/04/2021| Posted in Die Cutting, Ink Blending, Stamping Techniques, Card Making, Heat Embossing| 1| 267
Hello Sunflowers
08/04/2021| Posted in Colouring Stamped Images, Pencil Colouring, Card Making, Fussy Cutting| 1| 327
Floral Fancies
25/04/2021| Posted in Off The Page Projects, Stamp Layering, Partial Die Cutting, Gift Making, Stamping on non paper surfaces| 2| 406
Hi-Ya!!
26/04/2021| Posted in Colouring Stamped Images, Die Cutting, Ink Blending, sentiment Focal Points| 4| 710
Eclectic Florals
29/04/2021| Posted in Colouring Stamped Images, Pencil Colouring, Die Cutting, Card Making, No Line Colouring, Fussy Cutting| 1| 366
Aloha
06/05/2021| Posted in Colouring Stamped Images, Copic Colouring, Card Making, Fussy Cutting, Stamping| 1| 280
More Brilliant Butterflies
12/05/2021| Posted in Die Cutting, Stamping Techniques, Card Making, Stamp Layering, Heat Embossing, Stamping| 1| 298
Going Dotty!
20/05/2021| Posted in Colouring Stamped Images, Copic Colouring, Stamping Techniques, Card Making, Stamp Layering, Stamping, sentiment Focal Points| 2| 329
Cup of Friendship
10/06/2021| Posted in Colouring Stamped Images, Pencil Colouring, Stamping Techniques, Card Making, Heat Embossing, Stamping| 304
Amazing Butterflies
17/06/2021| Posted in Colouring Stamped Images, Copic Colouring, Die Cutting, Stamping Techniques, Card Making, Stencilling, Heat Embossing, Stamping| 307
Wild Paradise
25/06/2021| Posted in Ink Blending, Stamping Techniques, Card Making, Stencilling, Stamped Background, Fussy Cutting, Heat Embossing, Masking| 272
Don't be afraid of colour!
29/06/2021| Posted in Die Cutting, Card Making| 227
Hey Friend!
01/07/2021| Posted in Die Cutting, Stamping Techniques, Card Making, Stamped Background, turnabouts, Stamping| 262
Recharge with Watercolour
03/07/2021| Posted in Water Colouring, Card Making| 350
Flock of Seagulls
05/07/2021| Posted in Colouring Stamped Images, Copic Colouring, Ink Blending, Card Making, Stamped Background| 377
Shaking Up The World
10/07/2021| Posted in Shaker Cards| 268
All dies, No Stamps
20/07/2021| Posted in Die Cutting| 420
Floating On By
26/07/2021| Posted in Copic Colouring, Die Cutting, Ink Blending, Stencilling, sentiment Focal Points| 251
Playful Patterns
10/08/2021| Posted in Die Cutting, Ink Blending| 236
Friend Like You
12/08/2021| Posted in Stamping Techniques, Card Making, Stamped Background, turnabouts, Stamping| 197
S'more fun with you
17/08/2021| Posted in Copic Colouring, Die Cutting| 191
Sweater Weather!!
25/08/2021| Posted in Copic Colouring, Die Cutting, Stamping Techniques, Card Making, Stamped Background, Stamping, Embossing Folders| 414
The Season In-Between!
02/09/2021| Posted in Ink Blending, Card Making| 249
The Little Things
03/09/2021| Posted in Pencil Colouring, No Line Colouring| 1| 243
Creating with restrictions
07/09/2021| Posted in Die Cutting, Card Making| 241
Snow Buddies
13/09/2021| Posted in Colouring Stamped Images, Stencilling| 246
Autumn Leaves
21/09/2021| Posted in Die Cutting, Card Making| 1| 326
Sweet Gingko
05/10/2021| Posted in Die Cutting, Ink Blending, Card Making, Stamp Layering, Stamped Background, Stamping, Layering Stencils| 407
Butterfly Dies
14/10/2021| Posted in Die Cutting, Card Making, Special Effects, Fancy Folds, Stamping, Clean & Simple| 1| 240
Alcohol Markers on Embossed metal
26/10/2021| Posted in Card Making, Embossing Folders| 306
Caffeine Inspiration
17/11/2021| Posted in Copic Colouring, Die Cutting, Stamped Background, turnabouts, Stamping, Mini Slimline Card, Clean & Simple| 340
All Stacked Up
27/11/2021| Posted in Copic Colouring, Card Making, Interactive Cards, Fussy Cutting, Patterned Papers, Stamping, Clean & Simple| 338
Mini Superhero
04/12/2021| Posted in Copic Colouring, Fussy Cutting| 363
Twinkle Twinkle
18/12/2021| Posted in Copic Colouring, Off The Page Projects| 1| 936
Life
12/02/2022| Posted in Copic Colouring, Sketches| 300
One Layer Wonders!
17/02/2022| Posted in Ink Blending, Card Making, Stencilling, Stamping, Clean & Simple, Stencilled backgrounds| 322
Friends Fur-ever
25/02/2022| Posted in Copic Colouring, Card Making, Partial Die Cutting, Fussy Cutting, Stamping, Clean & Simple| 1| 302
3 ways with CCC Teacups and Mice
01/03/2022| Posted in Colouring Stamped Images| 475
Hello Dear Friend
10/03/2022| Posted in Stamping Techniques, Card Making, Stamped Background, Fussy Cutting, Stamping, Clean & Simple| 233
You Raise Me Up
19/03/2022| Posted in Water Colouring| 253
Friendship & Smiles
07/04/2022| Posted in Card Making, Stamped Background, Stamping, sentiment Focal Points, Clean & Simple| 298
3 ways to Purrfection
09/04/2022| Posted in Stamped Background, Sketches| 275
Wanna Hang Out
16/04/2022| Posted in Copic Colouring, Clean & Simple| 296
Down On The Farm
19/04/2022| Posted in Copic Colouring, Die Cutting, Ink Blending, Card Making, Stencilling, Interactive Cards| 145
One Layer Cards
20/04/2022| Posted in Card Making, Stamped Background| 324
Hey There Beautiful Friend
21/04/2022| Posted in Ink Blending, Card Making, Stencilling, Layering Stencils, Stencilled backgrounds| 230
Chevron Pattern Play
23/04/2022| Posted in Paper Piecing, Card Making, Patterned Papers, Stitching/Embroidery, Clean & Simple| 381
More Sunshine, Less Umbrella's - Please!
12/05/2022| Posted in Colouring Stamped Images, Copic Colouring, Stamping Techniques, Card Making, Stamped Background, Clean & Simple| 246
Just Saying Hello
26/05/2022| Posted in Die Cutting, Ink Blending, Stencilling, Layering Stencils, Stencilled backgrounds| 231
Super Duper
30/05/2022| Posted in Colouring Stamped Images, Copic Colouring, Die Cutting, Card Making, sentiment Focal Points| 250
Circle Quad
11/06/2022| Posted in Patterned Papers| 286
Greetings from the Couch
04/07/2022| Posted in Die Cutting, Shaped Cards| 289
Mini Gift Notes
17/07/2022| Posted in Die Cutting, Gift Making| 295
Stitched Florals
23/07/2022| Posted in Die Cutting, Card Making, Off The Page Projects, Stitching/Embroidery, Stamping, sentiment Focal Points, Clean & Simple| 449
Cocktail Cheers
08/08/2022| Posted in Die Cutting, colouring die cuts| 394
Maybe it's Coffee
15/08/2022| Posted in Homeware/Decorations, colouring die cuts| 259
Hey Possum
20/08/2022| Posted in Copic Colouring, Embossing Folders| 1| 258
I'll Be There
29/08/2022| Posted in Die Cutting| 262
Autumnal Warm Wishes
10/11/2022| Posted in Stamping Techniques, Card Making, turnabouts, Clean & Simple, Clean and Simple (CAS)| 334
Rainbow Cheer
17/11/2022| Posted in Die Cutting, Stamping Techniques, Card Making, Stamped Background, Clean & Simple| 222
Polar Opposites
19/11/2022| Posted in Water Colouring, Card Making, Heat Embossing, Stamping, Clean & Simple, Clean and Simple (CAS)| 342
Star Gazing
26/11/2022| Posted in Copic Colouring, Fussy Cutting| 262
Plant A Succulent - Hugs Card
29/11/2022| Posted in Die Cutting, Card Making| 185
Autumn Sunflower
06/12/2022| Posted in Die Cutting, Ink Blending, Card Making, Heat Embossing, Layering Stencils| 186
Christmas with Friends
10/12/2022| Posted in Copic Colouring, Die Cutting, Stamping Techniques, Partial Die Cutting, Fussy Cutting| 235
Fantasy Jungle
13/12/2022| Posted in Ink Blending, Card Making, Stencilling, Embossing Folders, Layering Stencils| 199
Encouraging Notecards
06/02/2023| Posted in Die Cutting, Card Making| 1| 223
Abstract Gouache Greeting Card
07/02/2023| Posted in Card Making, gouache painting| 201
Soak & Relax
06/03/2023| Posted in Die Cutting, Homeware/Decorations| 270
Sunshine and Hugs
07/03/2023| Posted in Die Cutting, Card Making| 288
Hot Dog!
25/03/2023| Posted in Copic Colouring, Off The Page Projects| 288
Boho Butterflies
30/03/2023| Posted in Die Cutting, Ink Blending, Card Making, Stencilling, Layering Stencils, Clean & Simple| 1| 261
Howdy Raccoon
15/04/2023| Posted in Colouring Stamped Images, Copic Colouring, Stamping Techniques, Stamped Background, Fussy Cutting, Stamping| 296
Llamas do Yoga
13/05/2023| Posted in Copic Colouring| 198
Hold on Tight
27/05/2023| Posted in Copic Colouring, Die Cutting| 219
Rain or Shine - I'll Be There For You
25/04/2023| Posted in Die Cutting, Card Making| 159
Hey Beautiful
29/06/2023| Posted in Colouring Stamped Images, Copic Colouring, Stamping Techniques, Card Making, Heat Embossing, Clean & Simple| 173
Ice Cream Helps
31/07/2023| Posted in Colouring Stamped Images, Copic Colouring, Pencil Colouring, Card Making, Heat Embossing, Clean & Simple| 239
Cross the Ocean
29/07/2023| Posted in Copic Colouring| 144
Bloomin' Wonderful!
03/08/2023| Posted in Die Cutting, Stamping Techniques, Card Making, Stamped Background, Clean & Simple| 183
Picked Posies - Just for You
23/08/2023| Posted in Die Cutting, Card Making| 201
Embossing Magic... 2 ways!
22/08/2023| Posted in Die Cutting, Ink Blending, Card Making, Heat Embossing, Embossing Folders| 191
Friday Feel Good Floral
25/08/2023| Posted in Ink Blending, Stencilling, Clean & Simple, Stencilled backgrounds, Stamp Wheel| 220
Flying By...
03/09/2023| Posted in Stencilling, Layering Stencils| 235
Fall Foliage
13/09/2023| Posted in Die Cutting, Ink Blending, Card Making, colouring die cuts, water colour pencils| 224
Hope Your Day Is Filled With Fun
12/09/2023| Posted in Colouring Stamped Images, Die Cutting, Ink Blending, Card Making, Interactive Cards| 146
Autumn Vibes
25/09/2023| Posted in Die Cutting, Card Making| 262
Wish Upon a Star Fish
04/11/2023| Posted in Copic Colouring, Card Making, Stamped Background, Fussy Cutting, Stamping, Sketches, Clean & Simple, Clean and Simple (CAS)| 219
Hello 2024
04/01/2024| Posted in Card Making, Stencilling, Layering Stencils, Clean & Simple, Clean and Simple (CAS)| 154
It's a Tweet Life
20/01/2024| Posted in Stencilling| 215
Metallic Magic: Crafting a Dramatic Black Floral Card
29/01/2024| Posted in Water Colouring, Die Cutting, Stamping Techniques, Card Making, Flashback Friday Bargains| 182
Garden Goodness
07/02/2024| Posted in Card Making, Stamp Layering, Stencilling, Layering Stencils, Clean & Simple, Stencilled backgrounds, Clean and Simple (CAS)| 172
Pop Heart Hugs
08/02/2024| Posted in Die Cutting, Stamping Techniques, Card Making, Stamped Background, turnabouts, Stamp Wheel| 153
un BEAR able
10/02/2024| Posted in Colouring Stamped Images, Copic Colouring, Die Cutting, Fussy Cutting, Patterned Papers, Stamping| 215
Simple Mandala Card
26/02/2024| Posted in Colouring Stamped Images, Copic Colouring, Card Making, Stencilling, Clean & Simple, Stencilled backgrounds, Clean and Simple (CAS)| 155
You're Going Places...
27/02/2024| Posted in Colouring Stamped Images, Copic Colouring, Die Cutting, Ink Blending, Card Making, Stencilling, 3D| 173
I Hope You Know...
07/03/2024| Posted in Stamping Techniques, Card Making| 563
A Sweet Duo
14/03/2024| Posted in Colouring Stamped Images, Die Cutting, Stamping Techniques, Card Making, Stencilling, colouring die cuts| 192
Sweet Hello
21/03/2024| Posted in Die Cutting, Card Making, Partial Die Cutting, Stencilling, Stencilled backgrounds| 138
You Are Amazing!
02/04/2024| Posted in Die Cutting, Stamping Techniques, Card Making, turnabouts, Inlaid Die Cutting| 117
Sending Hugs & Snuggles
09/04/2024| Posted in Die Cutting, Ink Blending, Card Making, Stencilling, Stamping, Embossing Folders| 142
Bouquet Wishes
10/04/2024| Posted in Die Cutting, Card Making| 146
Paper Bouquet
17/04/2024| Posted in Die Cutting, Card Making| 107
Cute Milkshake Card
22/04/2024| Posted in Water Colouring, Card Making| 62
How to add dimension to your projects!
23/04/2024| Posted in Die Cutting, Ink Blending, Card Making, Stencilling, Stamping, Layering Stencils| 64
Related Products
Controversial Santas
28/08/2022
Birthday Forecast
14/02/2022
Encouraging Leaves
15/03/2021
Framed Snowdrops
22/02/2021
Birthday Blossoms
25/04/2024
Paper Bouquet Take 2
24/04/2024
How to add dimension to your projects!
23/04/2024
Cute Milkshake Card
22/04/2024
Topics
- Birthdays
- Christmas
- New Home
- New Baby
- Mother's Day
- Father's Day
- Valentine's Day
- St Patrick's Day
- Masculine
- New Year
- Good Luck
- New Job
- Retirement
- Holidays
- Celebrations
- Belated
- Easter
- Florals
- Get Well
- Friendship
- Gifts
- Gift Packaging
- Halloween
- Interactive
- Invitation
- Weddings
- Anniversary
- Motivation
- Inspiration
- Kind Thoughts
- Number Birthdays
- Sympathy
- Cheers
- Food and Drink
- Children's Cards
- Covid19
- Love
- Thanks and Gratitude
- Hello
- Superheros
- Birds
- Gardening and Gnomes
- Weather
- Congratulations
- Summer
- Tag
- Wellbeing
- Home Decoration
- Puns/Humour
- Patterns
- Clock
- Seasonal
- Autumn
- Prize
- Winter
- Trees
- Trees
- Pets
- Notecards
- Animals
- Rainbows
- Plants
- Scenery
- Butterflies and insects
- Inky Backsides
- Framed art
- Gift Boxes
- Reading
- Borders and Edges
- People
- Storage
- Upcycling
- Party Decorations and Favours
- Wreaths
- Sport
- Thinking Of You
- Bookmark
- Alphabets
- Movies
- Eid
- Monochromatic
- Coronation
- Sentiments
- Sea creatures
- Leaves
Tags
Mochi Girls
Altenew
Avery Elle
Art Impressions
Colorado Craft Company
Concord & 9th
Echo Park
Fiskars
Flora & Fauna
Hero Arts
Kuretake
Lawn Fawn
Lil' Inker Designs
Mama Elephant
My Favorite Things
Neat & Tangled
Newton's Nook
Paper Smooches
Ranger
Reverse Confetti
Seven Hills Crafts
Simple Stories
Sizzix
Stampers Anonymous
Stamping Bella
Sguar Pea Designs
Therm-o-web
Tonic Studios
Tsukineko
Waffle Flower Crafts
We Are Memory Keepers
Wplus9
Purple Onion Designs
The Greetery
Thinking Of You
Transotype


