
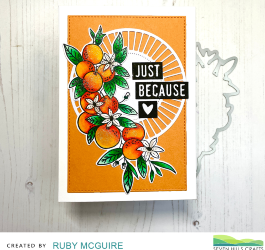
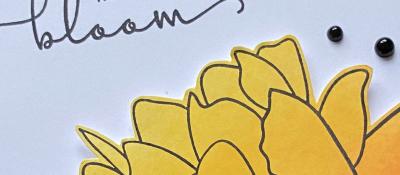
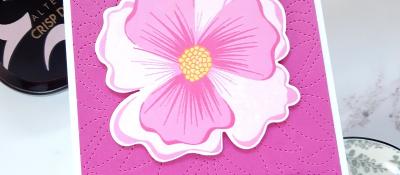
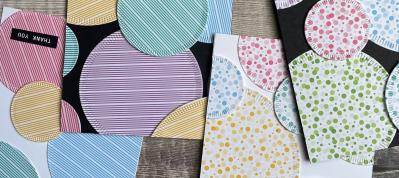
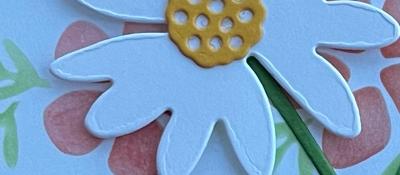
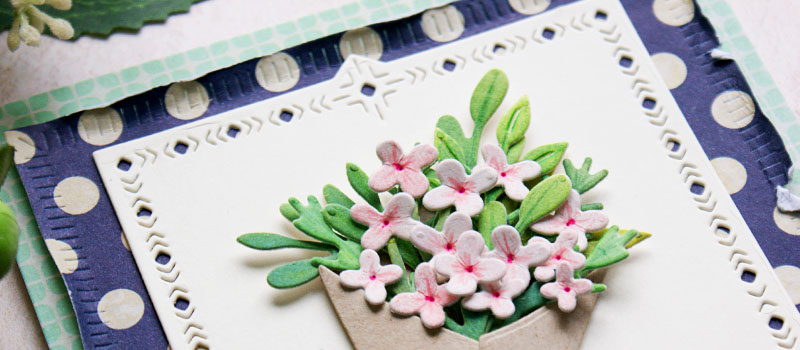
Orange Blossoms

Hi, it's Ruby. Happy Easter Monday!
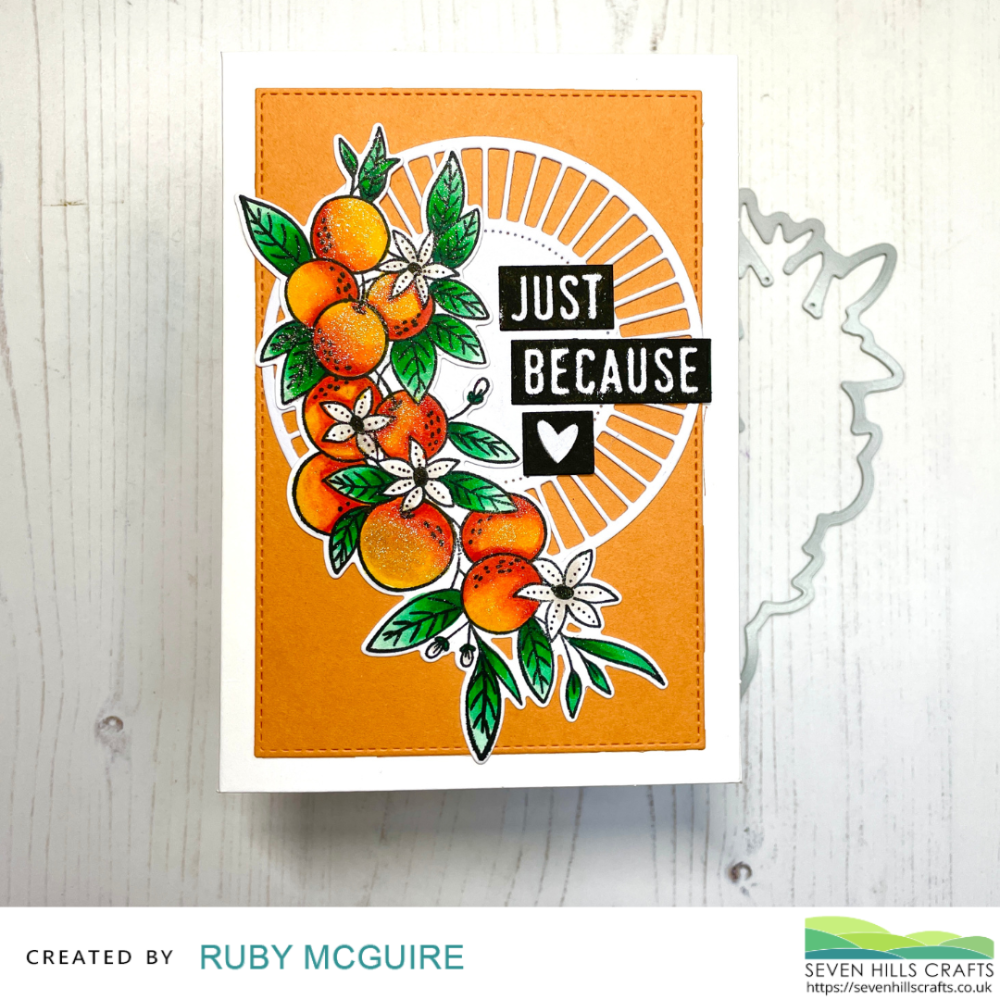
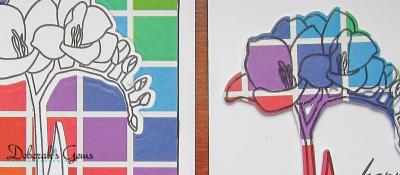
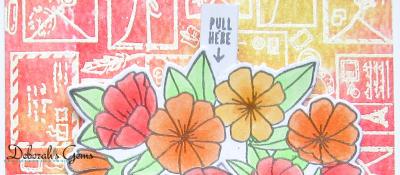
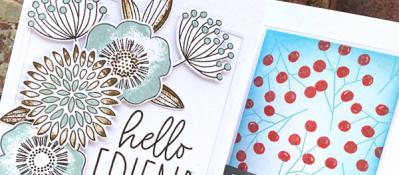
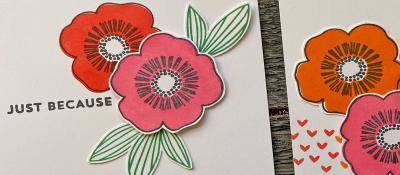
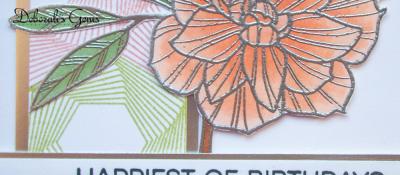
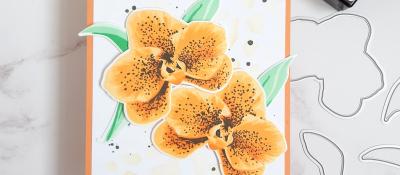
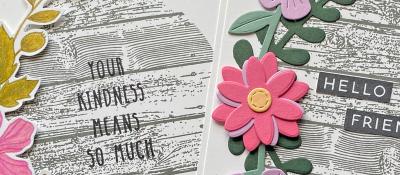
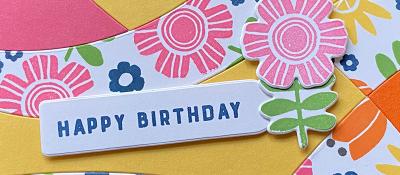
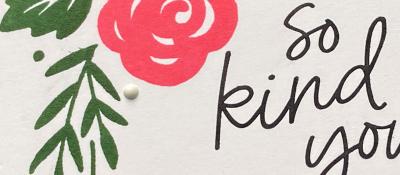
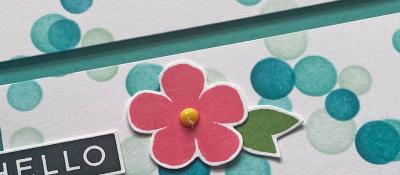
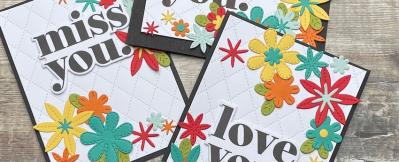
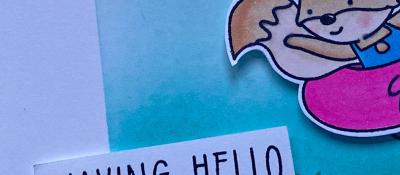
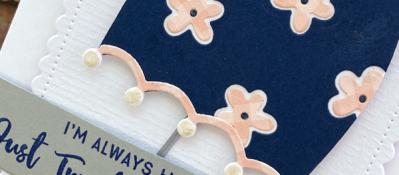
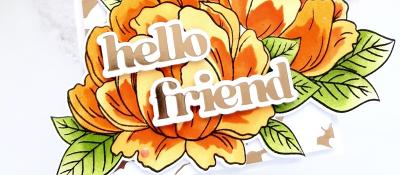
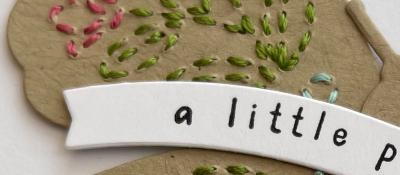
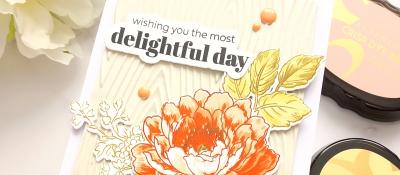
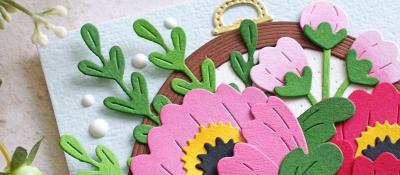
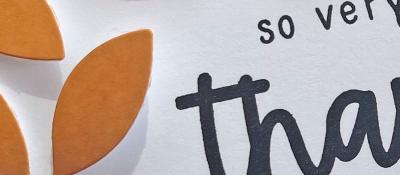
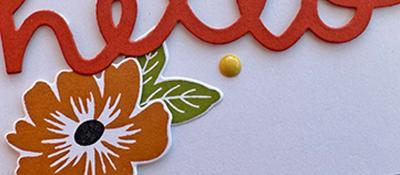
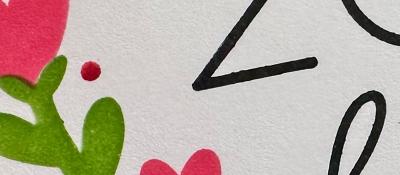
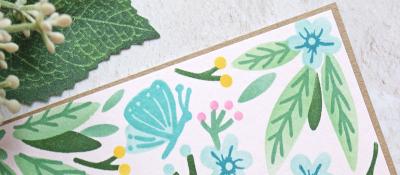
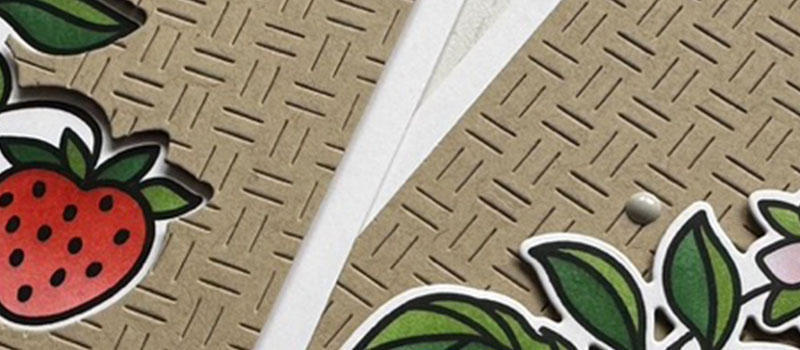
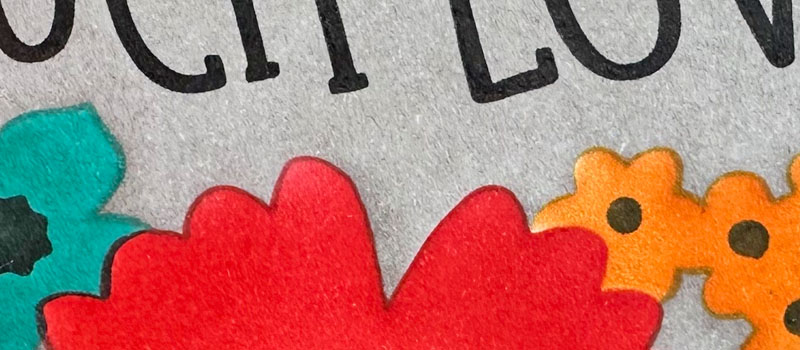
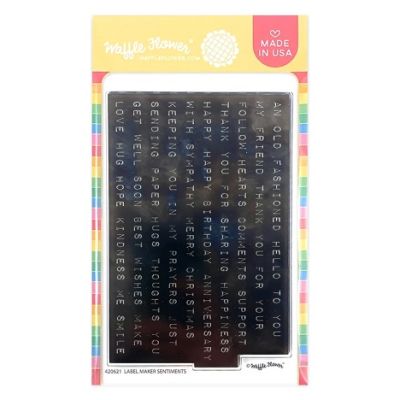
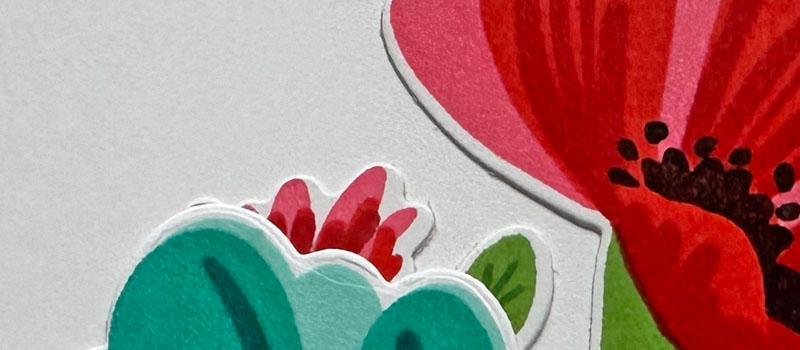
The first signs of spring are happening all around, so I wanted to make a bright and cheery card. Reverse Confetti's Orange Blossoms set is perfect because it's a big 'bloom' so the design practically falls together. These new block sentiment sets are great where you stamp all of your sentiments in one go. This Label Maker Sentiments Stamp and die set is a similar set to the one I used.
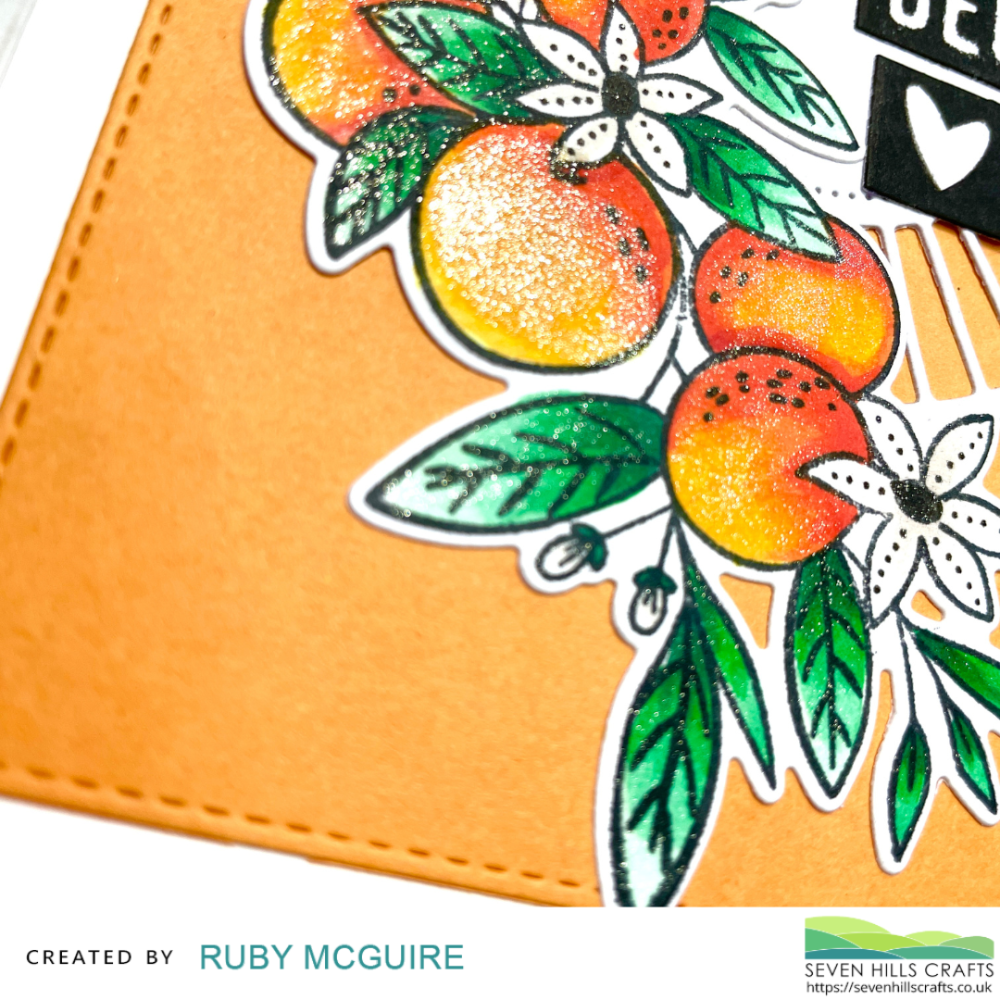
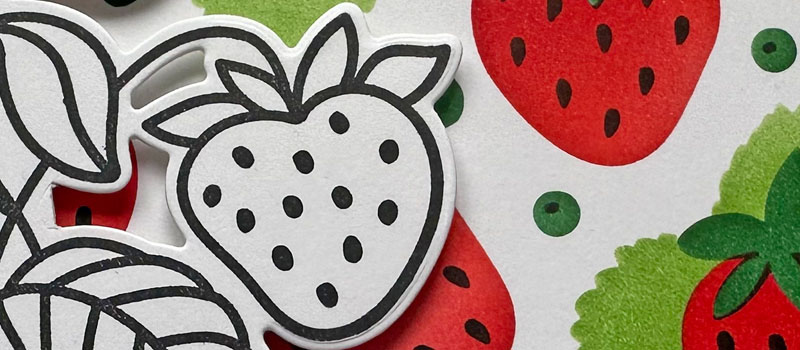
I get quite addicted when I pull the Orange Blossoms set out as I absolutely love colouring the oranges, they're great fun to colour! I've got loads saved for later.
Here's how the card came together:
-
Stamp, colour and die-cut the Orange Blossoms
-
Die-cut a stitched rectangular panel in orange cardstock, and add it to the card base
-
Die-cut the Radiating Circle Frame Die in white cardstock, add it to the orange stitched panel
-
Add the Orange Blossom panel to the left of the circle
-
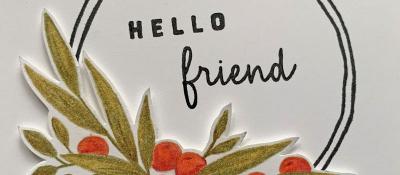
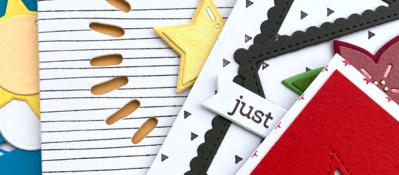
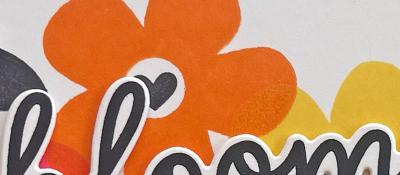
Stamp and die-cut the sentiments and attach them to the circle.
Top Tip: Stamp and die-cut extra sentiments so you have some ready for when you need a card in a hurry.
This is a nice flat card. I did contemplate layering everything up in my usual way, but I liked it as it was. The perfectionist in me wanted to tidy up the stamping of the sentiments but I think the recipient would prefer the more trendy look so I left it alone. Eek!

Have a great week!
PS. Be quick if you want to buy the Orange Blossoms set, there's only one left as it's on sale.
01/04/2024
|
View: 137
|
Categories: Copic Colouring, Die Cutting, Card Making, Stamping
|
Tags: Concord & 9th, Reverse Confetti, Waffle Flower Crafts
Related Posts

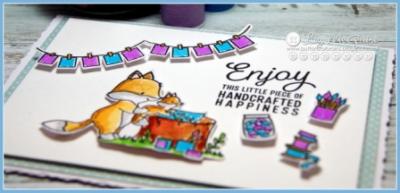
Handcrafted Happiness
10/03/2020| Posted in Card Making| 2| 304
Crafty Friends
18/03/2020| Posted in Copic Colouring, Die Cutting, Special Effects, Stamped Background, Interactive Cards| 332

Plant Kindness
22/03/2020| Posted in Copic Colouring| 334
You Are Beautiful
16/04/2020| Posted in Ink Blending, Fussy Cutting| 451
love from our home to yours
26/04/2020| Posted in Die Cutting, Stamping Techniques| 3| 584
Hello Lovely
30/04/2020| Posted in Pencil Colouring, Card Making| 1| 358

Every Hour is Happy Hour in Lockdown!
03/05/2020| Posted in Die Cutting, Stamping Techniques| 1| 671
Hello Friend
07/05/2020| Posted in Card Making, Fussy Cutting| 249

Quick and Easy Male Gift card
12/05/2020| Posted in Ink Blending, Card Making| 1| 258
2020 Spring/Summer Coffee Lovers Blog Hop
22/05/2020| Posted in Paper Piecing, Card Making| 40| 857
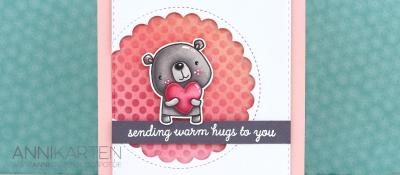
Sending Warm Hugs
30/05/2020| Posted in Colouring Stamped Images, Pencil Colouring, Water Colouring, Ink Blending| 538
Hello Friend
06/06/2020| Posted in Colouring Stamped Images, Die Cutting| 1| 384
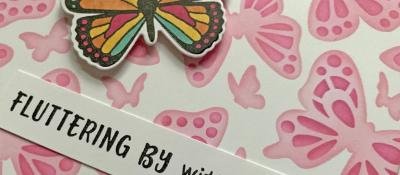
Fluttering By
11/06/2020| Posted in Card Making, Stencilling| 266

Shine Like a Diamond
17/06/2020| Posted in Copic Colouring, Die Cutting, Card Making, Stamp Layering, Stamped Background, Heat Embossing| 338
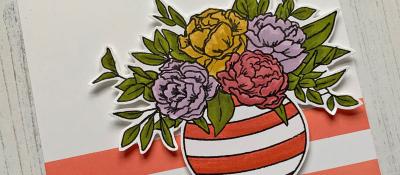
Bowl of Blooms
18/06/2020| Posted in Colouring Stamped Images, Card Making| 345
Bumping by to say..
22/06/2020| Posted in Colouring Stamped Images, Card Making| 680
Berry Sweet
29/06/2020| Posted in Water Colouring, Stencilling| 405
Paper Hugs
05/08/2020| Posted in Copic Colouring, Die Cutting, Ink Blending, Card Making, Stamped Background, Interactive Cards, Heat Embossing| 421
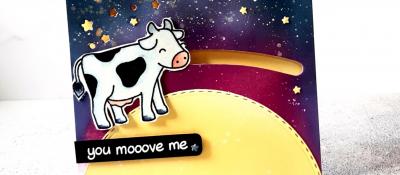
The Cow Jumps over the moon
04/08/2020| Posted in Colouring Stamped Images, Die Cutting, Ink Blending, Card Making, Interactive Cards, Heat Embossing| 383


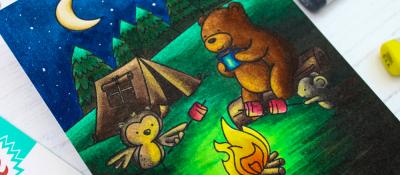
Camping Critters
21/08/2020| Posted in Copic Colouring| 359
Hey Friend!
27/08/2020| Posted in Die Cutting, Card Making| 310
Autumn Nuts
18/10/2020| Posted in Ink Blending, Inktense Pencils| 445
Cozy Friends
19/10/2020| Posted in Die Cutting, Card Making| 479
Aloha, 3 ways to colour your stamps.
27/10/2020| Posted in Colouring Stamped Images, Copic Colouring, Pencil Colouring, Water Colouring, Card Making| 3| 396
Delight in the Little Things
29/10/2020| Posted in Ink Blending, Card Making| 2| 255
Big and Bold Peacocks
30/10/2020| Posted in Copic Colouring, Card Making| 2| 415
Blossoms and Berries
02/11/2020| Posted in Stamping Techniques, Card Making| 2| 548

Friends and Christmas
18/11/2020| Posted in Stamping Techniques, Card Making, Stamp Layering, Stamped Background, Masking| 1| 380
A Winter Scene
23/11/2020| Posted in Colouring Stamped Images, Copic Colouring, Card Making, Interactive Cards, Shaped Cards| 2| 383
Hello on this Rainy day
24/11/2020| Posted in Copic Colouring, Die Cutting| 2| 294
Snowball Fun
30/11/2020| Posted in Colouring Stamped Images, Card Making| 2| 337

All the THANKS
10/12/2020| Posted in Die Cutting, Card Making| 2| 430
Going Dotty!
20/01/2021| Posted in Copic Colouring, Die Cutting, Stamping Techniques, Card Making, Stamped Background| 1| 232
More Hearts!
10/02/2021| Posted in Die Cutting, Stamping Techniques, Card Making, Stamped Background, Heat Embossing, turnabouts| 1| 217
A Little Something...
18/02/2021| Posted in Colouring Stamped Images, Copic Colouring, Stamping Techniques, Card Making, Stencilling, Masking| 1| 265
Trig 102
24/02/2021| Posted in Copic Colouring, Die Cutting, Card Making, Fussy Cutting, Heat Embossing, Repeat Pattern Building| 1| 554


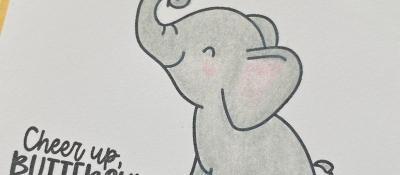
Elephantastic
25/03/2021| Posted in Colouring Stamped Images, Pencil Colouring, Card Making, Stamped Background, Masking| 2| 346
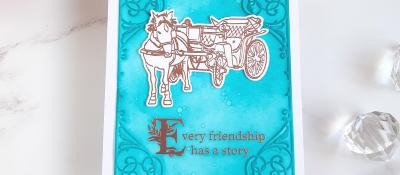
Every Friendship has a story
06/04/2021| Posted in Die Cutting, Ink Blending, Stamping Techniques, Card Making, Heat Embossing| 1| 267
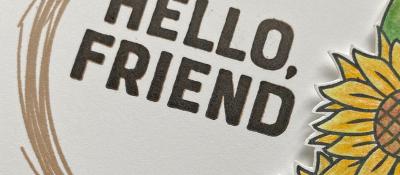
Hello Sunflowers
08/04/2021| Posted in Colouring Stamped Images, Pencil Colouring, Card Making, Fussy Cutting| 1| 327
Floral Fancies
25/04/2021| Posted in Off The Page Projects, Stamp Layering, Partial Die Cutting, Gift Making, Stamping on non paper surfaces| 2| 406
Hi-Ya!!
26/04/2021| Posted in Colouring Stamped Images, Die Cutting, Ink Blending, sentiment Focal Points| 4| 710
Eclectic Florals
29/04/2021| Posted in Colouring Stamped Images, Pencil Colouring, Die Cutting, Card Making, No Line Colouring, Fussy Cutting| 1| 366

Aloha
06/05/2021| Posted in Colouring Stamped Images, Copic Colouring, Card Making, Fussy Cutting, Stamping| 1| 281
More Brilliant Butterflies
12/05/2021| Posted in Die Cutting, Stamping Techniques, Card Making, Stamp Layering, Heat Embossing, Stamping| 1| 298
Going Dotty!
20/05/2021| Posted in Colouring Stamped Images, Copic Colouring, Stamping Techniques, Card Making, Stamp Layering, Stamping, sentiment Focal Points| 2| 330
Cup of Friendship
10/06/2021| Posted in Colouring Stamped Images, Pencil Colouring, Stamping Techniques, Card Making, Heat Embossing, Stamping| 305
Amazing Butterflies
17/06/2021| Posted in Colouring Stamped Images, Copic Colouring, Die Cutting, Stamping Techniques, Card Making, Stencilling, Heat Embossing, Stamping| 308
Wild Paradise
25/06/2021| Posted in Ink Blending, Stamping Techniques, Card Making, Stencilling, Stamped Background, Fussy Cutting, Heat Embossing, Masking| 272
Don't be afraid of colour!
29/06/2021| Posted in Die Cutting, Card Making| 228
Hey Friend!
01/07/2021| Posted in Die Cutting, Stamping Techniques, Card Making, Stamped Background, turnabouts, Stamping| 263
Recharge with Watercolour
03/07/2021| Posted in Water Colouring, Card Making| 350
Flock of Seagulls
05/07/2021| Posted in Colouring Stamped Images, Copic Colouring, Ink Blending, Card Making, Stamped Background| 377
Shaking Up The World
10/07/2021| Posted in Shaker Cards| 270

All dies, No Stamps
20/07/2021| Posted in Die Cutting| 422
Floating On By
26/07/2021| Posted in Copic Colouring, Die Cutting, Ink Blending, Stencilling, sentiment Focal Points| 251

Playful Patterns
10/08/2021| Posted in Die Cutting, Ink Blending| 236
Friend Like You
12/08/2021| Posted in Stamping Techniques, Card Making, Stamped Background, turnabouts, Stamping| 197
S'more fun with you
17/08/2021| Posted in Copic Colouring, Die Cutting| 192

Sweater Weather!!
25/08/2021| Posted in Copic Colouring, Die Cutting, Stamping Techniques, Card Making, Stamped Background, Stamping, Embossing Folders| 415
The Season In-Between!
02/09/2021| Posted in Ink Blending, Card Making| 249

The Little Things
03/09/2021| Posted in Pencil Colouring, No Line Colouring| 1| 243
Creating with restrictions
07/09/2021| Posted in Die Cutting, Card Making| 241
Snow Buddies
13/09/2021| Posted in Colouring Stamped Images, Stencilling| 247
Autumn Leaves
21/09/2021| Posted in Die Cutting, Card Making| 1| 326
Sweet Gingko
05/10/2021| Posted in Die Cutting, Ink Blending, Card Making, Stamp Layering, Stamped Background, Stamping, Layering Stencils| 408
Butterfly Dies
14/10/2021| Posted in Die Cutting, Card Making, Special Effects, Fancy Folds, Stamping, Clean & Simple| 1| 240
Alcohol Markers on Embossed metal
26/10/2021| Posted in Card Making, Embossing Folders| 306

Caffeine Inspiration
17/11/2021| Posted in Copic Colouring, Die Cutting, Stamped Background, turnabouts, Stamping, Mini Slimline Card, Clean & Simple| 340
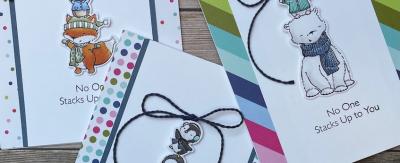
All Stacked Up
27/11/2021| Posted in Copic Colouring, Card Making, Interactive Cards, Fussy Cutting, Patterned Papers, Stamping, Clean & Simple| 338
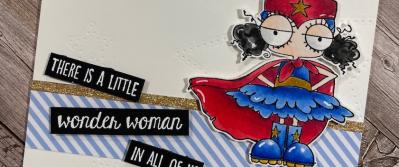
Mini Superhero
04/12/2021| Posted in Copic Colouring, Fussy Cutting| 363
Twinkle Twinkle
18/12/2021| Posted in Copic Colouring, Off The Page Projects| 1| 939


Life
12/02/2022| Posted in Copic Colouring, Sketches| 300
One Layer Wonders!
17/02/2022| Posted in Ink Blending, Card Making, Stencilling, Stamping, Clean & Simple, Stencilled backgrounds| 322

Friends Fur-ever
25/02/2022| Posted in Copic Colouring, Card Making, Partial Die Cutting, Fussy Cutting, Stamping, Clean & Simple| 1| 303
3 ways with CCC Teacups and Mice
01/03/2022| Posted in Colouring Stamped Images| 475

Hello Dear Friend
10/03/2022| Posted in Stamping Techniques, Card Making, Stamped Background, Fussy Cutting, Stamping, Clean & Simple| 233
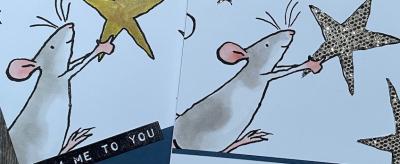
You Raise Me Up
19/03/2022| Posted in Water Colouring| 253
Friendship & Smiles
07/04/2022| Posted in Card Making, Stamped Background, Stamping, sentiment Focal Points, Clean & Simple| 299
3 ways to Purrfection
09/04/2022| Posted in Stamped Background, Sketches| 275
Wanna Hang Out
16/04/2022| Posted in Copic Colouring, Clean & Simple| 296
Down On The Farm
19/04/2022| Posted in Copic Colouring, Die Cutting, Ink Blending, Card Making, Stencilling, Interactive Cards| 145
One Layer Cards
20/04/2022| Posted in Card Making, Stamped Background| 325
Hey There Beautiful Friend
21/04/2022| Posted in Ink Blending, Card Making, Stencilling, Layering Stencils, Stencilled backgrounds| 230
Chevron Pattern Play
23/04/2022| Posted in Paper Piecing, Card Making, Patterned Papers, Stitching/Embroidery, Clean & Simple| 382

More Sunshine, Less Umbrella's - Please!
12/05/2022| Posted in Colouring Stamped Images, Copic Colouring, Stamping Techniques, Card Making, Stamped Background, Clean & Simple| 246

Just Saying Hello
26/05/2022| Posted in Die Cutting, Ink Blending, Stencilling, Layering Stencils, Stencilled backgrounds| 231
Super Duper
30/05/2022| Posted in Colouring Stamped Images, Copic Colouring, Die Cutting, Card Making, sentiment Focal Points| 250
Circle Quad
11/06/2022| Posted in Patterned Papers| 286
Greetings from the Couch
04/07/2022| Posted in Die Cutting, Shaped Cards| 290
Mini Gift Notes
17/07/2022| Posted in Die Cutting, Gift Making| 296
Stitched Florals
23/07/2022| Posted in Die Cutting, Card Making, Off The Page Projects, Stitching/Embroidery, Stamping, sentiment Focal Points, Clean & Simple| 451
Cocktail Cheers
08/08/2022| Posted in Die Cutting, colouring die cuts| 395
Maybe it's Coffee
15/08/2022| Posted in Homeware/Decorations, colouring die cuts| 259
Hey Possum
20/08/2022| Posted in Copic Colouring, Embossing Folders| 1| 258
I'll Be There
29/08/2022| Posted in Die Cutting| 263
Autumnal Warm Wishes
10/11/2022| Posted in Stamping Techniques, Card Making, turnabouts, Clean & Simple, Clean and Simple (CAS)| 335

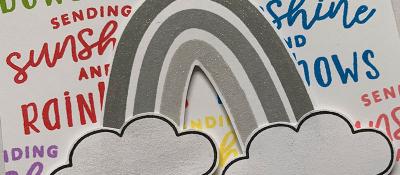
Rainbow Cheer
17/11/2022| Posted in Die Cutting, Stamping Techniques, Card Making, Stamped Background, Clean & Simple| 223
Polar Opposites
19/11/2022| Posted in Water Colouring, Card Making, Heat Embossing, Stamping, Clean & Simple, Clean and Simple (CAS)| 342
Star Gazing
26/11/2022| Posted in Copic Colouring, Fussy Cutting| 265
Plant A Succulent - Hugs Card
29/11/2022| Posted in Die Cutting, Card Making| 186
Autumn Sunflower
06/12/2022| Posted in Die Cutting, Ink Blending, Card Making, Heat Embossing, Layering Stencils| 188

Christmas with Friends
10/12/2022| Posted in Copic Colouring, Die Cutting, Stamping Techniques, Partial Die Cutting, Fussy Cutting| 235
Fantasy Jungle
13/12/2022| Posted in Ink Blending, Card Making, Stencilling, Embossing Folders, Layering Stencils| 200

Encouraging Notecards
06/02/2023| Posted in Die Cutting, Card Making| 1| 224
Abstract Gouache Greeting Card
07/02/2023| Posted in Card Making, gouache painting| 202
Soak & Relax
06/03/2023| Posted in Die Cutting, Homeware/Decorations| 272
Sunshine and Hugs
07/03/2023| Posted in Die Cutting, Card Making| 288
Hot Dog!
25/03/2023| Posted in Copic Colouring, Off The Page Projects| 289
Boho Butterflies
30/03/2023| Posted in Die Cutting, Ink Blending, Card Making, Stencilling, Layering Stencils, Clean & Simple| 1| 264
Howdy Raccoon
15/04/2023| Posted in Colouring Stamped Images, Copic Colouring, Stamping Techniques, Stamped Background, Fussy Cutting, Stamping| 297
Llamas do Yoga
13/05/2023| Posted in Copic Colouring| 199
Hold on Tight
27/05/2023| Posted in Copic Colouring, Die Cutting| 222
Rain or Shine - I'll Be There For You
25/04/2023| Posted in Die Cutting, Card Making| 159


Hey Beautiful
29/06/2023| Posted in Colouring Stamped Images, Copic Colouring, Stamping Techniques, Card Making, Heat Embossing, Clean & Simple| 175


Ice Cream Helps
31/07/2023| Posted in Colouring Stamped Images, Copic Colouring, Pencil Colouring, Card Making, Heat Embossing, Clean & Simple| 240
Cross the Ocean
29/07/2023| Posted in Copic Colouring| 146
Bloomin' Wonderful!
03/08/2023| Posted in Die Cutting, Stamping Techniques, Card Making, Stamped Background, Clean & Simple| 185
Picked Posies - Just for You
23/08/2023| Posted in Die Cutting, Card Making| 202
Embossing Magic... 2 ways!
22/08/2023| Posted in Die Cutting, Ink Blending, Card Making, Heat Embossing, Embossing Folders| 192
Friday Feel Good Floral
25/08/2023| Posted in Ink Blending, Stencilling, Clean & Simple, Stencilled backgrounds, Stamp Wheel| 221
Flying By...
03/09/2023| Posted in Stencilling, Layering Stencils| 235
Fall Foliage
13/09/2023| Posted in Die Cutting, Ink Blending, Card Making, colouring die cuts, water colour pencils| 227
Hope Your Day Is Filled With Fun
12/09/2023| Posted in Colouring Stamped Images, Die Cutting, Ink Blending, Card Making, Interactive Cards| 146

Autumn Vibes
25/09/2023| Posted in Die Cutting, Card Making| 263
Wish Upon a Star Fish
04/11/2023| Posted in Copic Colouring, Card Making, Stamped Background, Fussy Cutting, Stamping, Sketches, Clean & Simple, Clean and Simple (CAS)| 221

Hello 2024
04/01/2024| Posted in Card Making, Stencilling, Layering Stencils, Clean & Simple, Clean and Simple (CAS)| 156


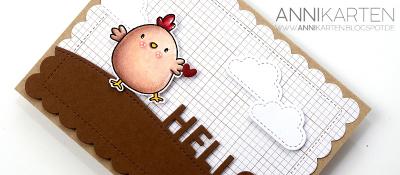
It's a Tweet Life
20/01/2024| Posted in Stencilling| 218
Metallic Magic: Crafting a Dramatic Black Floral Card
29/01/2024| Posted in Water Colouring, Die Cutting, Stamping Techniques, Card Making, Flashback Friday Bargains| 184
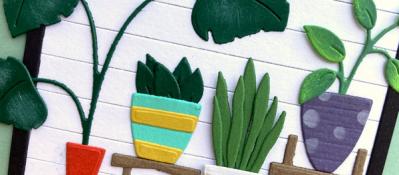
Garden Goodness
07/02/2024| Posted in Card Making, Stamp Layering, Stencilling, Layering Stencils, Clean & Simple, Stencilled backgrounds, Clean and Simple (CAS)| 177

Pop Heart Hugs
08/02/2024| Posted in Die Cutting, Stamping Techniques, Card Making, Stamped Background, turnabouts, Stamp Wheel| 157
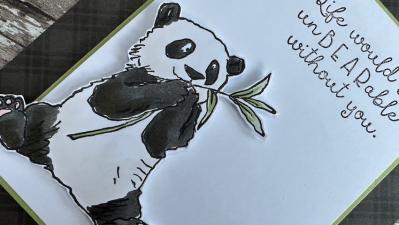
un BEAR able
10/02/2024| Posted in Colouring Stamped Images, Copic Colouring, Die Cutting, Fussy Cutting, Patterned Papers, Stamping| 222

Simple Mandala Card
26/02/2024| Posted in Colouring Stamped Images, Copic Colouring, Card Making, Stencilling, Clean & Simple, Stencilled backgrounds, Clean and Simple (CAS)| 158
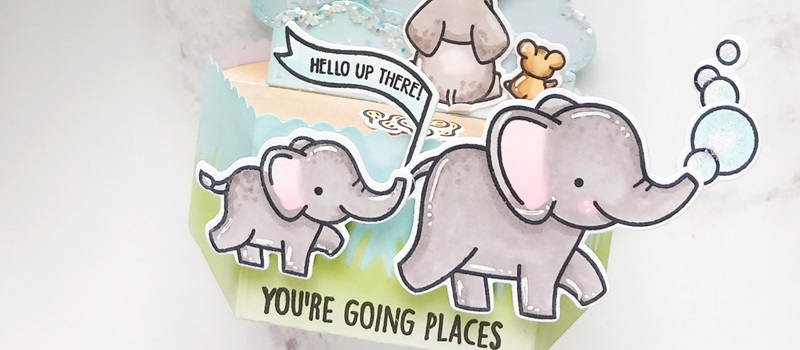
You're Going Places...
27/02/2024| Posted in Colouring Stamped Images, Copic Colouring, Die Cutting, Ink Blending, Card Making, Stencilling, 3D| 177
I Hope You Know...
07/03/2024| Posted in Stamping Techniques, Card Making| 564
A Sweet Duo
14/03/2024| Posted in Colouring Stamped Images, Die Cutting, Stamping Techniques, Card Making, Stencilling, colouring die cuts| 193
Sweet Hello
21/03/2024| Posted in Die Cutting, Card Making, Partial Die Cutting, Stencilling, Stencilled backgrounds| 142
You Are Amazing!
02/04/2024| Posted in Die Cutting, Stamping Techniques, Card Making, turnabouts, Inlaid Die Cutting| 118
Sending Hugs & Snuggles
09/04/2024| Posted in Die Cutting, Ink Blending, Card Making, Stencilling, Stamping, Embossing Folders| 142
Bouquet Wishes
10/04/2024| Posted in Die Cutting, Card Making| 149


Paper Bouquet
17/04/2024| Posted in Die Cutting, Card Making| 122
Cute Milkshake Card
22/04/2024| Posted in Water Colouring, Card Making| 74
How to add dimension to your projects!
23/04/2024| Posted in Die Cutting, Ink Blending, Card Making, Stencilling, Stamping, Layering Stencils| 84
Related Products


Controversial Santas
28/08/2022

Birthday Forecast
14/02/2022

Encouraging Leaves
15/03/2021

Framed Snowdrops
22/02/2021

Congratulations!
30/04/2024
Flowers - The Language of Love
29/04/2024
Sky High Birthday Balloons and Store News
28/04/2024
Birthday Blossoms
25/04/2024
Paper Bouquet Take 2
24/04/2024