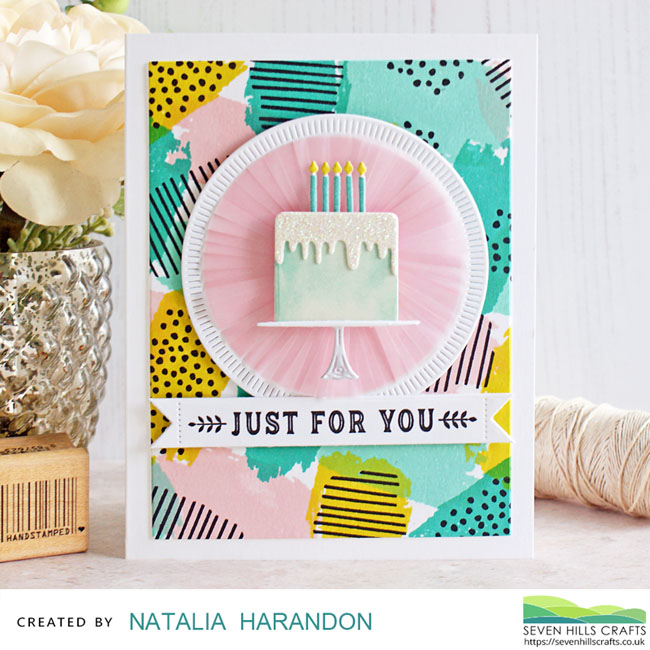
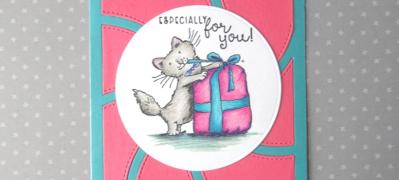
Just for you on your birthday


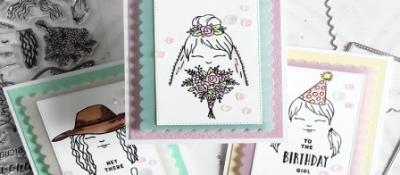
For my card today, I've paired up some of the new items from The Greetery's recent birthday release with a couple of versatile sets from Concord & 9th.
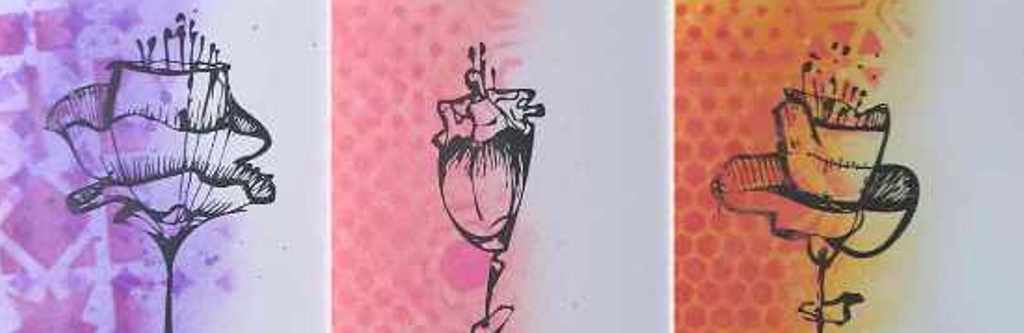
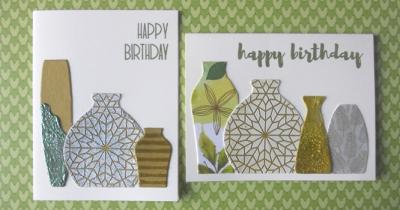
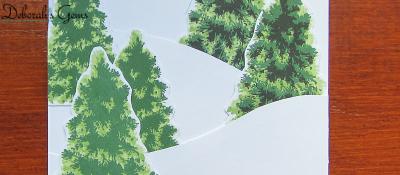
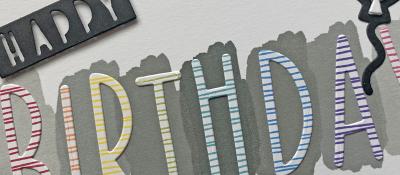
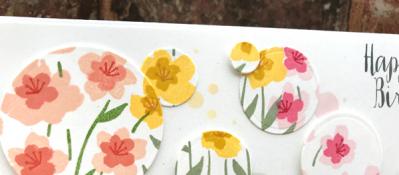
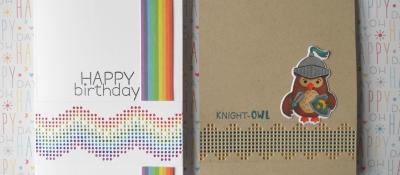
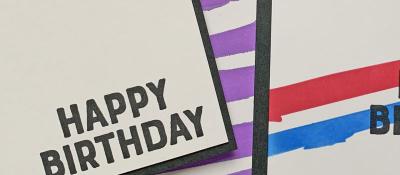
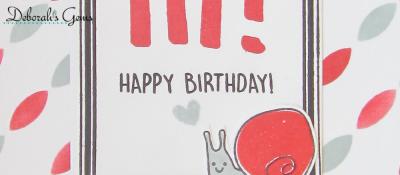
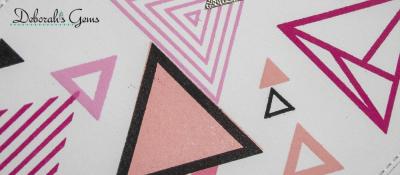
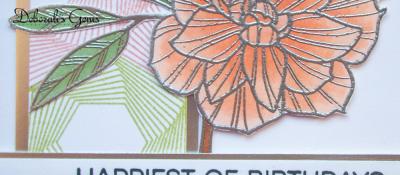
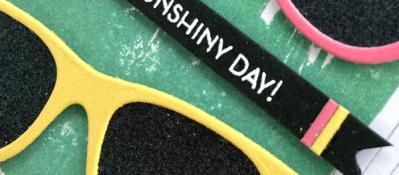
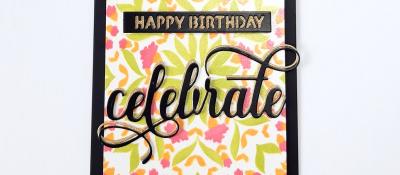
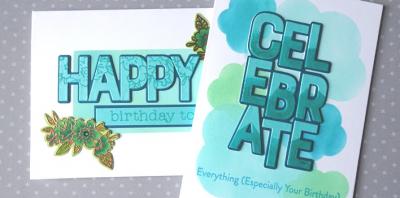
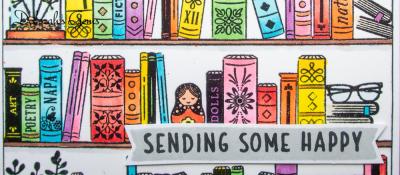
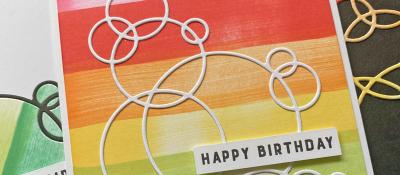
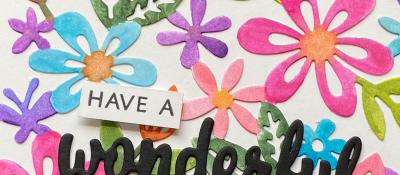
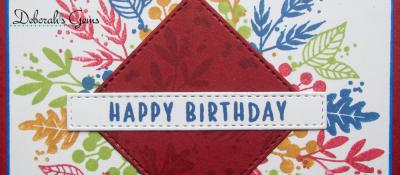
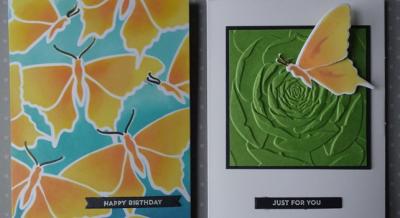
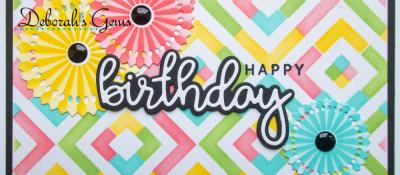
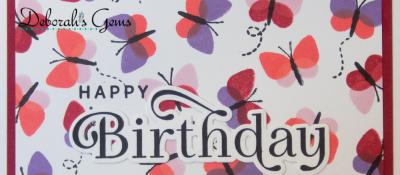
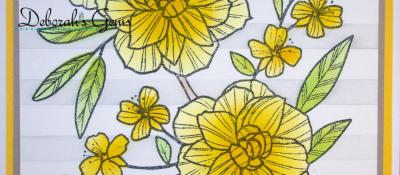
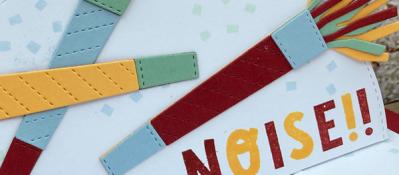
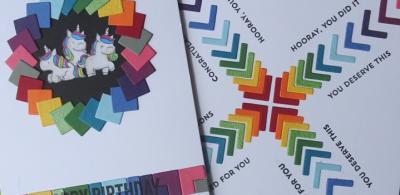
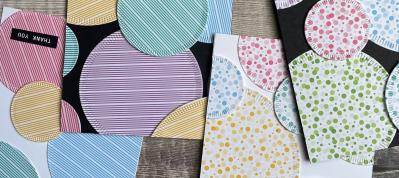
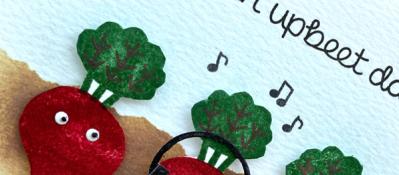
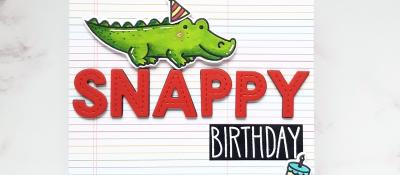
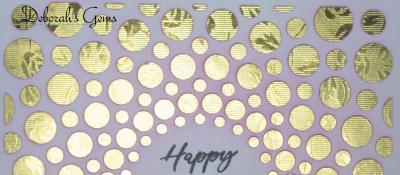
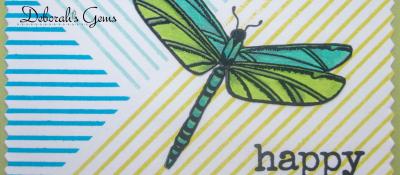
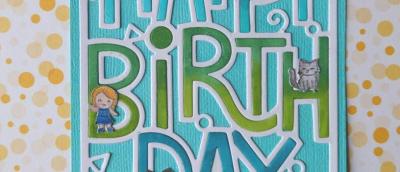
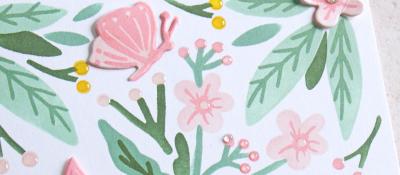
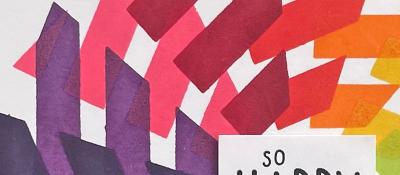
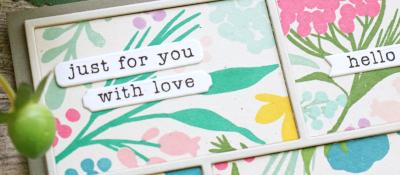
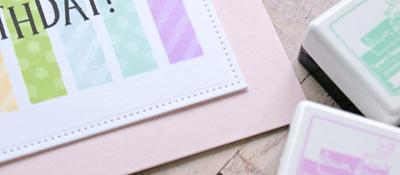
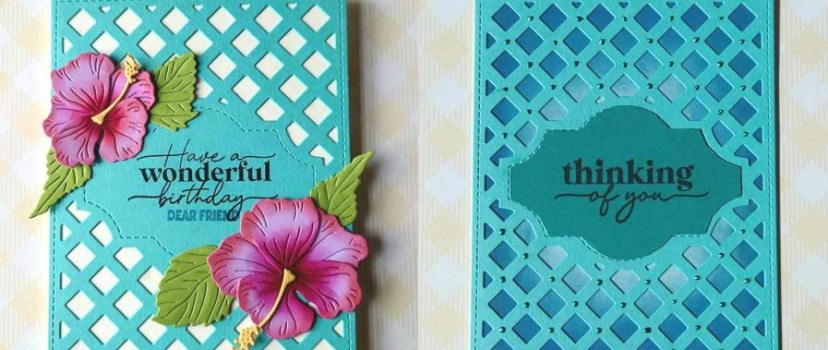
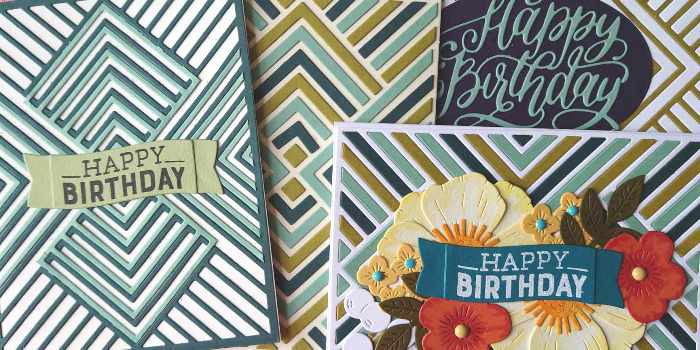
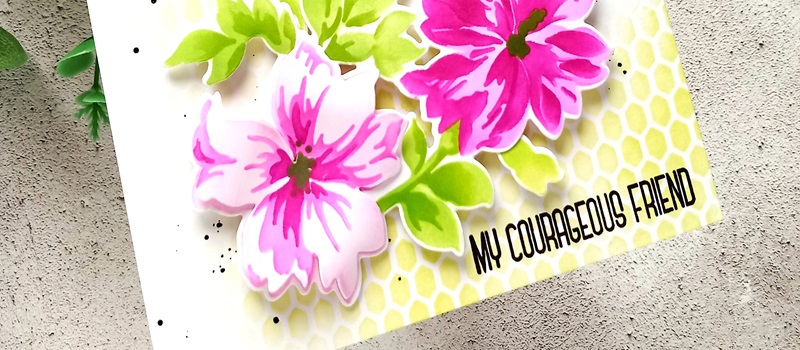
When you need a background for your card, Turnabout stamps are often the perfect solution.
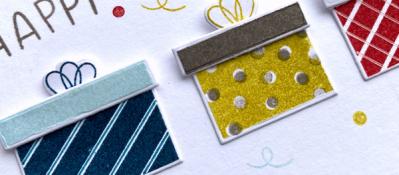
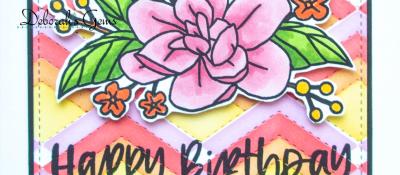
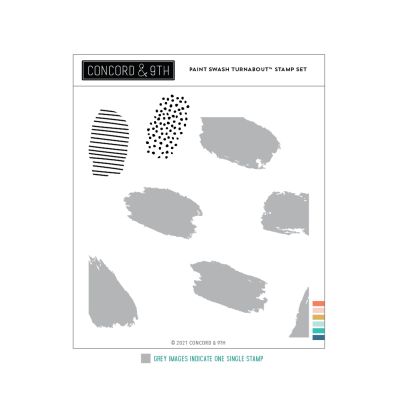
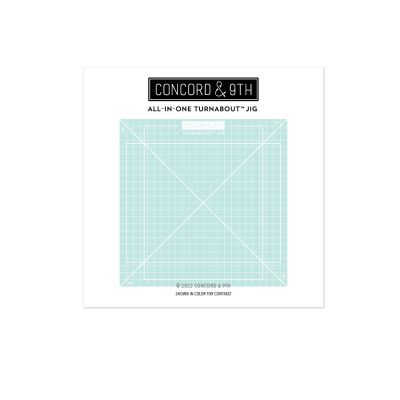
I already had a colour palette in mind for this project, so I grabbed the Paint Swash Turnabout set and the new and improved All-in-One Turnabout Jig from Concord & 9th and stamped an A2 background that I could later trim down to use on my card.
The Paint Swash Turnabout set also includes separate stamps for adding the spotty and striped details. So you can go really bold and use black ink for those accents, or omit them completely for a subtle pattern.
~~~
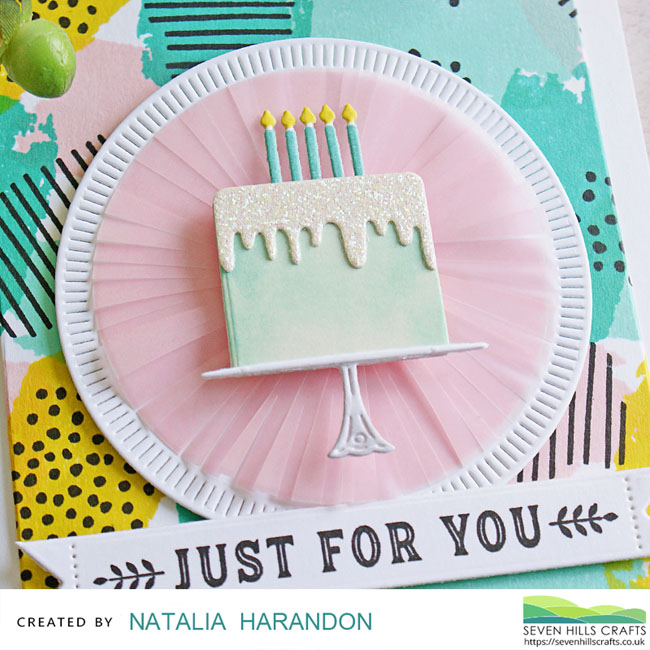
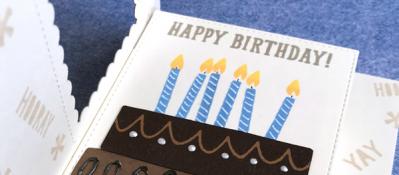
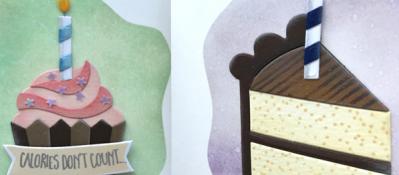
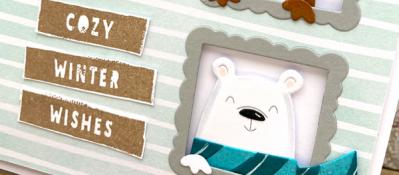
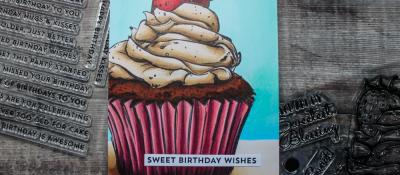
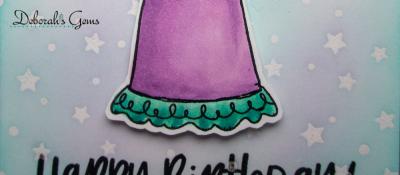
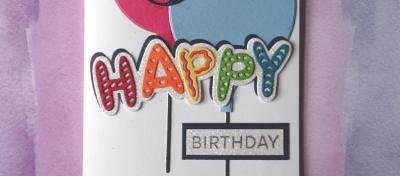
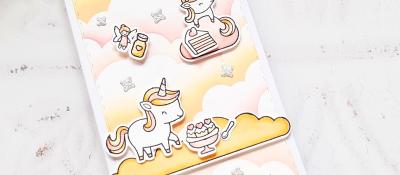
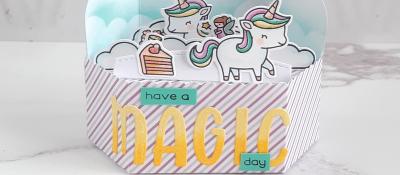
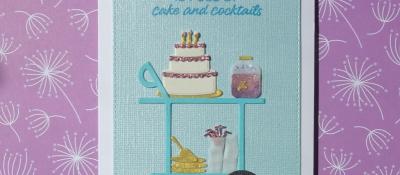
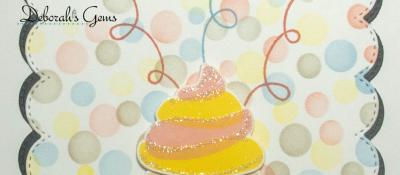
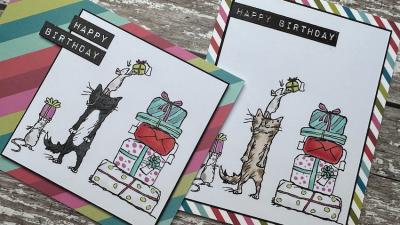
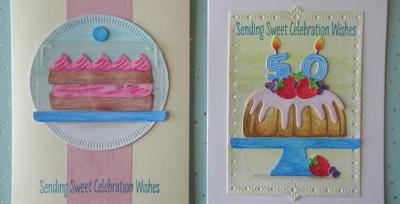
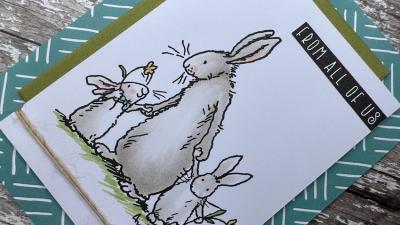
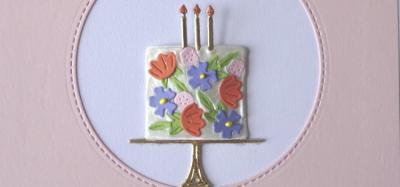
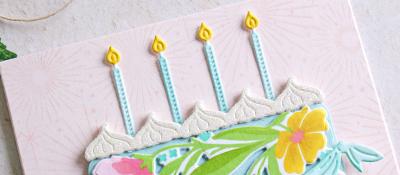
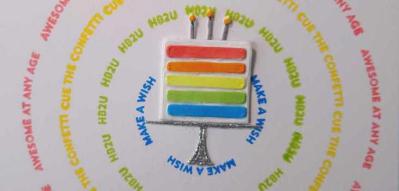
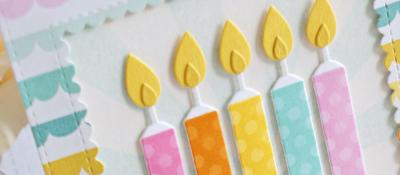
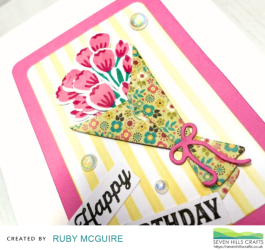
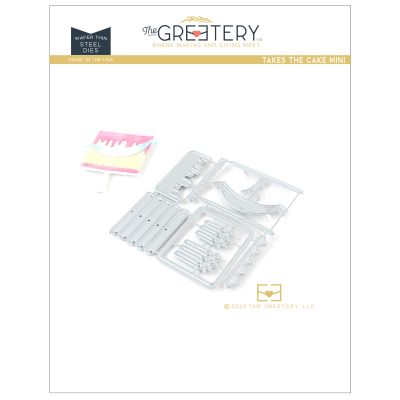
Next it was time to create the star of the show with the new Takes the Cake Mini die set from The Greetery. There are so many fun elements in this set for creating all sorts of fancy cakes – you've got icing details, layers for rainbow cakes, a banner, the little candles, and the cake stand.

I wanted to replicate the look of a fancy marbled/ombré effect on my cake. So I cut the cake from cream cardstock and used a small blending brush to stipple light teal ink over the cake for a mottled look.
I cut the icing from glittery cream cardstock and added some grey shading to the cake stand base.
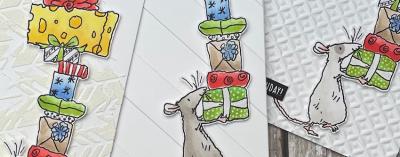
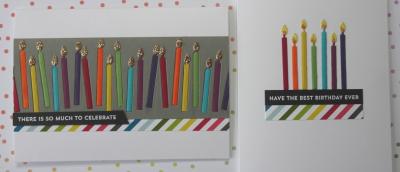
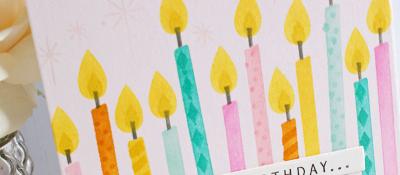
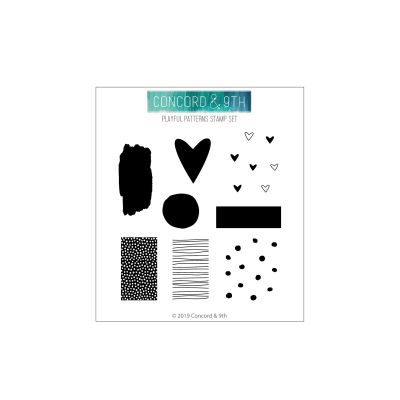
To colour the candles, I reached for a very handy little stamp set that I often use to add blocks of colour or patterns to small die-cuts. I used the solid rectangle in the Playful Patterns set to stamp yellow and teal rectangles one on top of the other on a scrap piece of white cardstock. There's a notch in the candle die that makes it easy to line up the flames over the yellow, and cutting the candles this way round instead of colouring them later is much less fiddly and also means the colouring is nice and uniform.
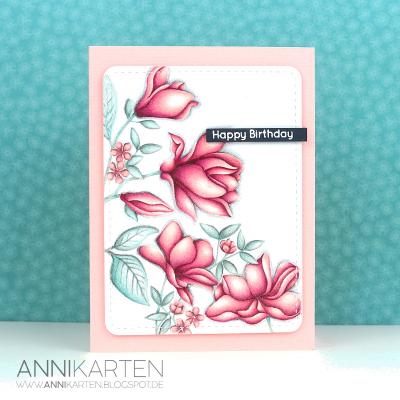
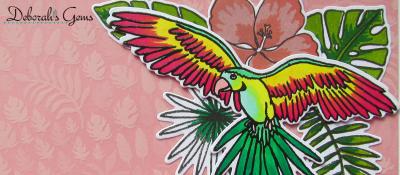
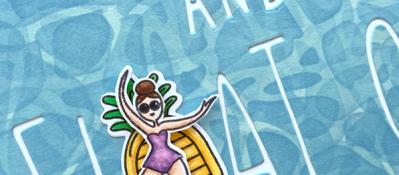
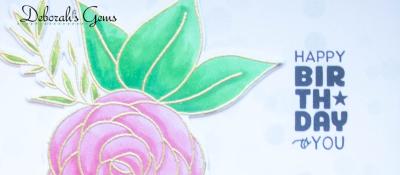
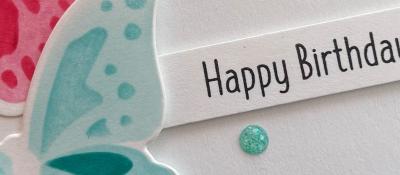
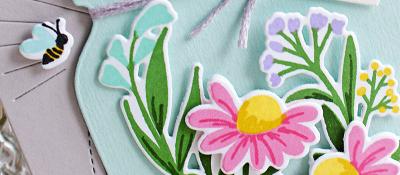
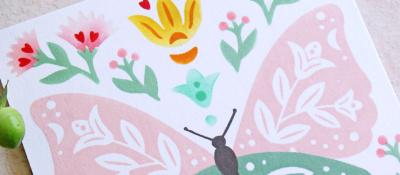
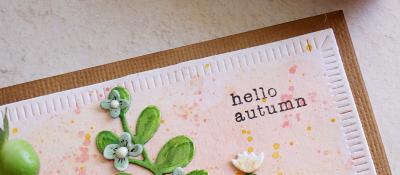
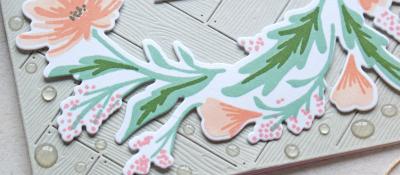
The recent projects showcased by Betsy from The Greetery used coloured vellum in some very creative ways. But my stash of coloured vellum from circa 2004 has long-since been donated elsewhere. So I decided to make my own coloured vellum to match the pink tones in the background.
I grabbed a piece of plain Lawn Fawn vellum and rubbed a Saltwater Taffy Distress Ink pad over the vellum, removing the excess ink with a microfibre cloth between applications until I reached the intensity I wanted. The vellum was also dry to the touch after rubbing with a microfibre cloth, so no need to zap with a heat gun and potentially warp the vellum.
Top tip: If you want to die-cut your DIY coloured vellum, pop it between two pieces of printer paper before running it through your die-cutting machine with a die. This will ensure no ink is transferred to your cutting plates, and no fuzzy bits embedded in your cutting plates get stuck to the vellum.
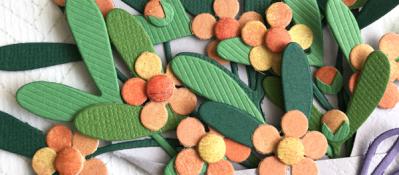
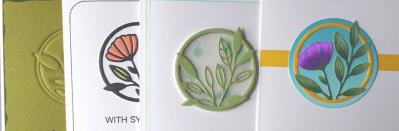
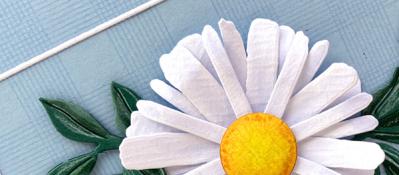
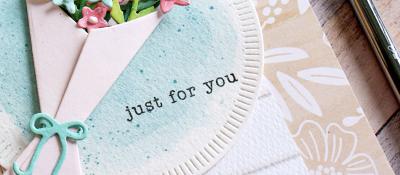
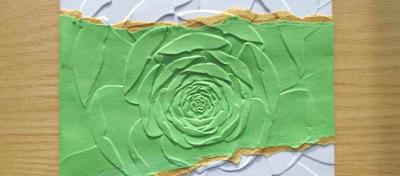
For extra pop and texture, I snipped into my die-cut vellum circle with a pair of scissors creating a fringed effect.
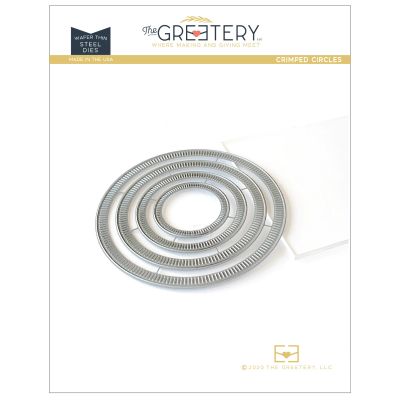
I then popped the vellum circle on one of the Crimped Circle dies from The Greetery with a blob of glue hidden by the mini cake.
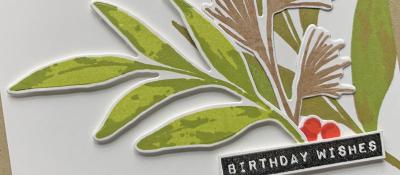
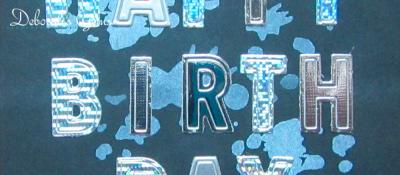
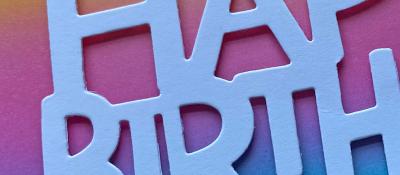
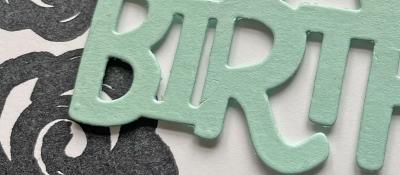
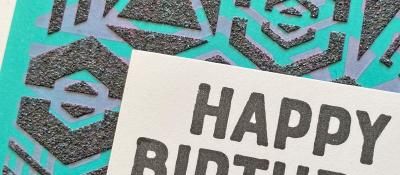
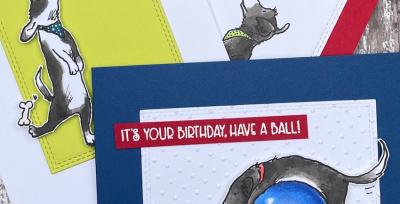
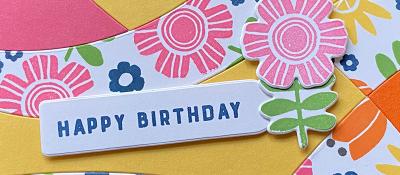
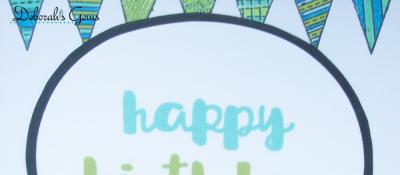
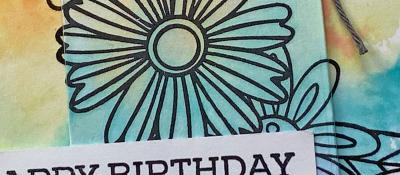
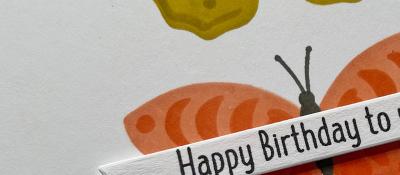
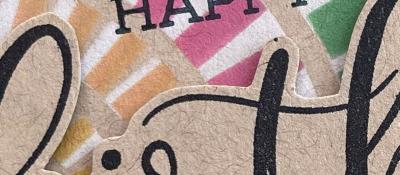
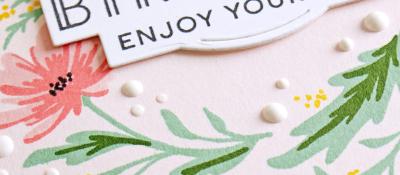
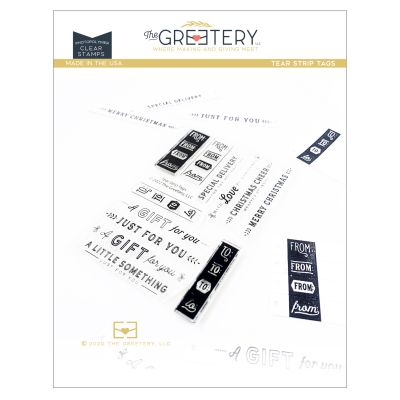
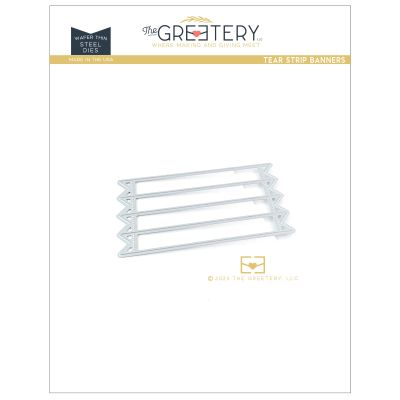
Finally, for my greeting I combined a sentiment from the original Tear Strip Tags stamp set with the new Tear Strip Banners die.
Until next time, happy crafting!
17/05/2023
|
View: 157
|
Categories: Die Cutting, Stamping Techniques, Card Making, Stamped Background, turnabouts, Stamping
|
Tags: Concord & 9th, The Greetery
Related Posts
The blog is back!
16/02/2020| Posted in Colouring Stamped Images, Copic Colouring, Pencil Colouring, Die Cutting| 6| 1099
Pottery Crazy
17/02/2020| Posted in Die Cutting, Stencilling, Stencilling with embossing paste, Special Effects| 1| 1216

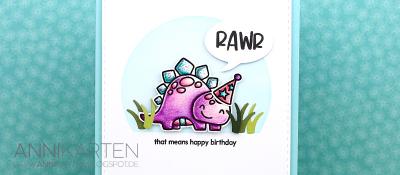
It's a RAWR-y Dino-mite Birthday!
06/03/2020| Posted in Copic Colouring, Ink Blending| 460

Butterfly Wreath
25/02/2020| Posted in Water Colouring, Card Making| 1| 452
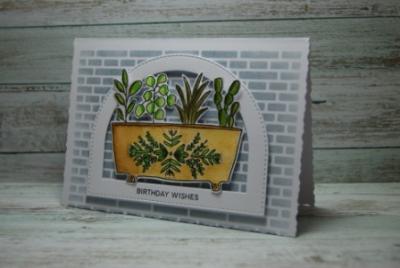
Spice Pot Birthday Wishes
03/03/2020| Posted in Water Colouring, Stencilling| 1| 288
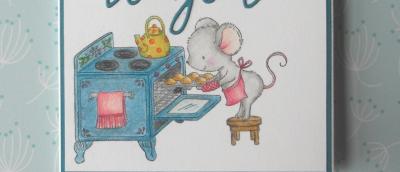
Birthday Baking
04/03/2020| Posted in Pencil Colouring, Die Cutting| 2| 246

Party Animals
07/03/2020| Posted in Colouring Stamped Images, Pencil Colouring| 431
Flower Truck
09/03/2020| Posted in Pencil Colouring, Stamped Background| 356
A touch of pattern
13/03/2020| Posted in Die Cutting| 1| 280
Flamazing Flamingo
17/03/2020| Posted in Card Making, Stamped Background| 290
Rainbow Birthday
14/03/2020| Posted in Copic Colouring, Die Cutting| 1| 433

Big Happy Birthday
21/03/2020| Posted in Colouring Stamped Images, Copic Colouring| 1| 249

Cool Geometrics
26/03/2020| Posted in Card Making| 2| 225
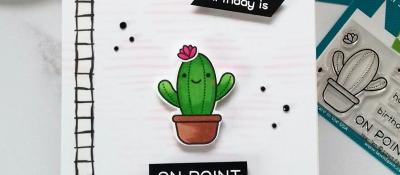
Cute cactus birthday card
31/03/2020| Posted in Colouring Stamped Images, Die Cutting, Ink Blending, Stamping Techniques| 1| 695
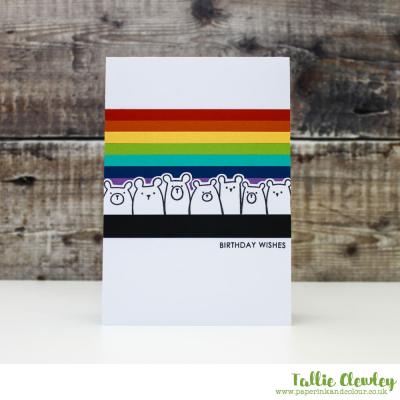
Sending Rainbows
03/04/2020| Posted in Card Making| 391
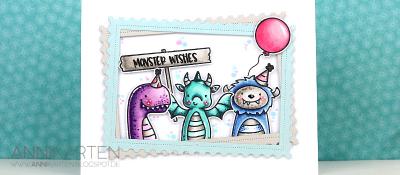
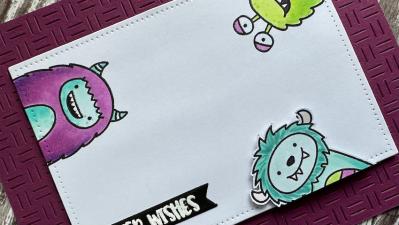
Monster Wishes
04/04/2020| Posted in Colouring Stamped Images, Copic Colouring| 430
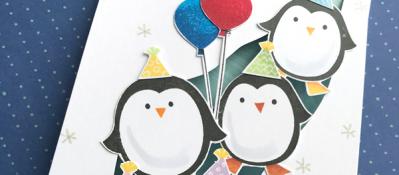
Penguin Party
06/04/2020| Posted in Card Making, Shaped Cards| 348
Mistletoe.. but not as you know it!
13/04/2020| Posted in Die Cutting, Card Making| 1| 508

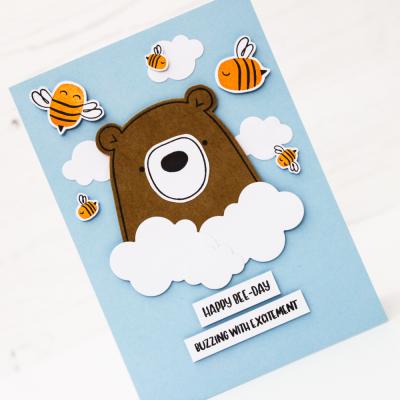
Happy Bee-Day
17/04/2020| Posted in Die Cutting, Card Making| 596
Bring on the Cake
20/04/2020| Posted in Card Making, Interactive Cards| 467
Spiderman
24/04/2020| Posted in Die Cutting, Stamping Techniques| 1| 523


Quick and Easy Male Gift card
12/05/2020| Posted in Ink Blending, Card Making| 1| 258
Birthday Blooms
14/05/2020| Posted in Card Making, Stamped Background| 2| 248

Tropical Birthday
27/05/2020| Posted in Copic Colouring, Die Cutting, Card Making, Stamp Layering, Heat Embossing| 281
Colourful Beetles
25/05/2020| Posted in Die Cutting, Card Making| 659

Spotlight Sentiments
31/05/2020| Posted in Stamping Techniques, Stamped Background| 458
Masculine Playful Patterns
04/06/2020| Posted in Die Cutting, Card Making| 365

BBQ Time
08/06/2020| Posted in Die Cutting, Card Making| 562

Trigonometry Birthday
10/06/2020| Posted in Stamping Techniques, Card Making| 313
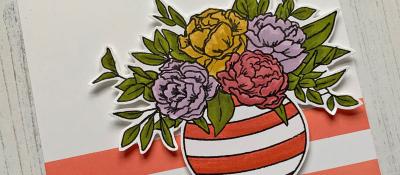
Bowl of Blooms
18/06/2020| Posted in Colouring Stamped Images, Card Making| 345
Distress Speckled Egg and Repeating Pattern Stamping
21/06/2020| Posted in Stamping Techniques, Repeat Pattern Building| 546
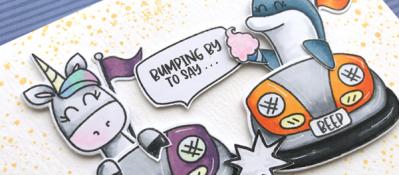
Bumping by to say..
22/06/2020| Posted in Colouring Stamped Images, Card Making| 680
Fox in a Forest
27/06/2020| Posted in Colouring Stamped Images, Water Colouring, Die Cutting, No Line Colouring| 374
It's a Pinata Party!
24/06/2020| Posted in Copic Colouring, Card Making| 724
Wish Big!
26/06/2020| Posted in Die Cutting| 257
Berry Sweet
29/06/2020| Posted in Water Colouring, Stencilling| 405
Rainbows & Party Animals
02/07/2020| Posted in Card Making, Stamped Background| 241
All The Fun of The Fair
05/07/2020| Posted in Colouring Stamped Images, Copic Colouring, Die Cutting, Partial Die Cutting, Special Effects, Interactive Cards, Fancy Folds| 458
Farming Fun
10/07/2020| Posted in Colouring Stamped Images, Copic Colouring, Pencil Colouring, Fussy Cutting| 275

Slim is In!
19/07/2020| Posted in Die Cutting| 563
Birthday Balloons
29/07/2020| Posted in Colouring Stamped Images, Copic Colouring, Die Cutting, Card Making, Heat Embossing| 403
Peekaboo birthday
28/07/2020| Posted in Colouring Stamped Images, Die Cutting| 391
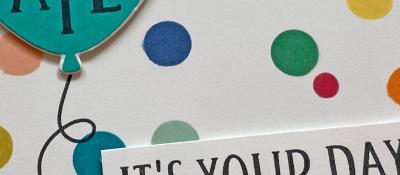
It's Your Day!
03/08/2020| Posted in Die Cutting, Stencilling| 272
Monkey Sea Monkey Do!
07/08/2020| Posted in Copic Colouring, Card Making| 275


An Alternative Gift Bag
24/08/2020| Posted in Die Cutting, Card Making, Stamped Background, Interactive Cards, Heat Embossing, Repeat Pattern Building, Gift Making| 609
Slimline Florals
18/08/2020| Posted in Ink Blending, Stencilling| 245
Hippo Pool Party
22/08/2020| Posted in Colouring Stamped Images, Pencil Colouring| 343
No Stitch Stitching Dies
23/08/2020| Posted in Stitching/Embroidery| 1| 586
Birthday Shakers
26/08/2020| Posted in Die Cutting, Stamping Techniques, Card Making, Stamped Background, Fussy Cutting, Heat Embossing, turnabouts, Repeat Pattern Building, Stamping on non paper surfaces| 421

Birthday Fishes To You
29/08/2020| Posted in Colouring Stamped Images, Copic Colouring| 318
Peek-a-Boo Jungle
04/09/2020| Posted in Copic Colouring, Card Making| 359
Have a thrilling birthday
08/09/2020| Posted in Colouring Stamped Images, Die Cutting, Card Making, Stencilling, Interactive Cards| 314

Gnome Girl on the Blog
12/09/2020| Posted in Colouring Stamped Images, Pencil Colouring| 405
Birthday Queen
23/09/2020| Posted in Card Making, Stamped Background| 379
Selfie Party Pics
18/09/2020| Posted in Copic Colouring, Card Making| 1080
Autumn Acorns
28/09/2020| Posted in Water Colouring, Card Making| 302
Sunset Dragon Scene Card
02/10/2020| Posted in Copic Colouring| 1| 374
Yeti or Not: Happy Birthday
03/10/2020| Posted in Copic Colouring, Ink Blending| 1| 295
One Stencil, Three Cards!
08/10/2020| Posted in Stencilling| 229
Cozy Friends
19/10/2020| Posted in Die Cutting, Card Making| 479
Colorado Craft Company Week!
25/10/2020| Posted in Water Colouring| 2| 460
Delight in the Little Things
29/10/2020| Posted in Ink Blending, Card Making| 2| 255
Big and Bold Peacocks
30/10/2020| Posted in Copic Colouring, Card Making| 2| 415
Lets Party!
03/11/2020| Posted in Die Cutting| 1| 253
Birthday Fishes
07/11/2020| Posted in Colouring Stamped Images, Water Colouring| 1| 187
Present Time!
09/11/2020| Posted in Stamping Techniques, Card Making, Fussy Cutting, Repeat Pattern Building, Masking| 313
Snowball Fun
30/11/2020| Posted in Colouring Stamped Images, Card Making| 2| 337
Floral Birthdays
09/12/2020| Posted in Colouring Stamped Images, Die Cutting, Stamping Techniques, Card Making, Stamped Background, Heat Embossing| 1| 237
Happy New Year!
03/01/2021| Posted in Pencil Colouring, Water Colouring| 2| 651
Botanical Notecards
04/01/2021| Posted in Stamping Techniques, turnabouts| 1| 367
Birthday Roses
07/01/2021| Posted in Colouring Stamped Images, Copic Colouring, Card Making, Stencilling, Stamped Background| 1| 272

Birthday Burst!
11/01/2021| Posted in Die Cutting, Card Making| 1| 290
Going Dotty!
20/01/2021| Posted in Copic Colouring, Die Cutting, Stamping Techniques, Card Making, Stamped Background| 1| 232
Birthday Cupcake
15/01/2021| Posted in Copic Colouring, Card Making| 1| 475

A Tale of Two Hearts
17/01/2021| Posted in Die Cutting| 1| 487
HAPPY HAPPY Birthday!
21/01/2021| Posted in Colouring Stamped Images, Copic Colouring, Stamping Techniques, Card Making, Fussy Cutting, Repeat Pattern Building| 1| 252
Magical Day
27/01/2021| Posted in Copic Colouring, Die Cutting, Card Making, Fussy Cutting, Heat Embossing| 1| 226


Slimline Birthday Card
30/01/2021| Posted in Colouring Stamped Images, Pencil Colouring, Water Colouring, Die Cutting| 1| 531
Let the Good Times Roll!
29/01/2021| Posted in Copic Colouring, Card Making| 1| 341

Thank you Mr Postman!
03/02/2021| Posted in Die Cutting, Stamping Techniques, Card Making, Stamp Layering, Stamped Background, turnabouts| 1| 409

Poppin' Popcorn
01/02/2021| Posted in Off The Page Projects, Stencilling with embossing paste, Heat Embossing| 1| 322

Bears on Adventure
13/02/2021| Posted in Colouring Stamped Images, Pencil Colouring, Water Colouring, Die Cutting, Ink Blending, Stencilling| 1| 488

Underwater Birthday Wishes
19/02/2021| Posted in Copic Colouring, Card Making| 1| 614

Trig 102
24/02/2021| Posted in Copic Colouring, Die Cutting, Card Making, Fussy Cutting, Heat Embossing, Repeat Pattern Building| 1| 552
Birthday Blooms
04/03/2021| Posted in Die Cutting, Card Making| 1| 277
Birthday Buds
06/03/2021| Posted in Colouring Stamped Images, Pencil Colouring| 1| 387

Happy Birthdays
14/04/2021| Posted in Copic Colouring, Die Cutting, Card Making, Stamped Background, Shaped Cards| 1| 388
Dandy Lion
11/04/2021| Posted in Pencil Colouring, Water Colouring, Interactive Cards, Fussy Cutting, Embossing Folders| 2| 424
Hex Layers
15/04/2021| Posted in Ink Blending, Card Making, Stencilling, Stencilling with embossing paste| 1| 257

Let's Party Birthday Cards
28/04/2021| Posted in Copic Colouring, Die Cutting, Stamping Techniques, Card Making, Stamped Background, Interactive Cards, Heat Embossing, turnabouts, Masking, Stamping| 1| 334
Introducing Elliot & Marcel
02/05/2021| Posted in Pencil Colouring, Stamping| 376
We Herd It's Your Birthday!
07/05/2021| Posted in Copic Colouring| 1| 378
Floral Birthdays
19/05/2021| Posted in Die Cutting, Stamping Techniques, Card Making, Stamp Layering, turnabouts, Stamping| 1| 516
Starry Birthday
26/05/2021| Posted in Copic Colouring, Ink Blending, Card Making, Fussy Cutting, Heat Embossing, turnabouts, Stamping| 1| 243

“The rules are… there ain’t no rules!”
02/06/2021| Posted in Colouring Stamped Images, Copic Colouring, Stamping Techniques, Card Making, Fussy Cutting, Stamping| 317
Kick Back and Chill
07/06/2021| Posted in Water Colouring, Card Making| 554
Time to Paw-ty!!!
12/06/2021| Posted in Sketches| 243

Rainbow Birthday
16/06/2021| Posted in Copic Colouring, Die Cutting, Ink Blending, Card Making, Stamped Background, Interactive Cards, Fussy Cutting, Heat Embossing| 496
Hay There Birthday
02/07/2021| Posted in Copic Colouring, No Line Colouring| 322

Sending Rainbows in the Rain
18/06/2021| Posted in Copic Colouring, No Line Colouring| 549
Birthday Gifts
16/07/2021| Posted in Pencil Colouring, No Line Colouring| 1| 331
Birthday 3D Floral
19/06/2021| Posted in Copic Colouring, Embossing Folders| 250

Coaster Fun
21/06/2021| Posted in Colouring Stamped Images, Ink Blending, Card Making, Fussy Cutting, Shaped Cards| 249
Leaves or Feathers?
24/06/2021| Posted in Die Cutting| 1| 310
Quick Masculine Makes
04/07/2021| Posted in Stamping Techniques| 276
Birthday fun
06/07/2021| Posted in Colouring Stamped Images| 321
Birthday Sprinkles
19/07/2021| Posted in Die Cutting, Stamping| 222
Floating On By
26/07/2021| Posted in Copic Colouring, Die Cutting, Ink Blending, Stencilling, sentiment Focal Points| 251
First Birthday Animals
02/08/2021| Posted in Colouring Stamped Images, Pencil Colouring, Stamped Background, Fussy Cutting| 427
A Cat Isn't Just for Christmas
30/07/2021| Posted in Pencil Colouring, Die Cutting| 259
Whale of a birthday
01/08/2021| Posted in Ink Blending, Stamp Layering| 227

Bright Birthday Geometrics
05/08/2021| Posted in Die Cutting, Card Making| 428
So Very Proud of You
07/08/2021| Posted in Copic Colouring, Stamping Techniques| 822
Succulent Bouquet Four Ways
18/08/2021| Posted in Copic Colouring, Water Colouring, Die Cutting, Card Making, Off The Page Projects, Heat Embossing, Patterned Papers, Stamping| 358
Oh Happy Day!
20/08/2021| Posted in Copic Colouring| 308
Sweater Weather!!
25/08/2021| Posted in Copic Colouring, Die Cutting, Stamping Techniques, Card Making, Stamped Background, Stamping, Embossing Folders| 414

Patterned Paper Play
27/08/2021| Posted in Die Cutting, Patterned Papers| 1| 351
A Wreath for All Seasons
01/09/2021| Posted in Copic Colouring, Die Cutting, Card Making, Stamped Background, Fussy Cutting, Heat Embossing, turnabouts, Stamping| 460
The Little Things
03/09/2021| Posted in Pencil Colouring, No Line Colouring| 1| 243
Gone But Not Forgotten
08/09/2021| Posted in Copic Colouring, Die Cutting, Card Making, Stamped Background, Repeat Pattern Building, Stamping| 500

All The Three's
11/09/2021| Posted in Copic Colouring, Card Making, Stencilling with embossing paste, Fussy Cutting, Stamping, stamp surgery| 295
Picture Perfect!
17/09/2021| Posted in Copic Colouring| 303
Autumn Leaves
21/09/2021| Posted in Die Cutting, Card Making| 1| 326
Heroes On The Inside
02/10/2021| Posted in Ink Blending, Interactive Cards| 244
Butterfly Dies
14/10/2021| Posted in Die Cutting, Card Making, Special Effects, Fancy Folds, Stamping, Clean & Simple| 1| 240
Happy as a Seagull with a Chip
15/10/2021| Posted in Copic Colouring, No Line Colouring| 298

Masculine Birthday Card
03/11/2021| Posted in Copic Colouring, Die Cutting, Card Making, Stamping, sentiment Focal Points| 301
The Big 5-0
05/11/2021| Posted in Die Cutting, Heat Embossing| 400

Caffeine Inspiration
17/11/2021| Posted in Copic Colouring, Die Cutting, Stamped Background, turnabouts, Stamping, Mini Slimline Card, Clean & Simple| 340
Winter Wreath
13/12/2021| Posted in Pencil Colouring, Card Making| 369
Twinkle Twinkle
18/12/2021| Posted in Copic Colouring, Off The Page Projects| 1| 936
Happy Birthday
22/12/2021| Posted in Die Cutting, Stamping Techniques, Card Making, Stamped Background, Layering Stencils| 359

Every Day Labels His and Hers
09/01/2022| Posted in Die Cutting, Stamping Techniques| 306

Masculine Birthday Cards
26/01/2022| Posted in Die Cutting, Stamping Techniques, Card Making, Stamped Background, Embossing Folders, Layering Stencils| 477
Lets Conga
15/01/2022| Posted in Copic Colouring, Card Making, Off The Page Projects, Stamping, Clean & Simple| 1| 1126

LOVE You
27/01/2022| Posted in Die Cutting, Stamping Techniques, Card Making, Stamped Background, turnabouts, Stamping, Clean & Simple| 290
I Smell A Birthday
29/01/2022| Posted in Copic Colouring, Card Making, Fussy Cutting, Patterned Papers, Stamping, Sketches, Clean & Simple| 297

Big Birthday Balloons
04/02/2022| Posted in Die Cutting| 229

Flowers For Your Birthday
11/02/2022| Posted in Die Cutting| 340

Friends Fur-ever
25/02/2022| Posted in Copic Colouring, Card Making, Partial Die Cutting, Fussy Cutting, Stamping, Clean & Simple| 1| 302

Smooshed Blooms
17/03/2022| Posted in Colouring Stamped Images, Water Colouring, Die Cutting, Stamping Techniques, Card Making, Special Effects, Stamping, Clean & Simple| 290
Tiny Flowers
18/03/2022| Posted in Die Cutting| 296

Fairy Magic
28/03/2022| Posted in Colouring Stamped Images, sentiment Focal Points| 219
Birthdays
06/04/2022| Posted in Copic Colouring, Die Cutting, Card Making, Stamped Background, Heat Embossing| 2| 357

Birthday Bar
17/04/2022| Posted in Copic Colouring, Die Cutting| 305
Sending Birthday Flowers
18/04/2022| Posted in Card Making, Stamping| 215
Fake Cake
22/04/2022| Posted in Die Cutting| 381
Chevron Pattern Play
23/04/2022| Posted in Paper Piecing, Card Making, Patterned Papers, Stitching/Embroidery, Clean & Simple| 381

Geometric Quilt
27/04/2022| Posted in Die Cutting, Card Making| 316
Happy Birthday
04/05/2022| Posted in Copic Colouring, Ink Blending, Card Making, Stencilling, Stencilled backgrounds| 324
Pussy Willow
29/04/2022| Posted in Die Cutting, Die Cut Felt and Fabric| 399
Birthday Magic
02/05/2022| Posted in Colouring Stamped Images, Copic Colouring, Card Making, sentiment Focal Points, Clean & Simple| 236
Birthday Hugs and Kisses
08/05/2022| Posted in Die Cutting| 279
BBQ Time
09/05/2022| Posted in Die Cutting| 249

The Personal Touch
14/05/2022| Posted in Card Making, Partial Die Cutting| 296
Rainbow Spacers and a Busy Week in Store
15/05/2022| Posted in Die Cutting| 351
Monochrome Moustache
28/05/2022| Posted in Patterned Papers| 222
Super Duper
30/05/2022| Posted in Colouring Stamped Images, Copic Colouring, Die Cutting, Card Making, sentiment Focal Points| 250

Pool Party
09/06/2022| Posted in Colouring Stamped Images, Die Cutting| 227
Making the Most of Mini Stamps - Part Two
12/06/2022| Posted in Stamped Background| 272
Circle Quad
11/06/2022| Posted in Patterned Papers| 286
Having a Hoot of A Time
19/06/2022| Posted in Pencil Colouring, Die Cutting| 266
Fishing You A Happy Birthday
25/06/2022| Posted in Stamping, mixed media, Clean & Simple, Inky Backsides, Clean and Simple (CAS)| 220
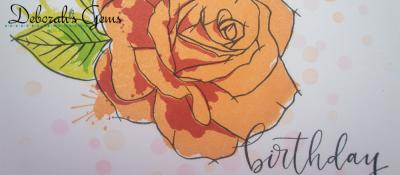
Birthday Rose
01/07/2022| Posted in Card Making, Stamp Layering, Stamped Background, Masking, Stencilled backgrounds| 311

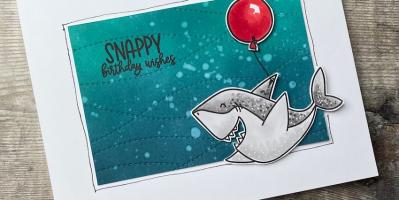
Snappy Birthday Wishes
02/07/2022| Posted in Copic Colouring, Ink Blending, Card Making, Fussy Cutting, Inky Backsides| 341
Picnic In The Sky
12/07/2022| Posted in Colouring Stamped Images, Copic Colouring, Die Cutting, Ink Blending, Card Making, Stencilling| 244
One for the Guys & One for the Girls.
28/07/2022| Posted in Die Cutting, Card Making, Stamped Background, Stamping, Inlaid Die Cutting| 451
Say it with Balloons
01/08/2022| Posted in Die Cutting, Stamping| 235

Cocktail Cheers
08/08/2022| Posted in Die Cutting, colouring die cuts| 394

Is it on the trolley?
21/08/2022| Posted in Die Cutting| 341
Pick A Pattern
25/08/2022| Posted in Stamping Techniques, Card Making, Stamping, Clean & Simple, Clean and Simple (CAS)| 300
To The Rescue
17/09/2022| Posted in Copic Colouring, Ink Blending, Stencilling with embossing paste, Fussy Cutting, Inky Backsides| 169


Birthday Tweet
17/10/2022| Posted in Colouring Stamped Images| 2| 263
Baroque Opulence
22/11/2022| Posted in Die Cutting, Ink Blending, Card Making, Stencilling, Layering Stencils, Hot Foil| 205

Cards for my Great Nephew
25/11/2022| Posted in Card Making, Stamped Background, turnabouts, Stamping, colouring die cuts| 240
Star Gazing
26/11/2022| Posted in Copic Colouring, Fussy Cutting| 263
Winter Pine
05/12/2022| Posted in Colouring Stamped Images, Stamping| 271
Month By Month - Part 1
01/12/2022| Posted in Colouring Stamped Images, Copic Colouring, Die Cutting, Stencilling, Stamped Background, Gift Making| 279
Birthday Flowers
09/12/2022| Posted in Copic Colouring, Die Cutting, Card Making, Stamping, Stencilled backgrounds| 319

Stacks of Presents
07/01/2023| Posted in Copic Colouring, Patterned Papers| 157

Penguin Party
09/01/2023| Posted in Patterned Papers, Stamping| 148

One Background - Four Ways
20/01/2023| Posted in Copic Colouring, Die Cutting, Card Making, Stamped Background, Heat Embossing, Stamping| 242
White Diecutting and Yummy Cakes
18/01/2023| Posted in Die Cutting, water colour pencils| 297
Graphic Weaving
25/01/2023| Posted in Die Cutting, paper weaving| 190
Organic Cherry Blossom
08/02/2023| Posted in Die Cutting, Ink Blending| 204
A Trio of Cards
24/02/2023| Posted in Copic Colouring, Card Making, Stencilling, Fussy Cutting, Stamping, Stencilled backgrounds| 327
Ghost Bricks
22/02/2023| Posted in Ink Blending, Card Making, Stencilling, Layering Stencils, Clean & Simple| 293
Tiny Giant Birthday
05/03/2023| Posted in Die Cutting| 217
Soak & Relax
06/03/2023| Posted in Die Cutting, Homeware/Decorations| 272
it's Your Day
22/03/2023| Posted in Die Cutting| 252
Easter Chicks
27/03/2023| Posted in Colouring Stamped Images, Die Cutting, Card Making, sentiment Focal Points, Clean & Simple| 235
Garden Goodness Birthday Blooms
12/04/2023| Posted in Die Cutting, Card Making, Stamp Layering, Stencilling, Layering Stencils, Stencilled backgrounds| 332
Boho Butterflies
30/03/2023| Posted in Die Cutting, Ink Blending, Card Making, Stencilling, Layering Stencils, Clean & Simple| 1| 262
Howdy Raccoon
15/04/2023| Posted in Colouring Stamped Images, Copic Colouring, Stamping Techniques, Stamped Background, Fussy Cutting, Stamping| 297

Llamas do Yoga
13/05/2023| Posted in Copic Colouring| 199
Classy in Pink
21/04/2023| Posted in Die Cutting| 193

Iced Mini Cake
07/05/2023| Posted in Die Cutting, Stencilling with embossing paste| 299

Simply Make a Wish
12/05/2023| Posted in Stamping Techniques| 210

Mod Turnabout
14/05/2023| Posted in Stamping Techniques, turnabouts| 310
Sewn with love
23/05/2023| Posted in Copic Colouring, Card Making| 220
Ornate Florals
02/06/2023| Posted in Die Cutting, Faux Embossing| 179
First Steps in the Urban Jungle
09/06/2023| Posted in Die Cutting, Ink Blending| 227
Takes the Cake!
12/06/2023| Posted in Die Cutting, Card Making, Stamped Background, Stamping, Layering Stencils| 191

Partners In Adventure
17/06/2023| Posted in Copic Colouring, Die Cutting, Paper Piecing, Card Making, Fussy Cutting, Patterned Papers, Stamping, Clean & Simple, Clean and Simple (CAS)| 187

Pawsome Party In the Park
22/06/2023| Posted in Pencil Colouring, Die Cutting| 154
All Aglow
28/06/2023| Posted in Card Making, Stencilling, Stamped Background, Stamping, Layering Stencils| 229
Circular Sentiment Stamping with a Stamp Wheel Tool
25/06/2023| Posted in Stamping, Stamp Wheel| 179
Tips and Tricks for Easy Paper Piecing with Large Dies
09/07/2023| Posted in Die Cutting, Paper Piecing| 243
A Chilled Day
10/07/2023| Posted in Colouring Stamped Images, Ink Blending, Card Making, sentiment Focal Points, colouring die cuts| 199
Make a Wish...
12/07/2023| Posted in Die Cutting, Card Making, Stamp Layering, Stamping, Clean & Simple, Clean and Simple (CAS)| 256


Donuts and Sprinkles
14/07/2023| Posted in Copic Colouring, Die Cutting| 200
Garden Goodness Birthday Wishes
19/07/2023| Posted in Die Cutting, Card Making, Stamping, sentiment Focal Points, Layering Stencils, Stencilled backgrounds| 241
Floral Frame
26/07/2023| Posted in Card Making, Stamp Layering, Stamping, sentiment Focal Points, Stencilled backgrounds| 234

Ice Cream Helps
31/07/2023| Posted in Colouring Stamped Images, Copic Colouring, Pencil Colouring, Card Making, Heat Embossing, Clean & Simple| 240
Just for You
16/08/2023| Posted in Die Cutting, Card Making, Stamp Layering, Stamped Background, Stamping, sentiment Focal Points| 207
Colour Wheel Happiness
10/08/2023| Posted in Stamping Techniques, Card Making, turnabouts, Wreath Building, Stamp Wheel| 283

Happy Bee-Day
15/08/2023| Posted in Copic Colouring, Die Cutting, Ink Blending, Card Making, Stamping, Stencilled backgrounds| 168
Picked Posies - Just for You
23/08/2023| Posted in Die Cutting, Card Making| 202
Hay Ride Drive By
24/08/2023| Posted in Pencil Colouring, Masking| 175

Home Grown Notecard
04/09/2023| Posted in Clean & Simple, colouring die cuts| 181
Hope Your Day Is Filled With Fun
12/09/2023| Posted in Colouring Stamped Images, Die Cutting, Ink Blending, Card Making, Interactive Cards| 146
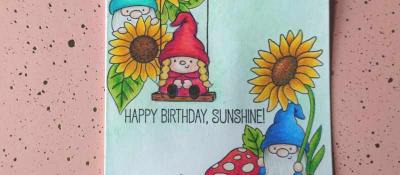
Gnomes in the sunflower patch
29/09/2023| Posted in Pencil Colouring| 199
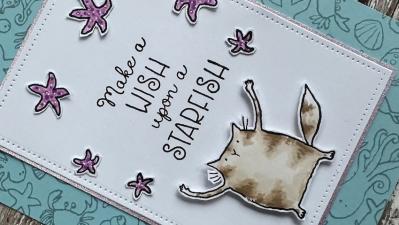
Wish Upon a Star Fish
04/11/2023| Posted in Copic Colouring, Card Making, Stamped Background, Fussy Cutting, Stamping, Sketches, Clean & Simple, Clean and Simple (CAS)| 220

Introducing Flashback Friday Bargains
20/10/2023| Posted in Copic Colouring| 1| 1005
Out with the old, in with the new!
03/01/2024| Posted in Card Making, sentiment Focal Points| 167
More than Merry Sprigs
10/01/2024| Posted in Stamping Techniques, Card Making, Stamp Layering, Stamped Background, Stamping| 156
Infinity Birthday Card
08/01/2024| Posted in Die Cutting, Interactive Cards| 162

Ski Season
19/01/2024| Posted in Die Cutting| 136
Layered Embossing Technique
21/01/2024| Posted in Embossing Folders| 197
It's a Tweet Life
20/01/2024| Posted in Stencilling| 216

Let's Party!
01/02/2024| Posted in Die Cutting, Ink Blending, Card Making, Stencilling, Clean & Simple, Stencilled backgrounds| 169

Legend-diary Birthday
04/02/2024| Posted in Copic Colouring, Die Cutting| 182
Garden Goodness
07/02/2024| Posted in Card Making, Stamp Layering, Stencilling, Layering Stencils, Clean & Simple, Stencilled backgrounds, Clean and Simple (CAS)| 172
Sew Cute Mini Notebook & Card
19/02/2024| Posted in Pencil Colouring, Die Cutting, Card Making, Stencilling, Gift Making, Layering Stencils, Stencilled backgrounds, Flashback Friday Bargains| 133
Grungy Flappy Birthday
20/02/2024| Posted in Colouring Stamped Images, Copic Colouring, Die Cutting, Ink Blending, Card Making| 149

Big Contempo Birthday Vibes
23/02/2024| Posted in Die Cutting, Stamping Techniques, Card Making, Stamped Background, turnabouts, sentiment Focal Points| 175
You're Going Places...
27/02/2024| Posted in Colouring Stamped Images, Copic Colouring, Die Cutting, Ink Blending, Card Making, Stencilling, 3D| 174
One panel two ways
17/03/2024| Posted in Die Cutting| 205
You Are Amazing!
02/04/2024| Posted in Die Cutting, Stamping Techniques, Card Making, turnabouts, Inlaid Die Cutting| 117
It's a Wrap Posy
08/04/2024| Posted in Die Cutting, Card Making, Stencilling, Patterned Papers, Clean & Simple, Clean and Simple (CAS)| 120
Birthdays and Backgrounds
14/04/2024| Posted in Die Cutting| 177

Paper Bouquet
17/04/2024| Posted in Die Cutting, Card Making| 107
Paper Bouquet Take 2
24/04/2024| Posted in Die Cutting, Card Making| 85
Related Products


Controversial Santas
28/08/2022

Birthday Forecast
14/02/2022

Encouraging Leaves
15/03/2021

Framed Snowdrops
22/02/2021

Birthday Blossoms
25/04/2024
Paper Bouquet Take 2
24/04/2024
How to add dimension to your projects!
23/04/2024
Cute Milkshake Card
22/04/2024